Character Animation and Portfolio
This week we have been asked to have a go at rigging our characters. I have been having issues and trying to find ways to fix them but i still have had no luck so ive decided to blog my errors etc instead and once i have a solution i can post how it was resolved.
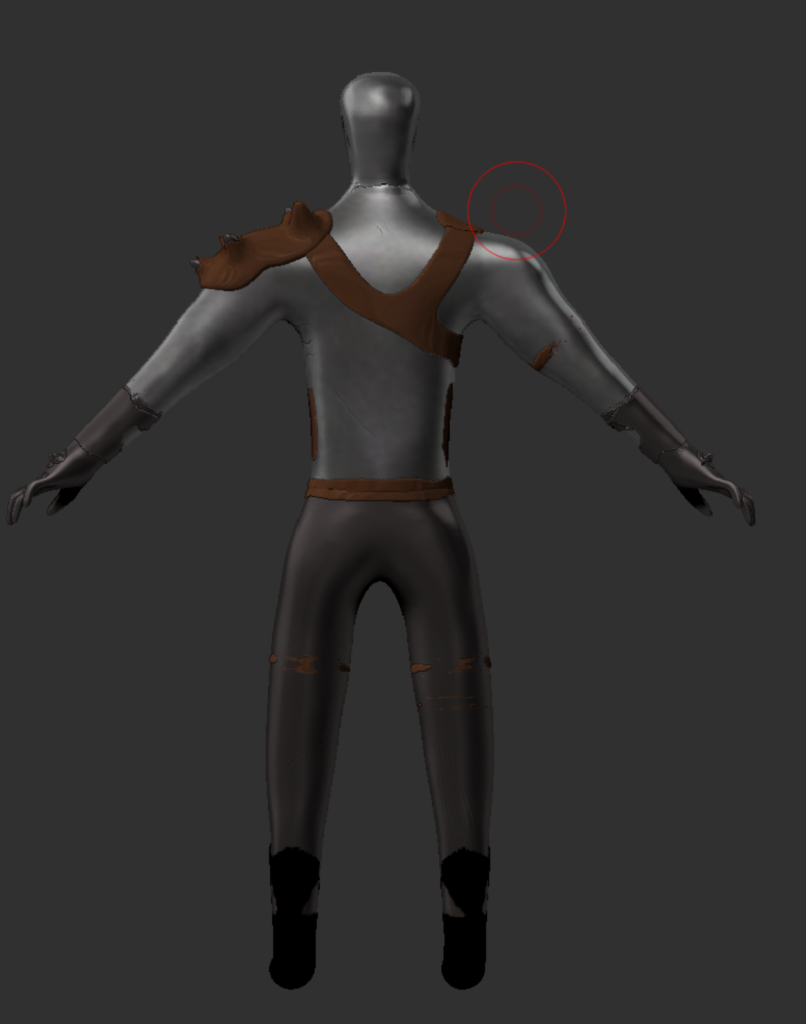
The first issue i have been having is i cant really lower my polycount on Zbrush for my model so its just too high. i have been able to open the model in Maya but then i have other issues where parts of the model are in parts that dont make sense. I have looked online and done the best i can to see if i can fix it but i haven’t been able to.

One of the ways im going to try to fix this is using the steps we have been given in the most recent lecture if these dont work or im struggling to get them to work im going to remake my character in a simpler way and making sure the poly count is kept down, as i did not pay too much attention to it while creating this character.
After attempting multiple solutions found online and the one given by our lecturer (decimation etc) the poly count is still too high and the overall quality of my model is lost. I have now decided to use one of the characters provided on canvas to do my animations with which should be much easier and allow me to do it to the best i can.
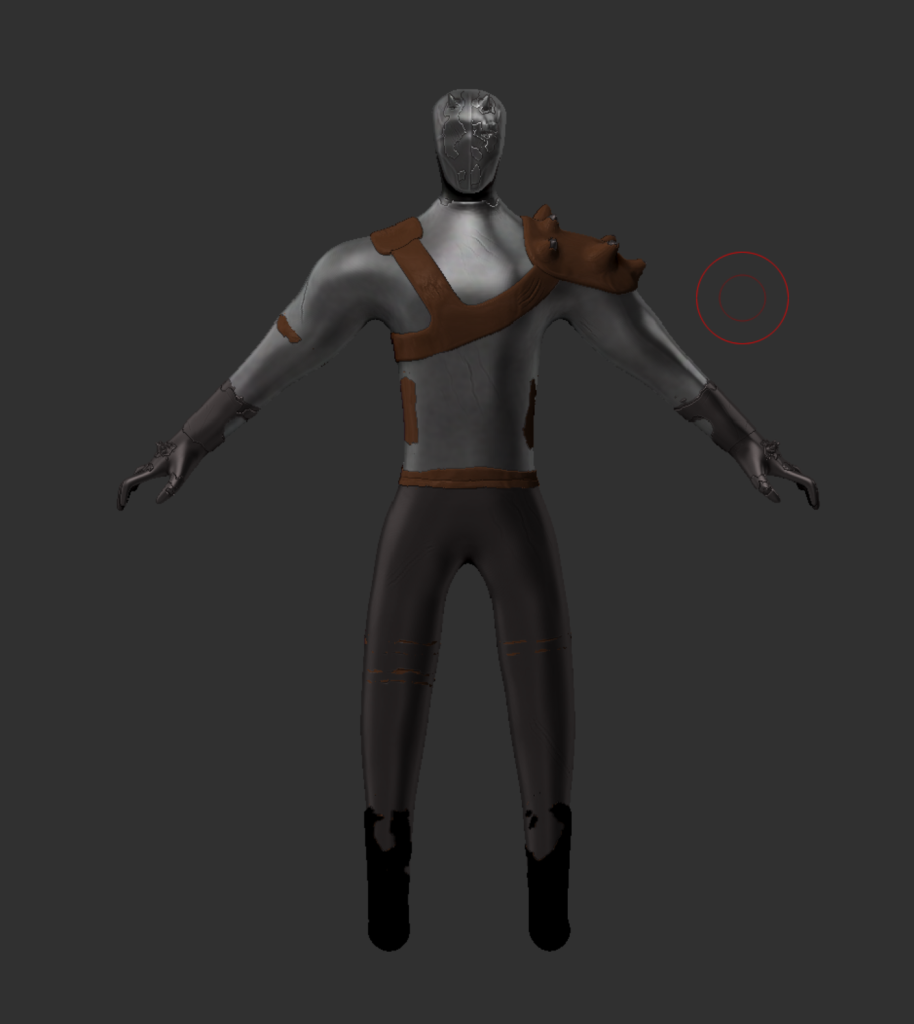
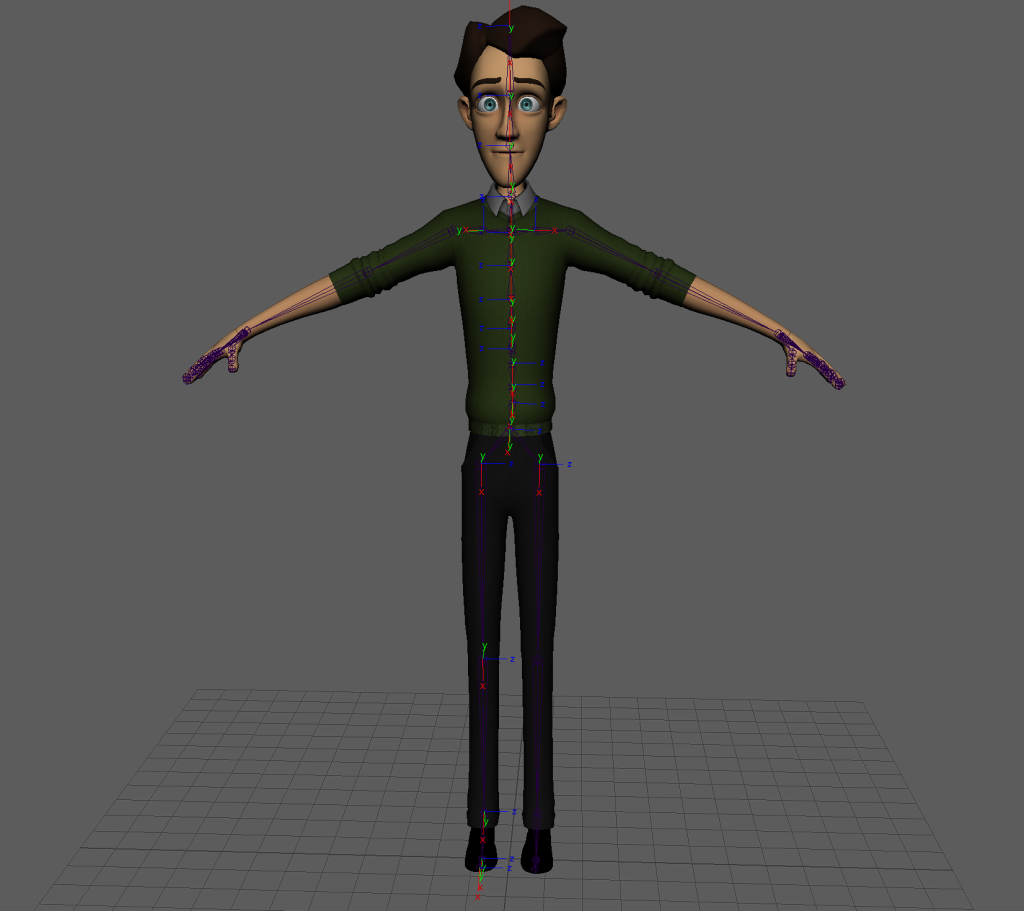
After deciding my character was not going to work i moved onto using one of the characters provided on canvas. The character i chose to use is jerry, i then started to add joints in. In the image below i had added in the joints for the legs, spine, left arm and hand, i used the mirror option for the legs and the arm as well.
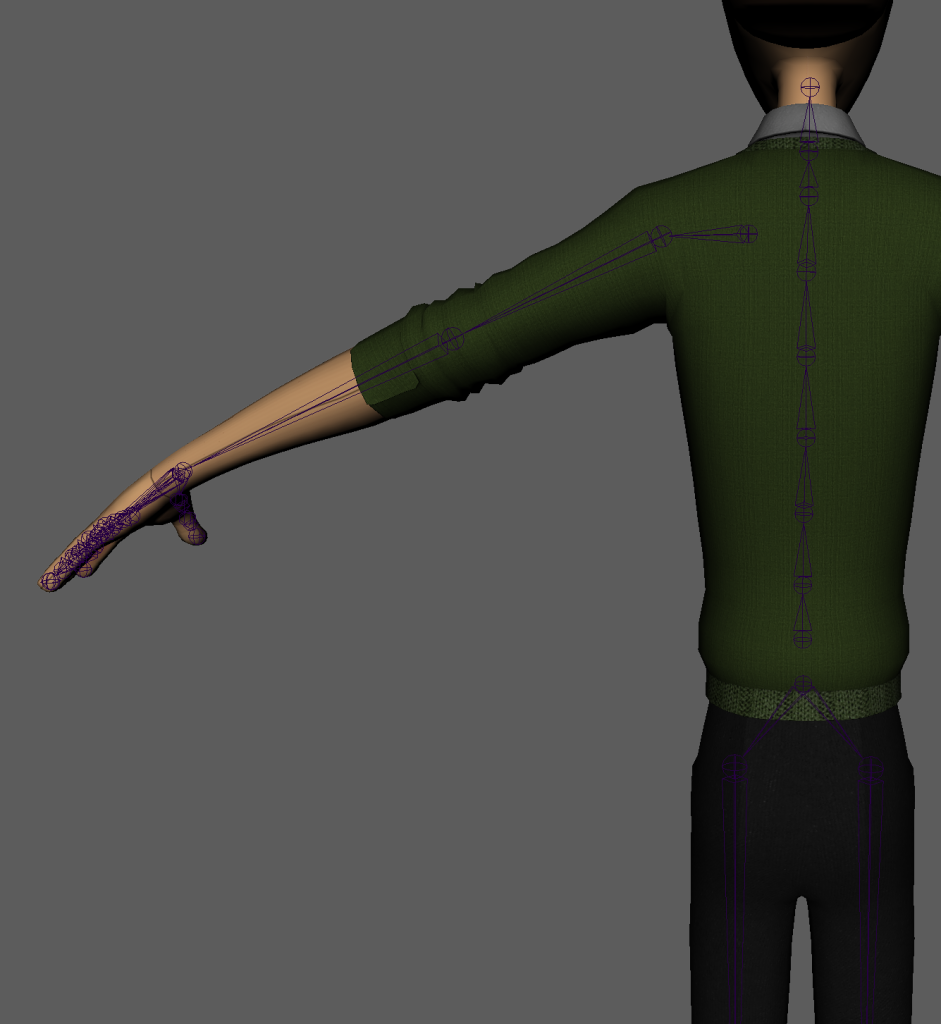
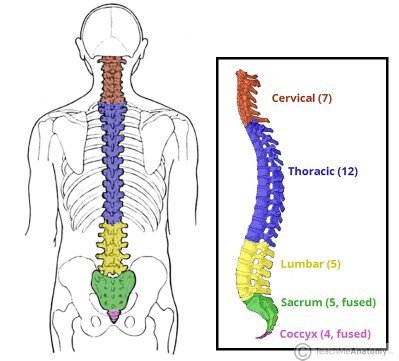
Reference image when doing the spine
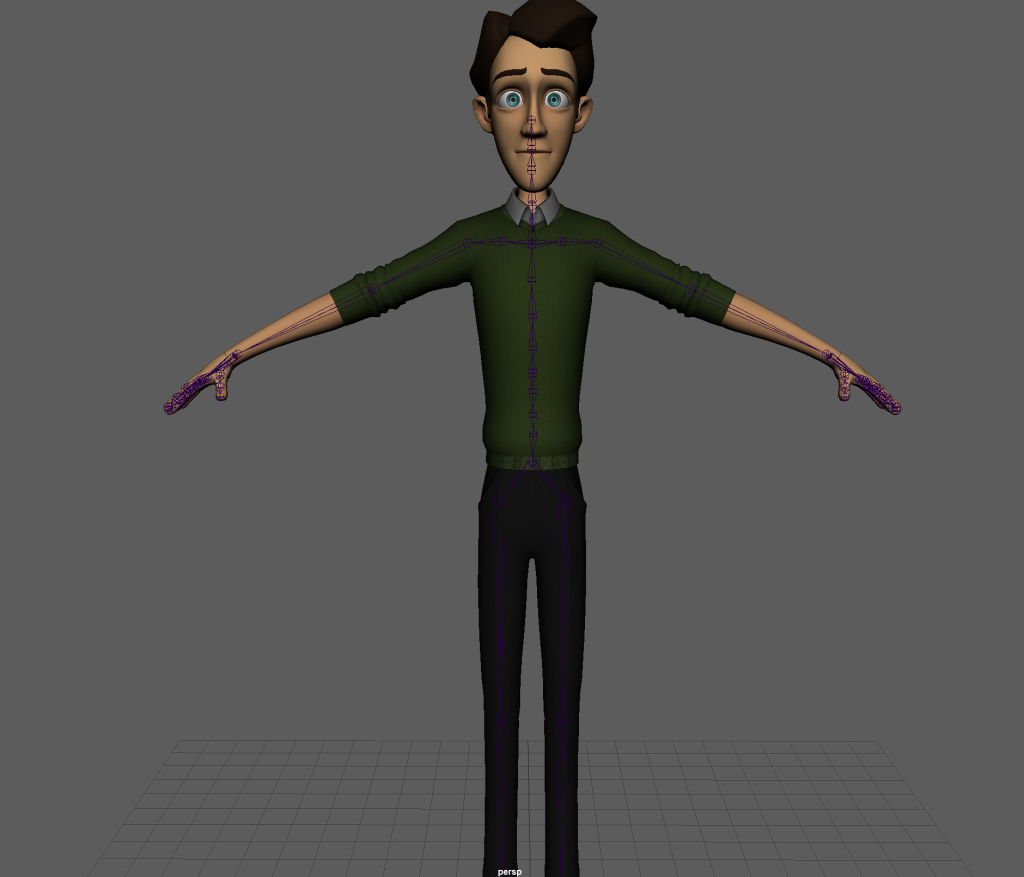
The image above shows how it looked once i had finished (feet are done just cut off) i did make some slight adjustments before moving onto joint orientation. I found this quite difficult and used the video on canvas a lot to make sure i did it right/the best i could. Some of the joint axis did not show up however i did change those ones as well.
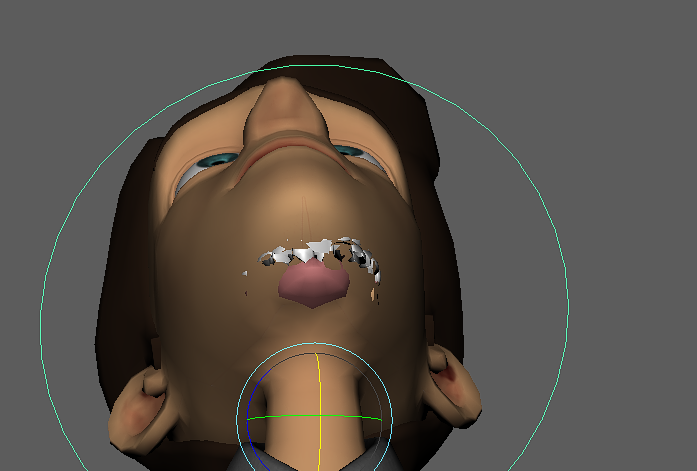
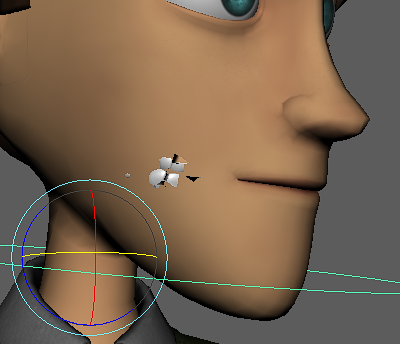
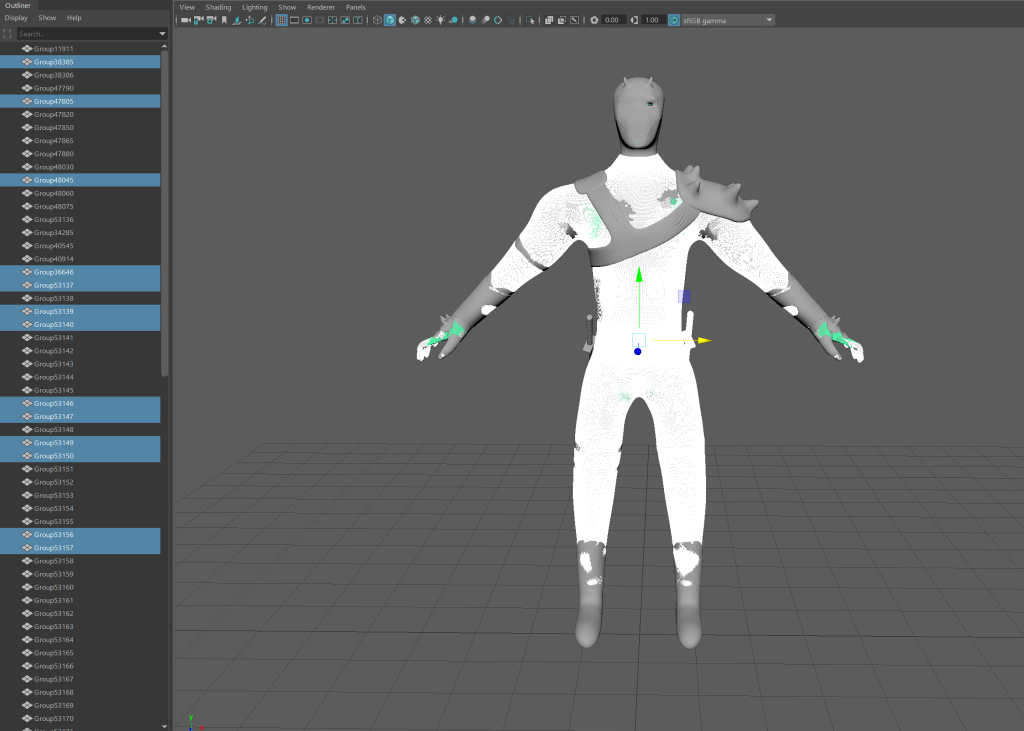
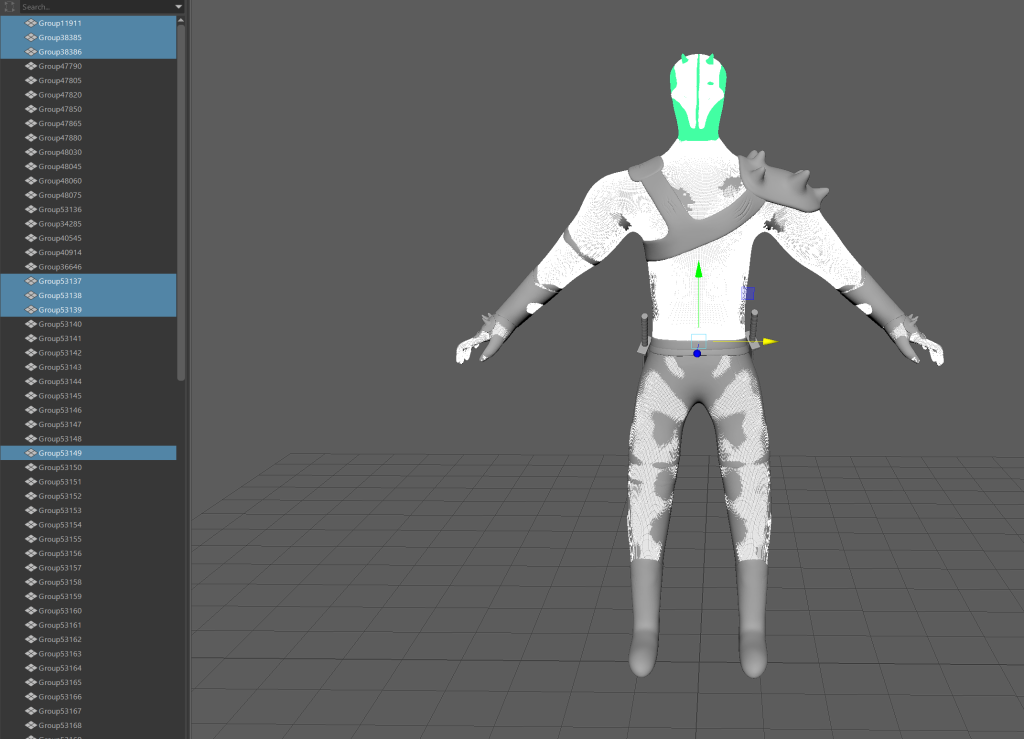
After trying to find fixes online and being unsuccessful, i spoke to my lecturer and asked them what the issue is. They then explained to me that it was due to the way the weight painting had been done. He told me a method called the inside out method for weight painting there was also a video on canvas about it, along side some other videos. I gave this a go had a couple issues but managed to figure out my own way to get it to work.
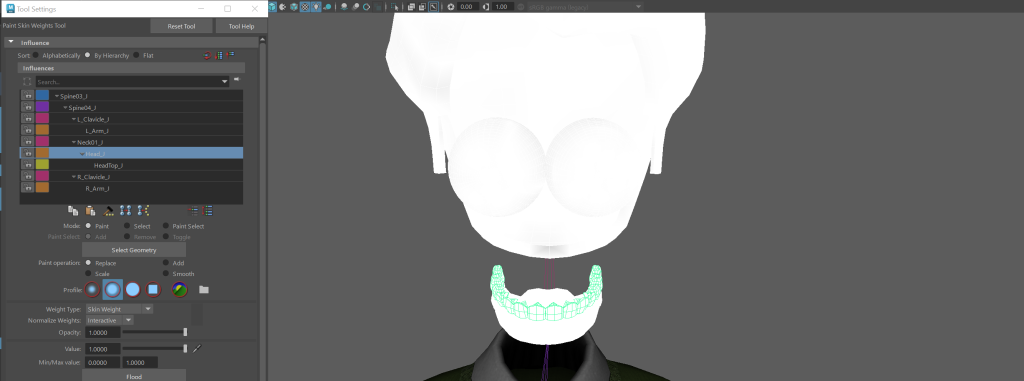
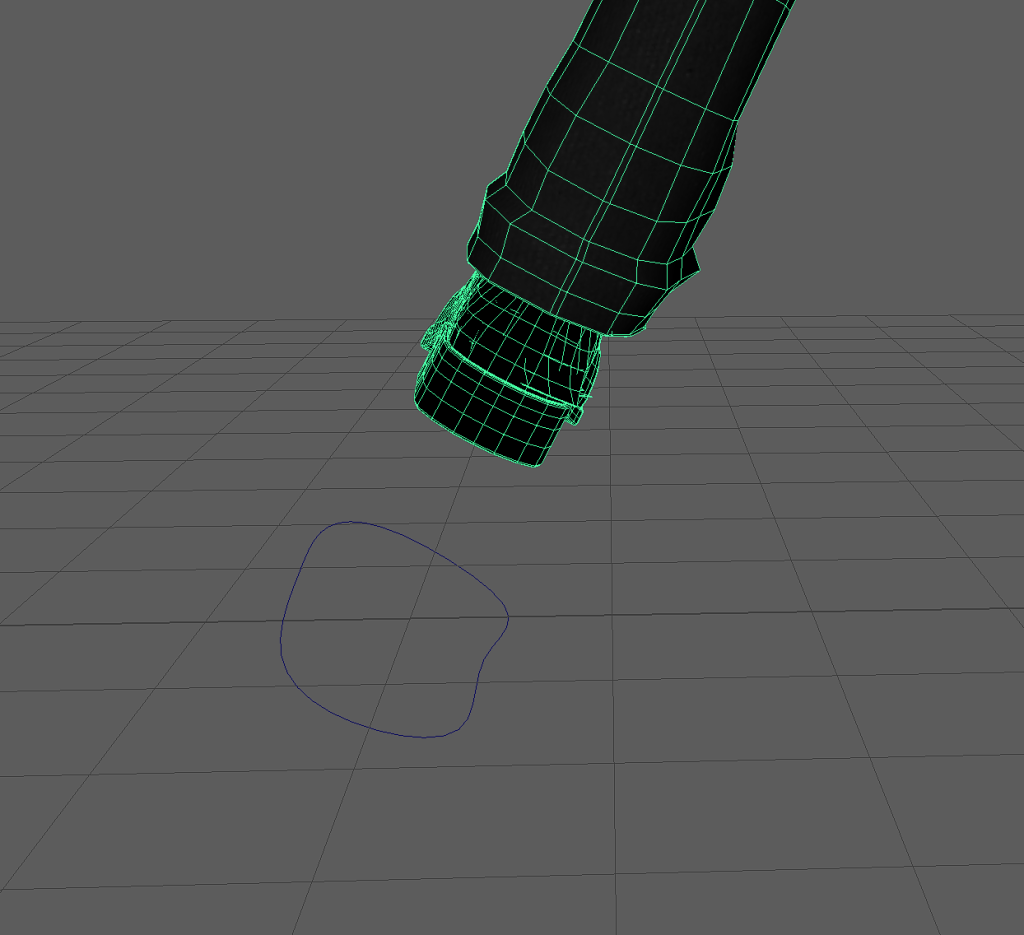
In the image above it shows how the eyes, teeth and tongue are all weight painted with the head this means the head has influence over them, moving them when it moves. i then had to do similar steps for the foot issue, however i just had to make sure a certain part of the inside of the shoe was painted.
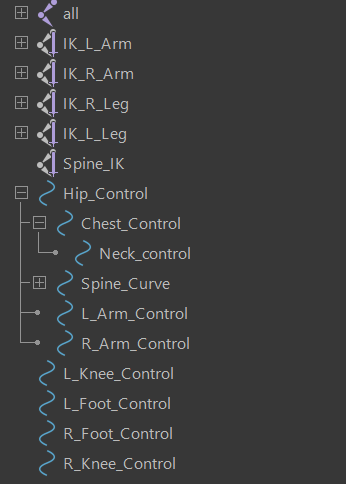
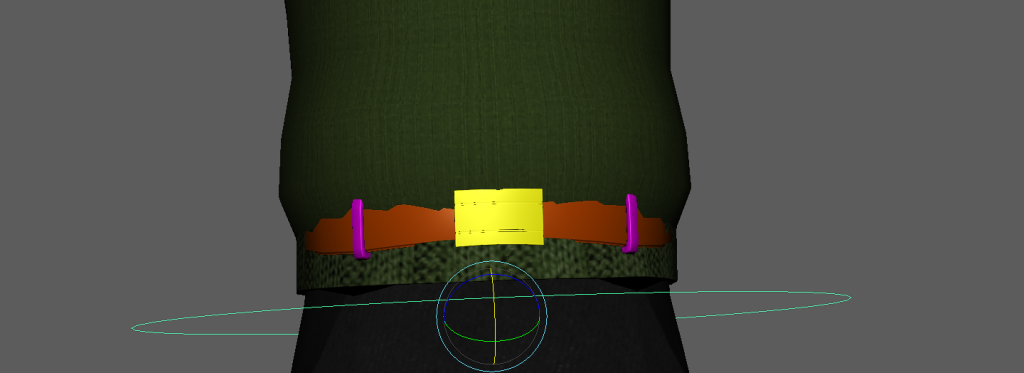
I then finished off the rig by making sure all the IK handles worked properly and were labelled correctly, and adding the rest of the controls as well. After doing this a few times it was a very easy process as i messed around quite often as i wanted to get them right. I was also just trying different controls to see what worked best.
Here are some video clips showing how my controls work on the character.
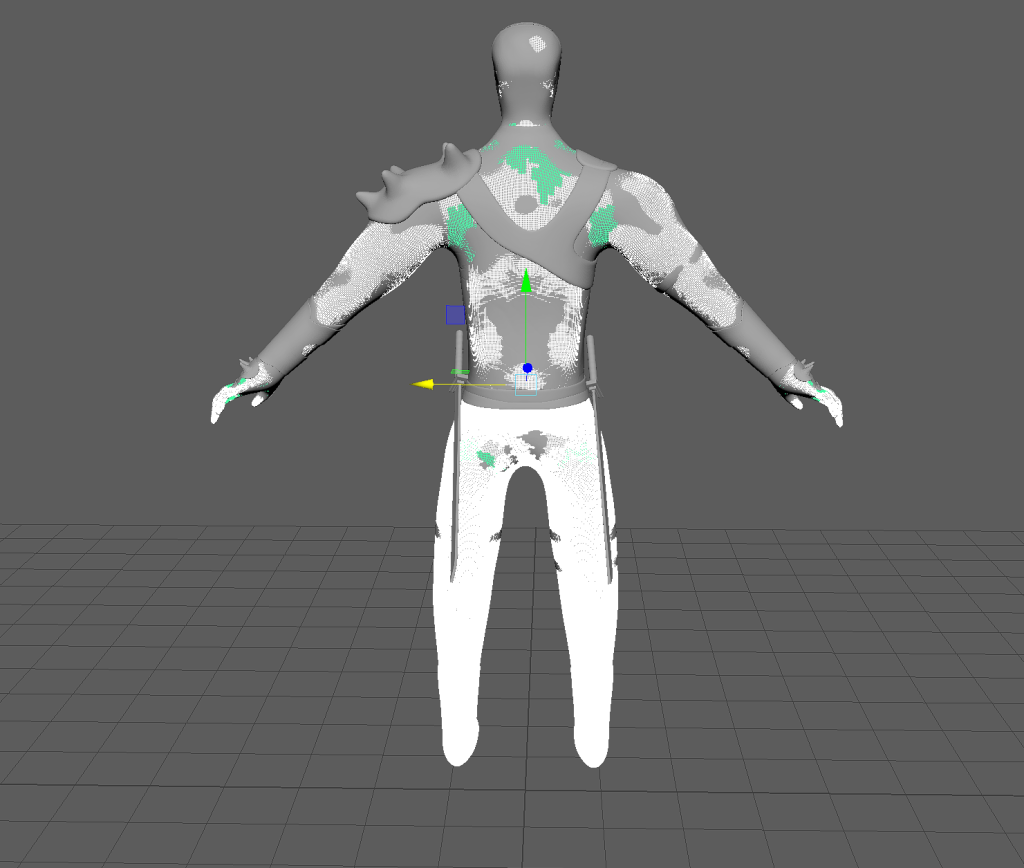
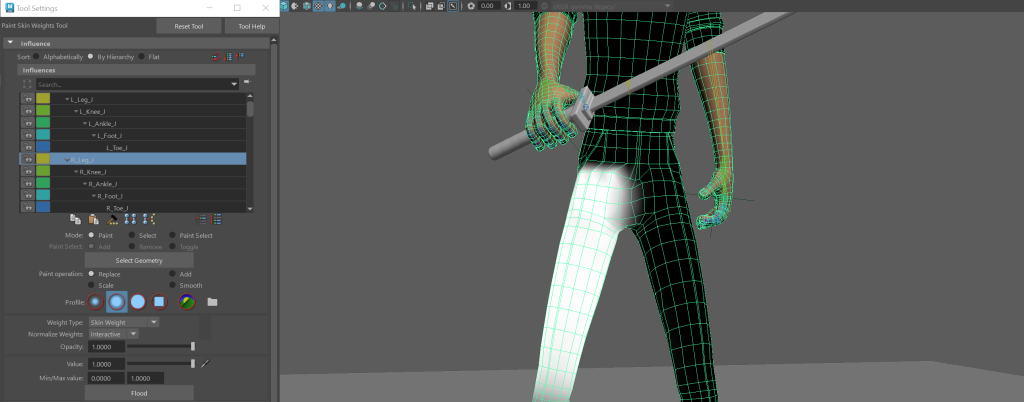
The biggest issue i had was making sure the weight painting was done evenly and only influenced where i needed it to on the fingers. Fortunately i only needed to make the fingers curl to be able to grip a weapon but in any future projects i will have to work on them more. There was also alot of influence coming from the inside of the character so i had to make sure i paid close attention to any abnormalities when testing the controls.
Now that the character was ready i was able to move onto animating him. The aim for my original character that im not able to use, was a futuristic/modern looking warrior/soldier in a game. So the three animations i wanted to do were a idle cycle (in game), a combat cycle (in game cut scene) and finally a running cycle (in game). I started researching how some attacks look using a katana which is the weapon i made for the character. I found a really helpful video of two Japanese sword experts recreating and commenting on ghost of Tsushima attacks. I also looked at images of poses/attacks. The main principles i tried applying to my animations are, anticipation(slight), follow through (on attacks, jumping/landing etc), and timing as well (overall movements etc).
Throughout the video i was able to see how the moves should be preformed and the different stances done during before and after. I did find it a challenge to get the accurate which i feel is down to how i rigged the character, but id love to see how i can build on what i have learned to see how close i can get to these moves. The the three attacks i took inspiration from were a quick slash down diagonally then slashing back up. This took quite some time to get right as the attacks needed to be quite fast but if. the key frames were too close the arm would just teleport down, up etc.
The other challenge was the angle of the wrist/sword. I could not have the sword angled exactly how it should be for these attacks as the wrist would look broken and i could not rotate the sword with it being connected to the hand/wrist. But as mentioned before when i improve at rigging etc things like this wont be an issue.
i then added in a jab/poke as well where the character leans back and put emphasis on the action, which is incorporating some anticipation. I also wanted to make a 3 swing combo instead of it just being two. Most i saw online looked really smooth as a three swing combo.

Following on from this i wanted to add in a kicking attack but it looked strange with it not actually kicking at anything to so added a door and made it so the character kicks it down like hes bursting out of a room after defeating the enemies.
I had to play around with the key frames making sure when the leg was extended upon contact with the door, i then played around with how fast the door falls to give it a realistic look and to emphasise the power behind the kick (possible Follow through/timing too).
To finish this animation the character escapes/leaves the area by jumping to another area, i had a little bit of trouble with this at first as i didn’t know how to position the arms and legs in the air but a little research on youtube i was able to sort it.
Moving onto the Second animation, the run cycle. We have done something similar during a lab session but it was also just about getting used to a rigged character so i had to do a lot of research to understand how i should space the strides etc. I looked through a lot of videos and photos before i found someone who explained the process in parts and used and explained the example images i found online. it also helped me understand the spacing between keyframes more and why its important to get it right for a smooth animation. I was then able to build on what i learned from this video to make the run fit my character, for example making sure the arm holding the sword is down and out at a angle. I found out that this is the way warriors etc used to run with a katana in their hand when i found some images online.
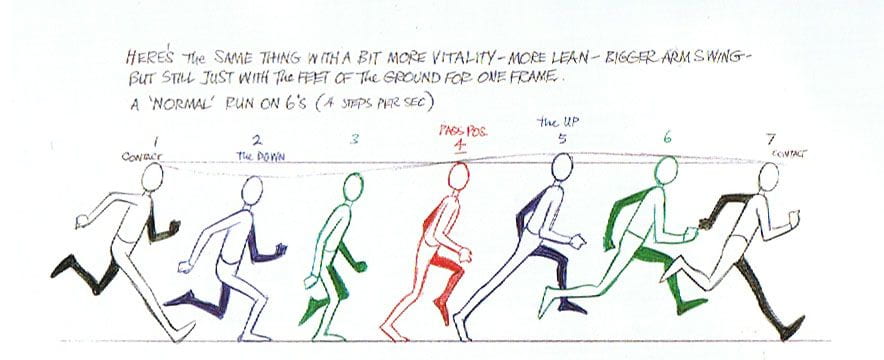
I wanted the movements to be as natural and realistic as i could get them. making sure to have the body moved/rotated instead of it being locked in place. I also made sure that the height of the character lowered as they stepped and increased as they pushed off into the next step, also making sure the arms moved in time with the opposite leg. I did have to to re make this animation as i made a mistake when key framing and when the animation was played it looked like his legs were running backwards and visa versa. to improve this animations detail, i could of set a driven key for the ball of the foot or the toes so there was more detail in the cycle instead of just rotating the foot even though it works. However i tried to for the fingers and it did not work so it did not come to mind for the feet.
theres still improvements that can be made, but with this being the first time ive animated a character properly i think it came out how i wanted it to. one issue i had though was head movement(s)/the upper body in general, as i think it definitely could of been smoother looking.
The final animation piece is the idle cycle. In the process of making this i used the graph editor for the first time and found it very useful as it seemed to have made the movements for this animation smoother. I did not want to do anything i knew i could not do (due to some limitations) even though i had some ideas in mind, for example the character standing while swinging their swords every so often and looking around surveying the area. I got the idea to use the graph editor from some forums that were talking about animations and looping them etc (since this would be quite a short animation). So what i went for was the character standing but moving up and down slowly (giving the impression the character is breathing).
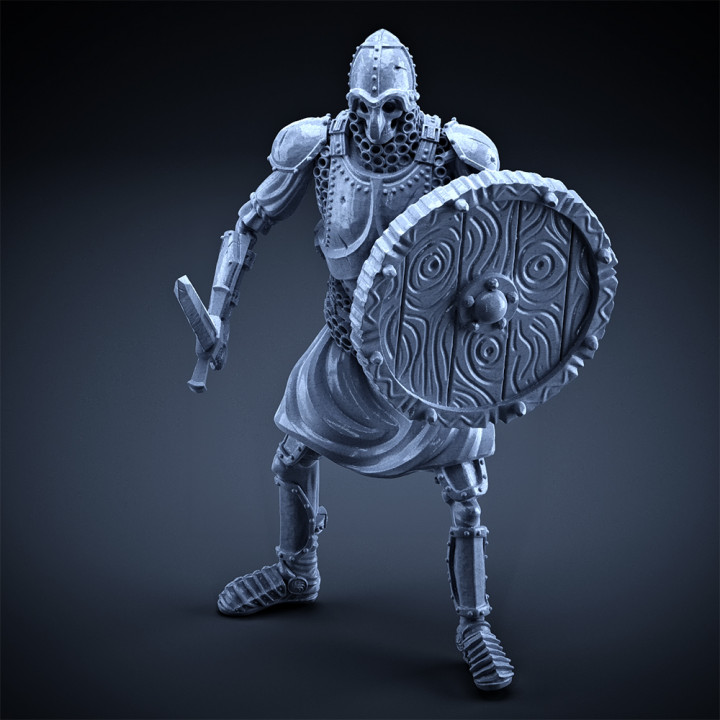
I had no issues making this animation, (the challenge was understanding the graph editor) and im very happy with the characters movements. they have a realistic and natural look. This can still be improved massively, but gives me a good start for an idle animation. The pose was inspired from an image i found of a soldier standing with a sword and a shield, (shown above).
All of the animation clips shown above would be improved greatly with just my character being added in as they would fit the look/design of that character, as the placeholder one from canvas looks out of place. Through out the animations i have tried using blend shapes, to show the character being angry or happy (eyebrows, smirk/smile) but with my characters design he had a helmet on so i did not take into account that this placeholder character would not and the face would be visible. So i opted for minimal use of blend shapes instead of trying to force them in as it ended up looking out of place/strange ruining the whole animation.
I also made a change to the weapons, the character was going to have two katanas however with the way the character was rigged the choice of poses and animations it looked better with only one weapon. I was also unsure and did not want to mess about trying to get one attached to the hip or back like its sheathed.
FINAL ANIMATION VIDEOS:
REFERENCES:
Learn CGI with Yawyee, (2020), Maya run cycle tutorial (video), Available Online: https://www.youtube.com/watch?v=JlGPlu8vPqs
Gameology, (2021), Japanese Sword experts recreate moves from ghost of Tsushima (video), Available Online: https://www.youtube.com/watch?v=bRhisN4EKFY
TeachMeAnatomy, (2022), Vertebrae structure (image), Available Online: https://teachmeanatomy.info/back/bones/vertebral-column/
Reins Digital Academy, (2020), How to animate a jump (video), Available Online: https://www.youtube.com/watch?v=fM6hiXN1OFo
MyMiniFactory, (2020), Skeleton with sword and shield (image), Available Online: https://www.myminifactory.com/object/3d-print-skeleton-heavy-infantry-sword-round-shield-idle-pose-129848
Ulster Blogs, (2021), Azri Run cycle (image), Available Online: https://blogs.ulster.ac.uk/rachelmartinn/2021/01/02/azri-run-cycle/
Tenor, (2017), Samurai run (gif/image), Available Online: https://tenor.com/view/samurai-run-running-charge-katana-gif-8083525