Development Log (Character 2)
What makes a good character?:
(This analysis was done for development log 1 and is repeated as the same information can be applied to this character too. dev log 1 can be found here.)
When it comes to creating a good character the first thing that must be done is defining the character. This includes things like, the look of the character, their silhouette, these help to separate them from any other characters within their game world. These also help players get an understanding of possible traits/abilities that particular character might have. For example, a big muscular character, the first assumption is they are really strong, and then the opposite being a skinny smaller character being weak and frail, however these tend to fall into stereotypes which is something to avoid when it comes to making a good character.
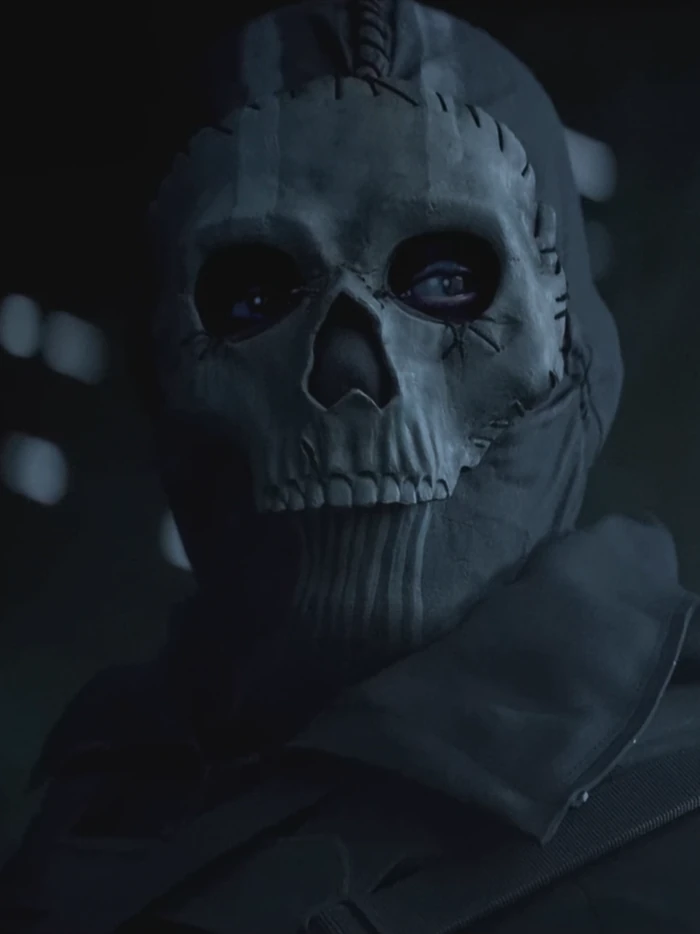
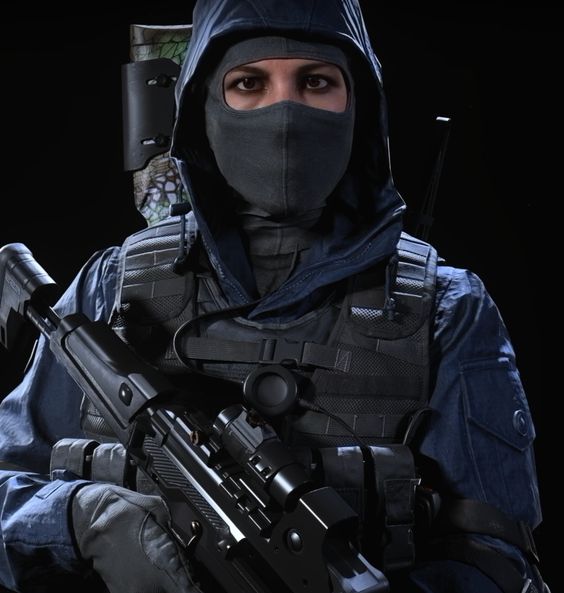
Michel Sabbagh (2015) goes on to say in his blog that “What’s worse than an uninspired character? An uninspired character that’s actually a walking stereotype. Stereotypes are the bane of good character design: they strip the character of any individuality and turn him into an absolute bore to listen to and/or look at.” He goes on to say how dead island did this and almost made him mute the games due to the one liners the characters would come out with, the butchered accents they had and the shallow personalities. A great but simple example of making a character diverse is the character Ghost from the call of duty modern warfare series, hes easily picked out by fans of the series due to the mask he wears. The images below show the mask and even though theres slight adjustments made (left 2022 MW2) compared to the original (MW2 2009) its very clear who the character is.
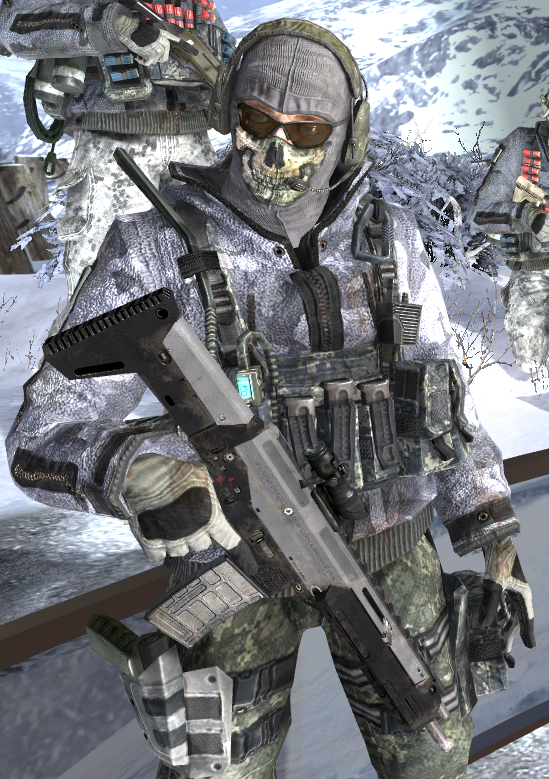
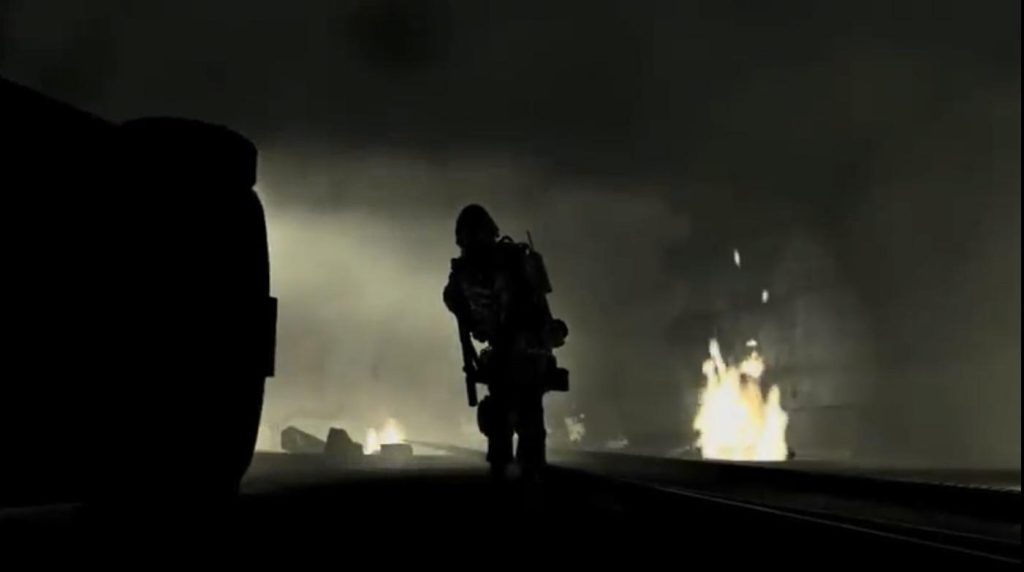
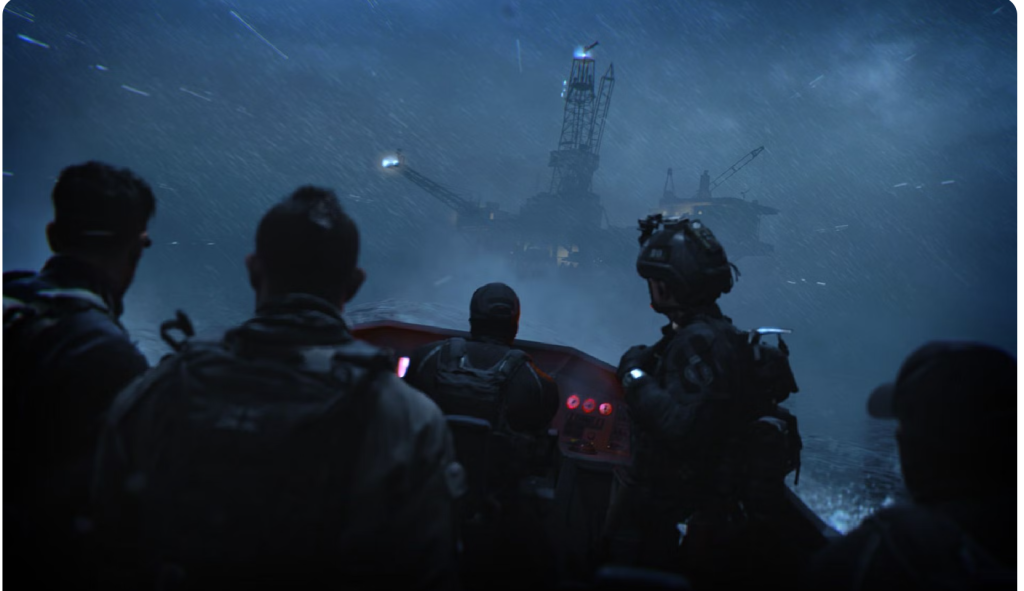
A good example of how silhouettes are very important and why you need to make sure you can differentiate between them and others characters, is when a shot during a Modern Warfare 3 trailer looked like ghost, this led fans to believe he was included in the game but it ended up being a completely different character. as the image below shows, it looks very similar to ghost in Modern Warfare 2 (2009) shown just above. A characters silhouette also helps distinguish them from the environment they are in. Here is another example from the newly released Modern Warfare 2 (2022) which is a shot from a boat but is behind the characters. Any fan of the Modern Warfare series will know that soap is the character just left of the middle based on his hair as its something he has always had. You can then apply this to all other protagonists in games.
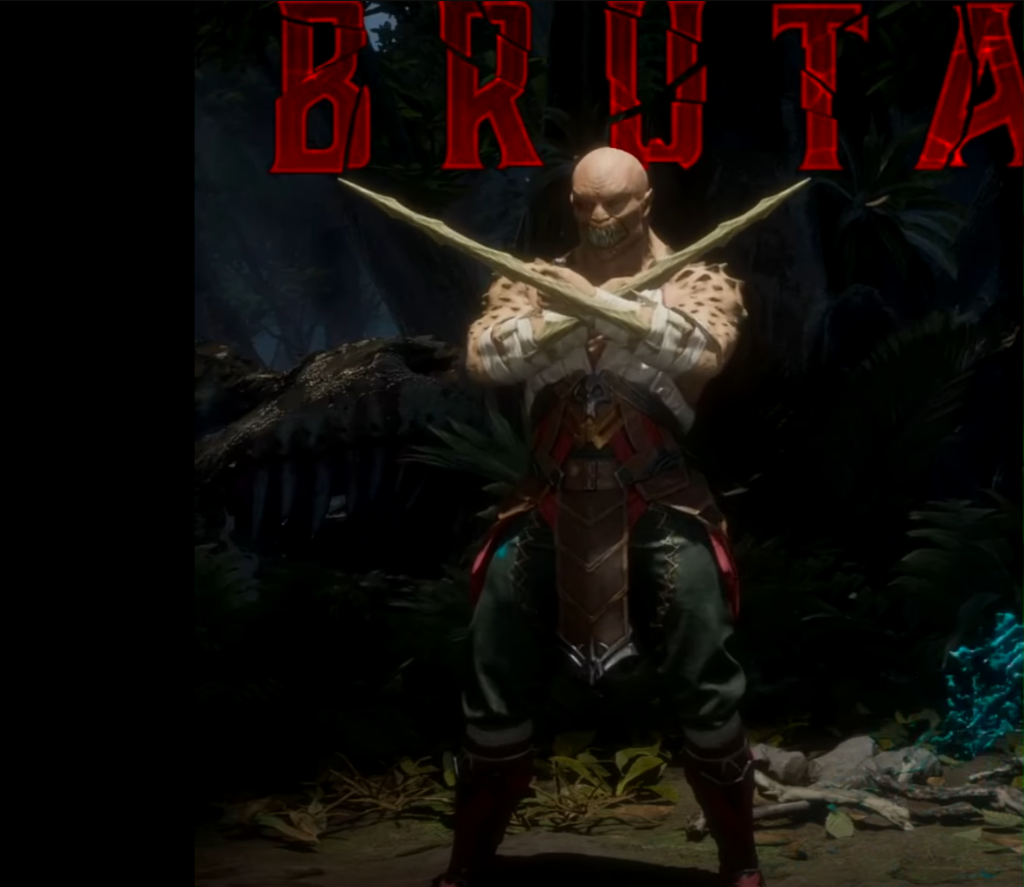
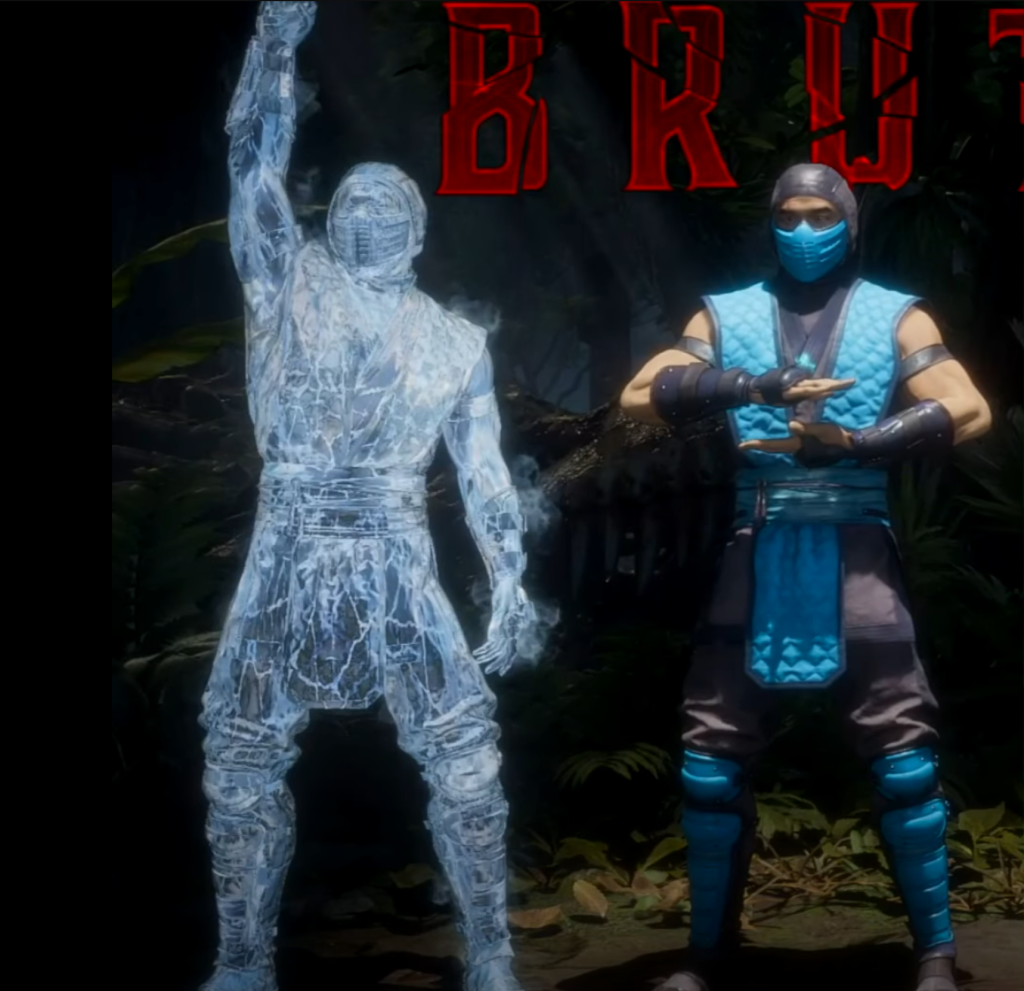
guilty gear Moving onto my next point is poses. These mainly apply to fighting games like Tekken, Mortal Kombat, street fighter, dragoon ball fighter Z, WWE2k, Fatal fury, just to name a few. These poses become a way users are able to identify the different characters, first example is a character from MK called Baraka and this is their victory pose, victory poses are probably the most popular poses with the MK user base. The next example is another from MK called sub-zero. Just like the previous areas covered, these are unique to each character and will allow users to identify that character purely based on the pose. These poses also end up deciding if a user picks that character to use, due to them finding it cool etc.
Michel Sabbagh (2015) goes on to say in his blog that “a character dual-wielding revolvers flauntingly gives us the impression that he’s going to shoot first and ask questions later. The TimeSplitters series is an excellent reference for character poses. When browsing through the multiplayer roster, you always see the characters adopt a particular pose before being selected by the player. Those poses give you a decent idea of what to expect from that character.” This reiterates my point about how poses help users identify the character and also decide if they want to use them in game.
The next point, avoid tokenism. this is when a minority character is put in purely for the sake of it instead of actually having that character fit the game world/story. Michel Sabbagh (2015) covers this in his blog saying “if you remember a minority character simply because of their minority traits, you know you made a mistake somewhere down the line” just like any other character they need depth and meaning and need to fit the world they will be in.
For this character the focus is on the clothes and accessories they will be wearing, along with some wires they will have in parts of the body representing the work they had done due to injuries and the cyber spine that will be inserted in the back. This character has had some setbacks and changes made going away from the initial plan but i feel she fits the world better now with these changes than she would of done if i continued.
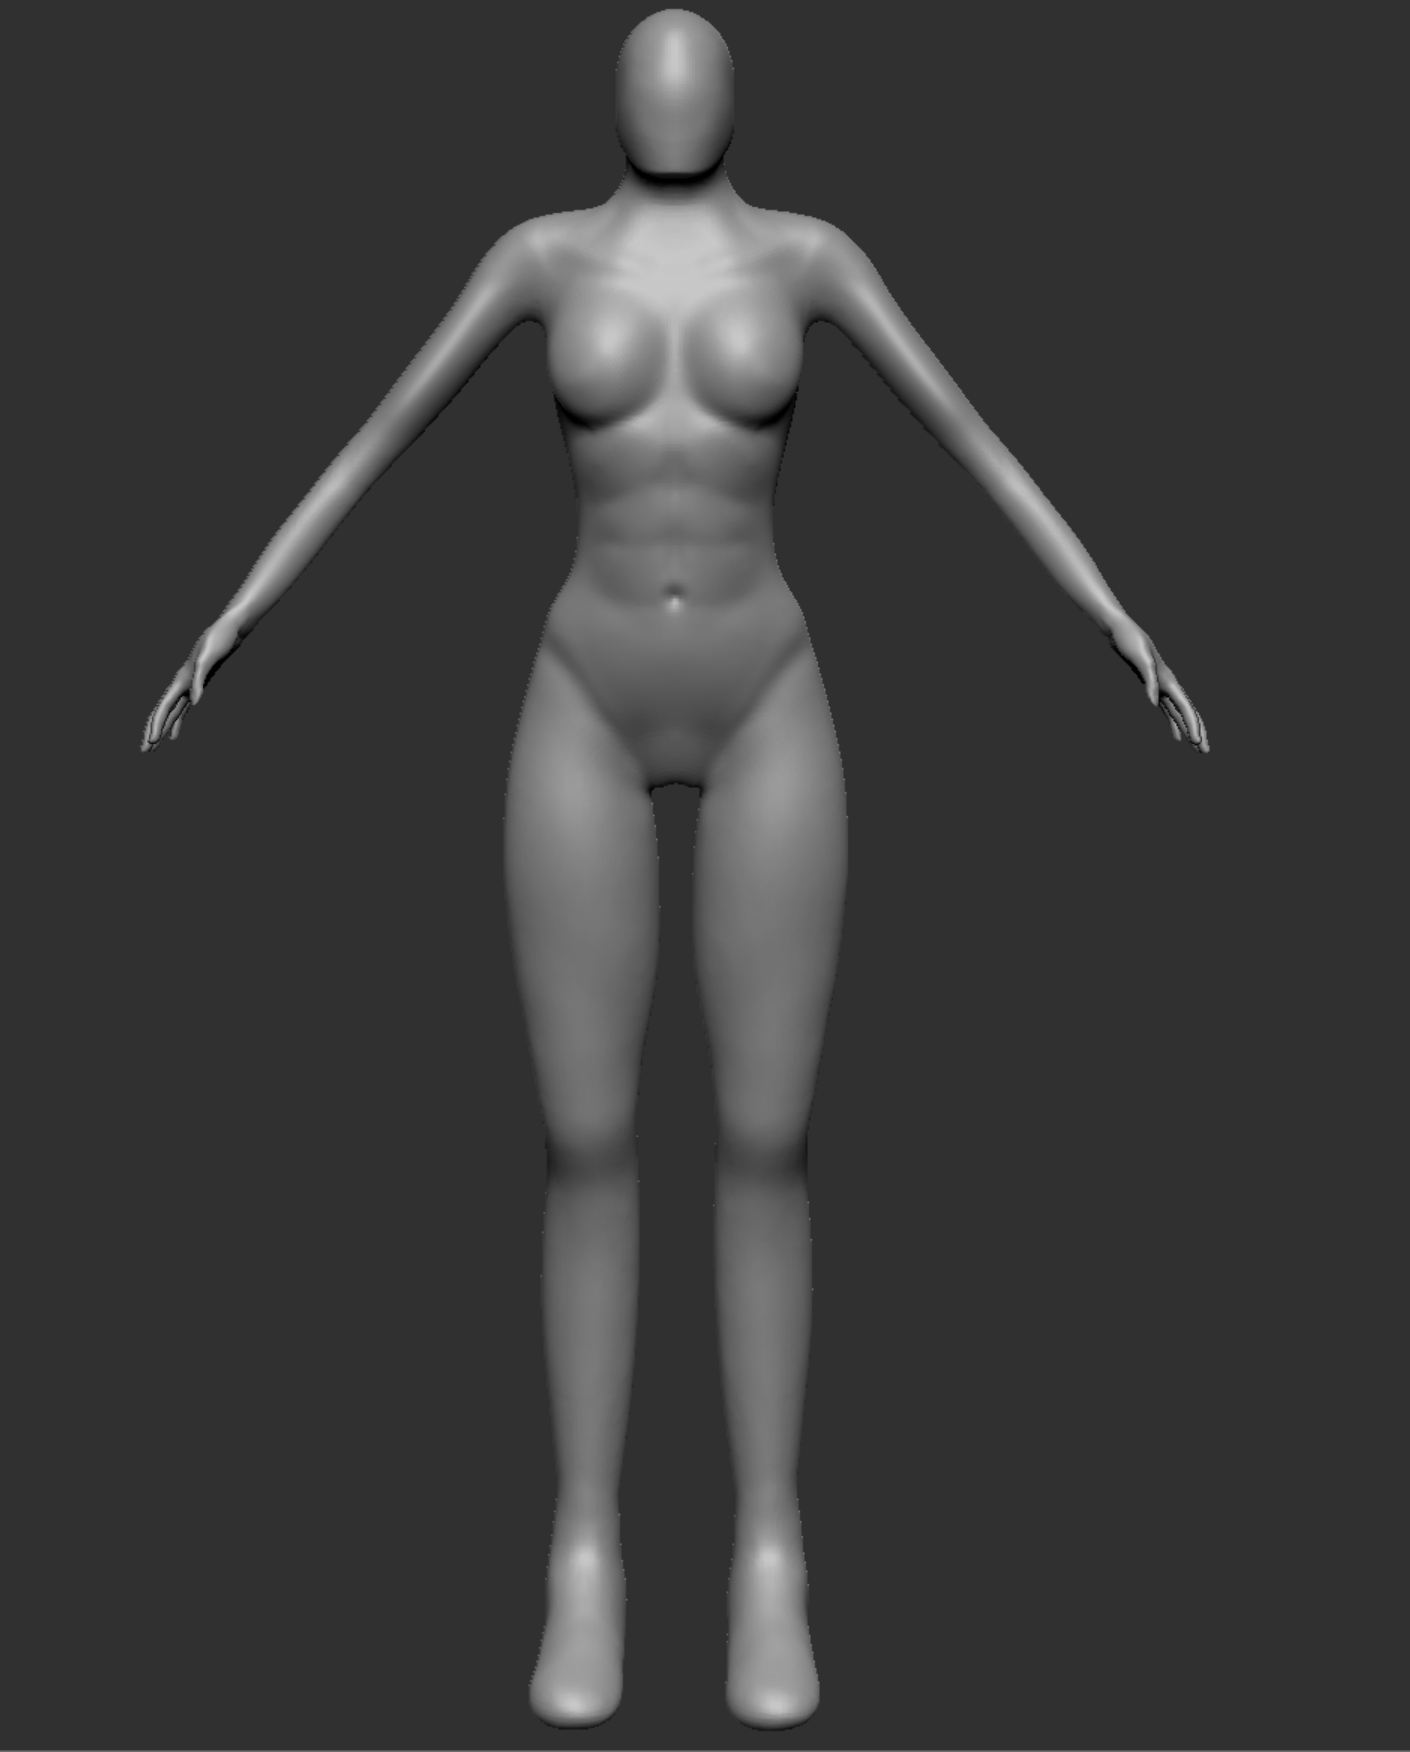
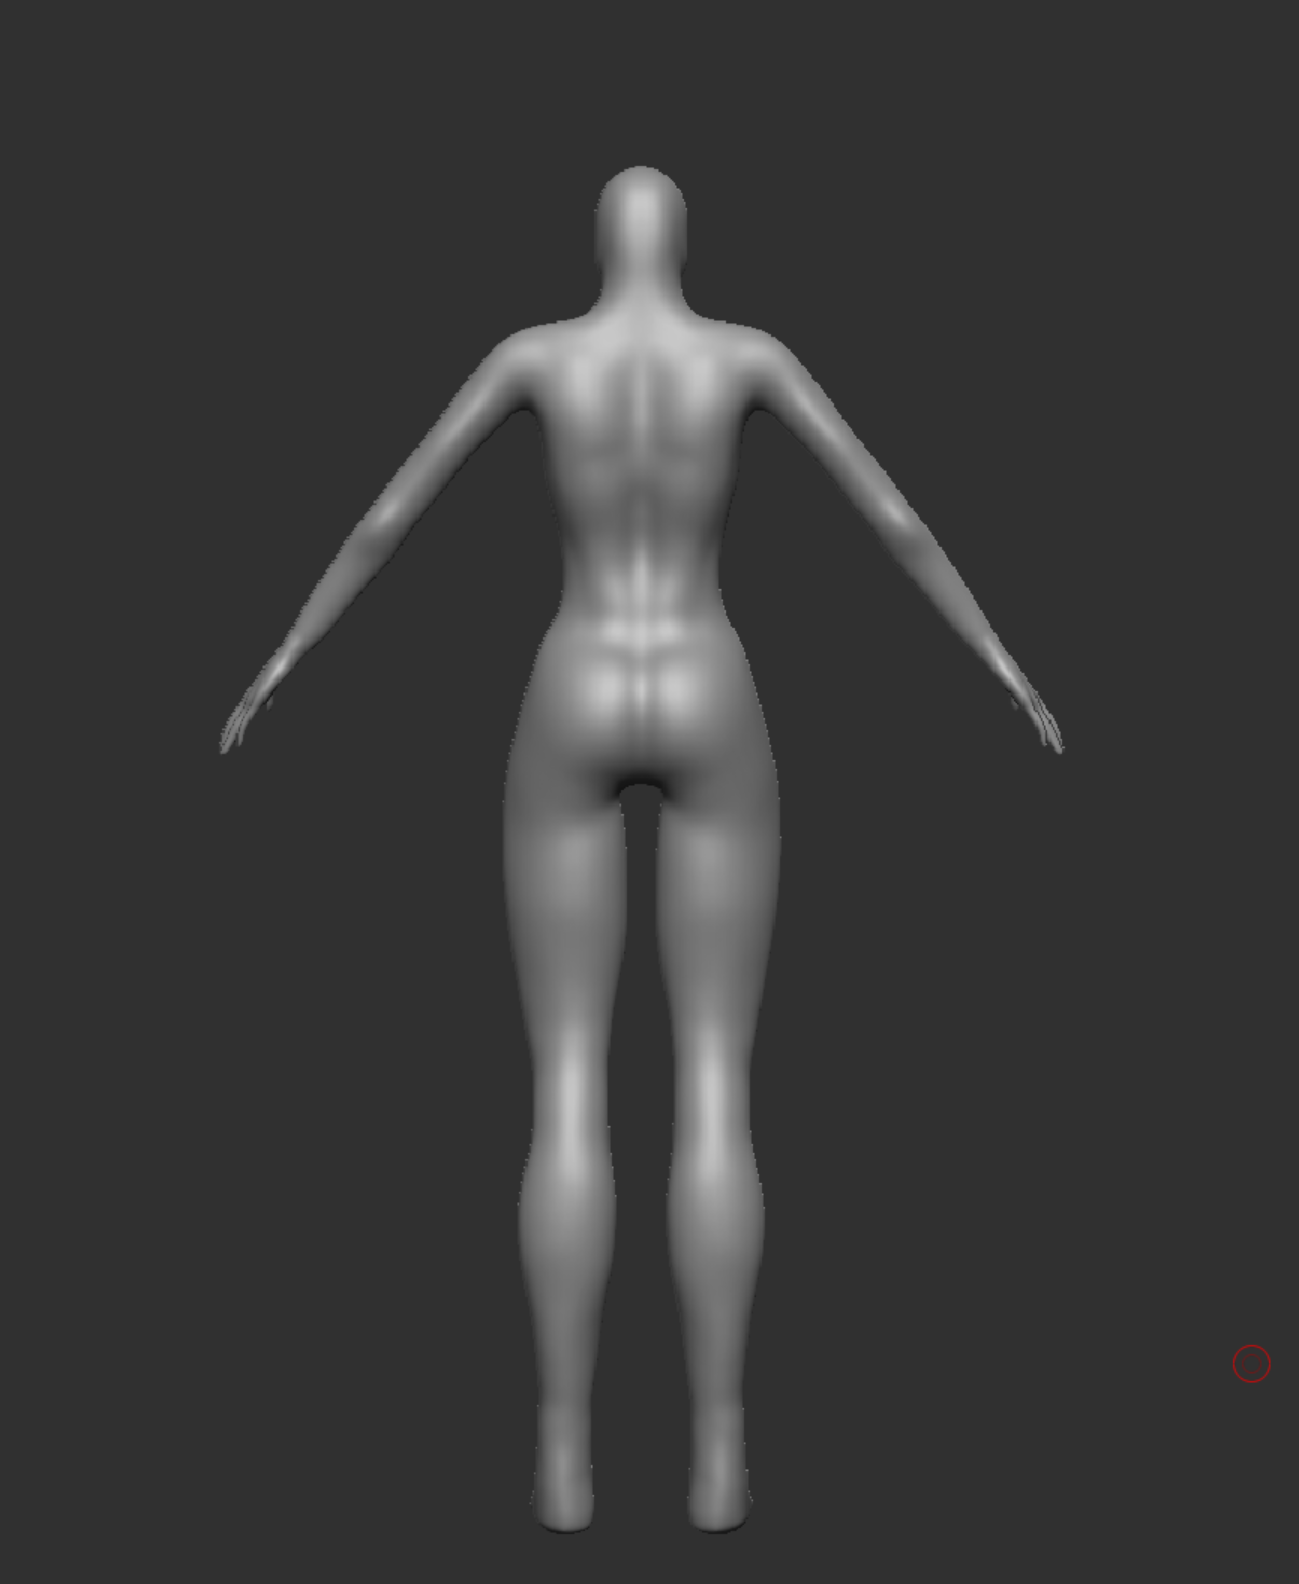
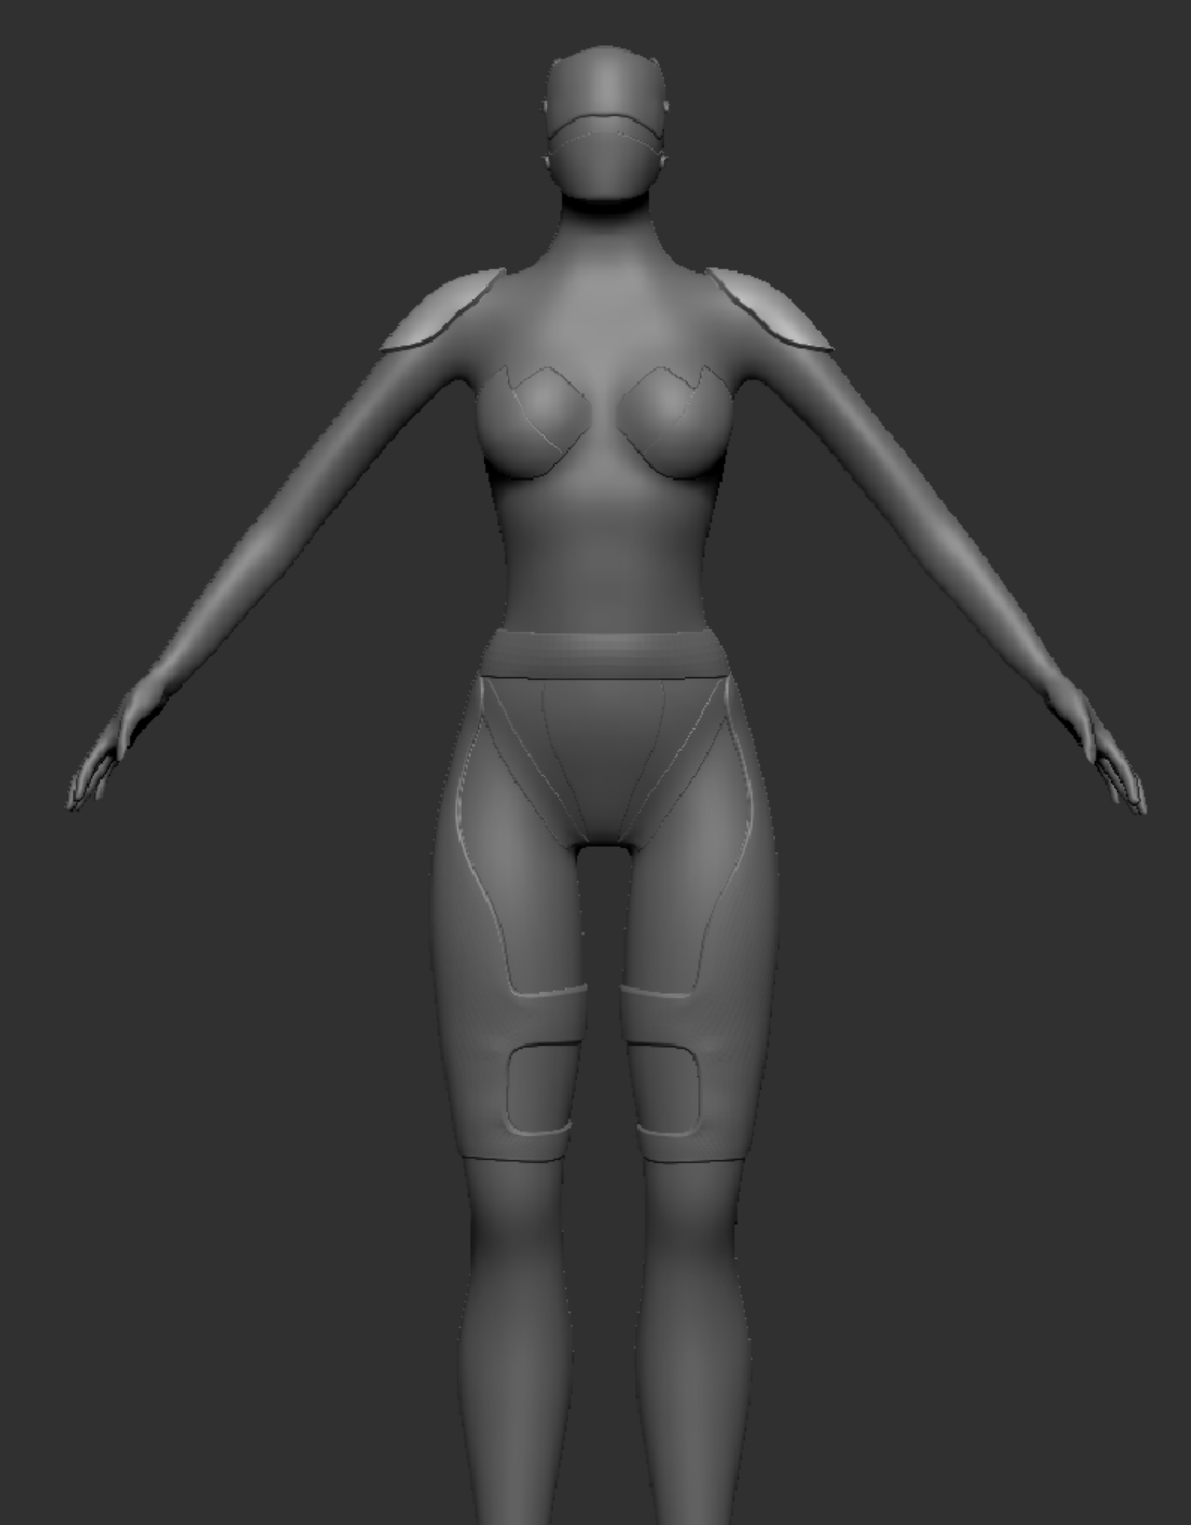
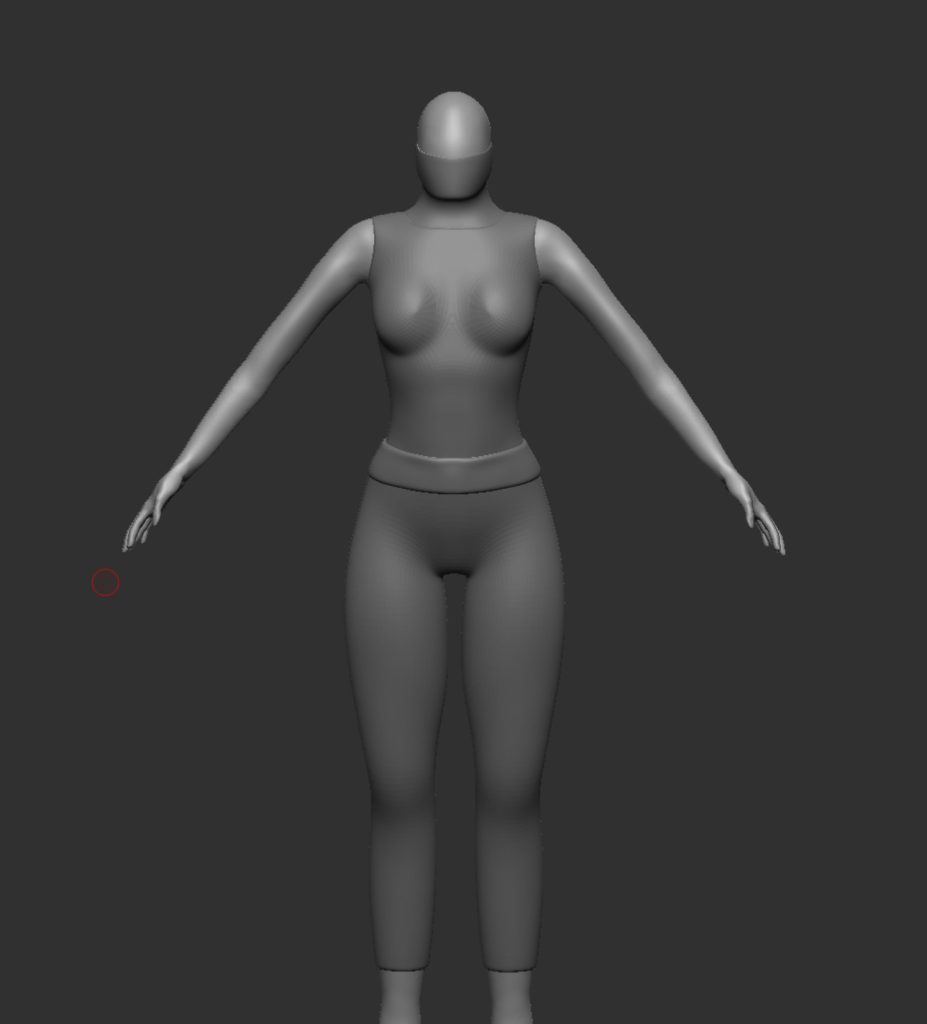
For the second character the beginning process was pretty much the same as the first, i sculpted the general shape before adding in muscles where they were needed. This was not as hard as the first character as i learned from previous mistakes for example making abs identical, forearms too small, shoulder being above the arm instead of going into the arm, however the muscles on this character don’t have anywhere near as much definition/emphasis as its not needed.
I followed this up by adding the hands and the feet, this was done by taking them from the first character, scaling them and lining them up with the wrists and then mirror and welding so there was 2 hands and two feet (add images).
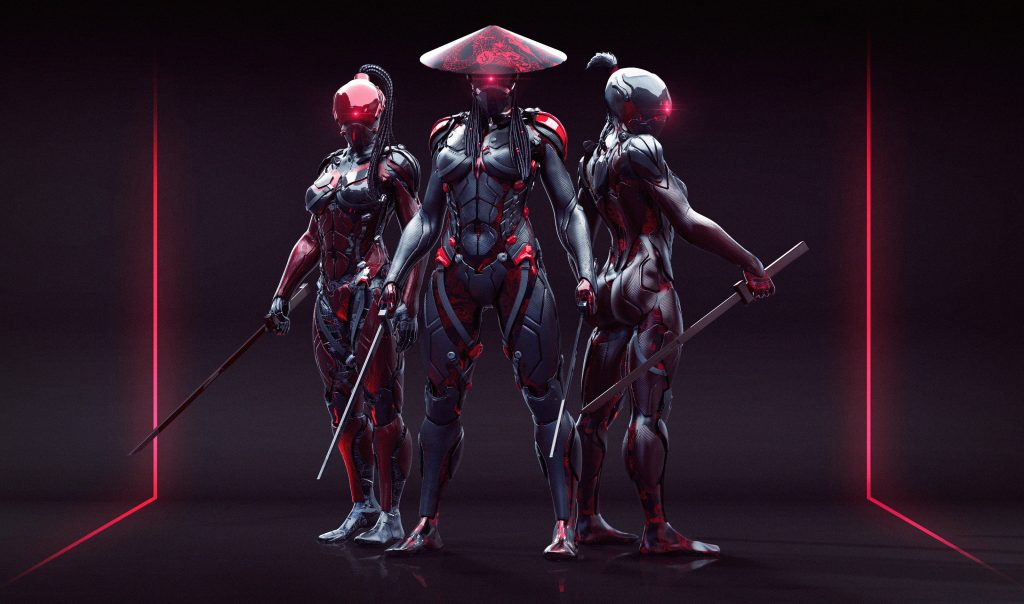
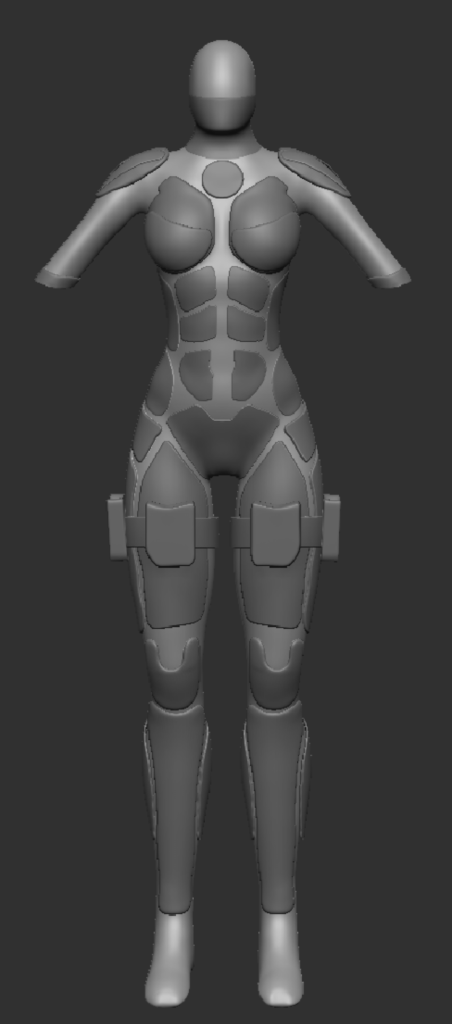
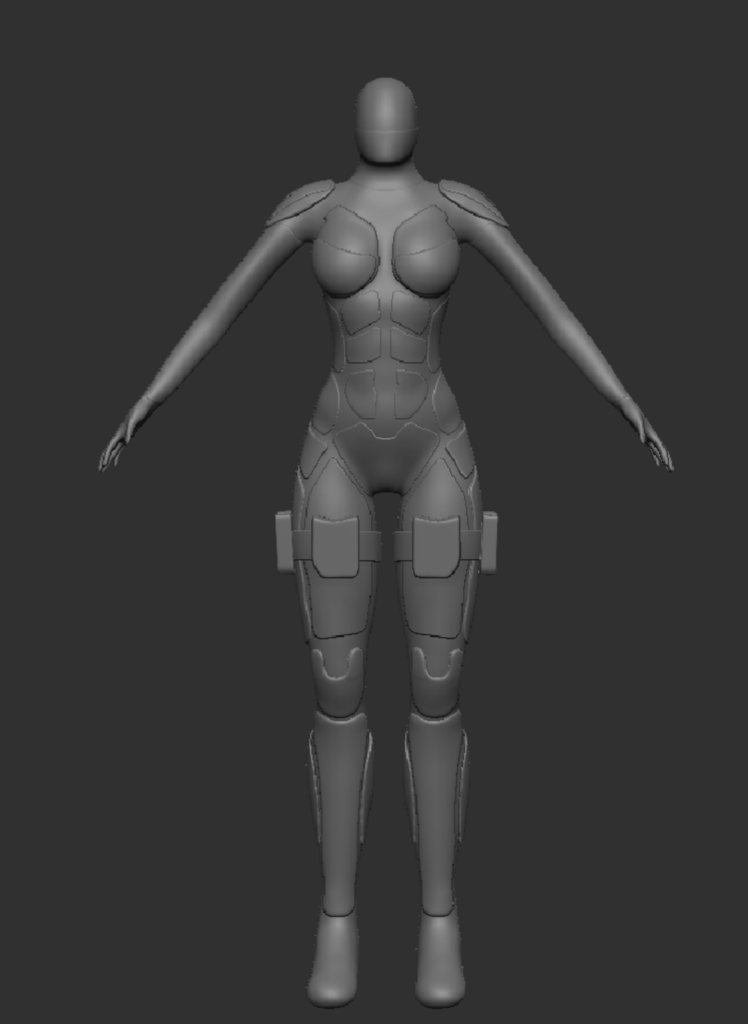
Now that was done and the basic shape of the character was there, I then moved onto blocking out the Armor. This has been quite a tough stage of the design process due to me having lots of ideas causing me to keep changing how I want it to look and since I have not done hard surface before finding the right technique has been tough, even though its just the basic design right now with the small details being added later. I did lots of research into ideas for armour that I could do, below are some examples of things I looked at.
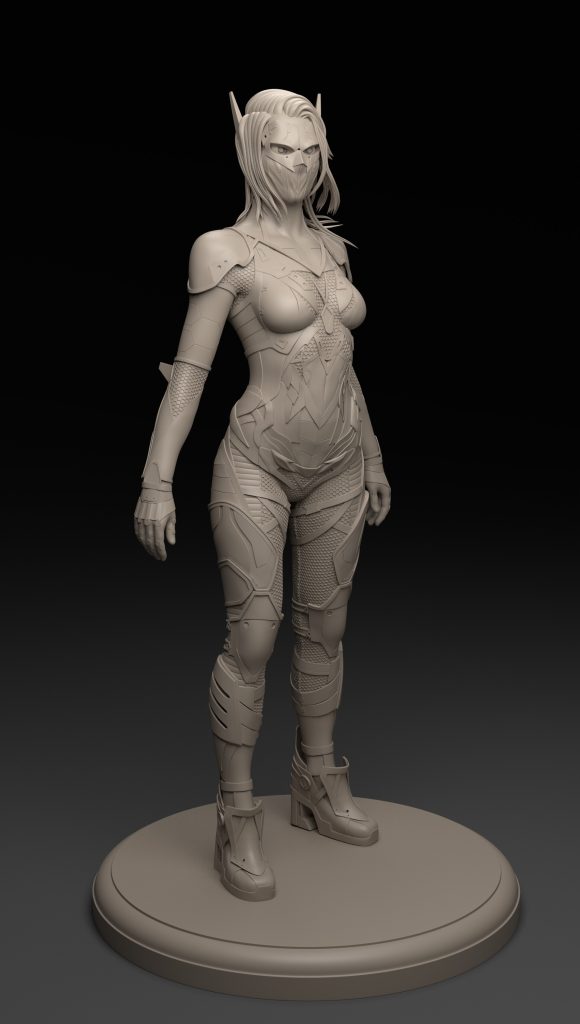
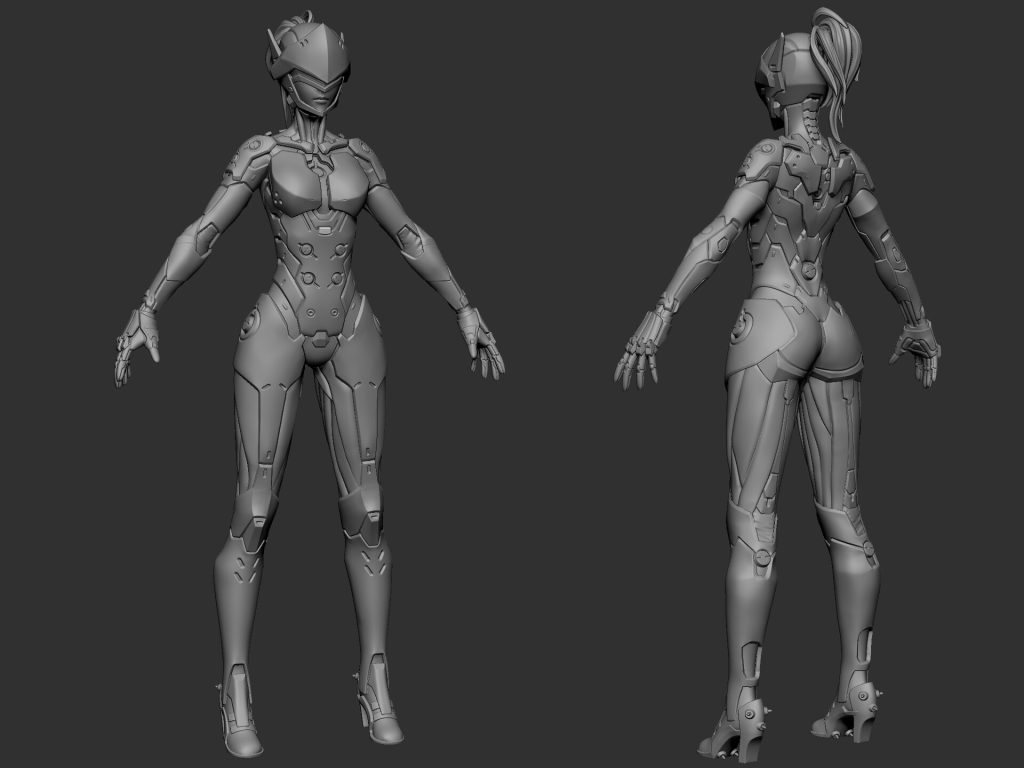
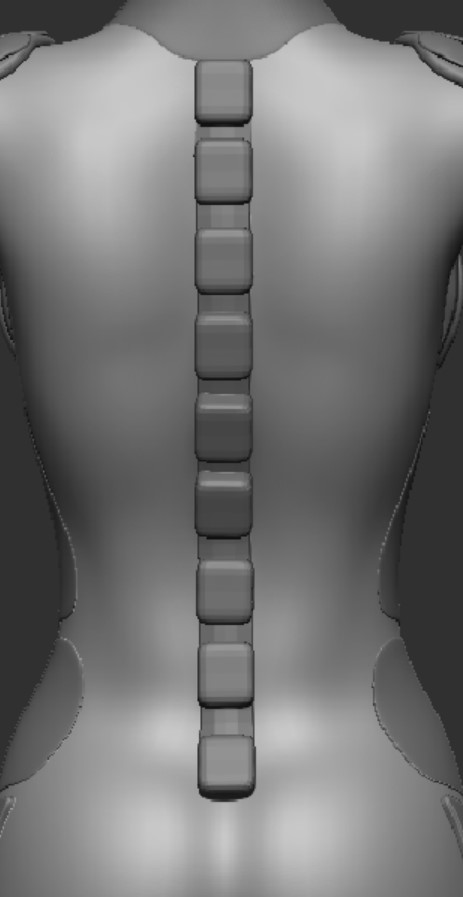
Once I had chosen which armour block out I liked the most I started to build upon that as shown in the images below. Since this character will have some kind of prosthetic/robotic limb(s) I removed the arms to get an idea of how the character looks visually and try to help create the visual idea I had for the arms. I then looked into the spine and what i could potentially do for that to make it fit the robotic sci-fi theme I have for this character. The main thing i looked into was cyberpunk 2077 as they have lots of different body implants used in the game and series.
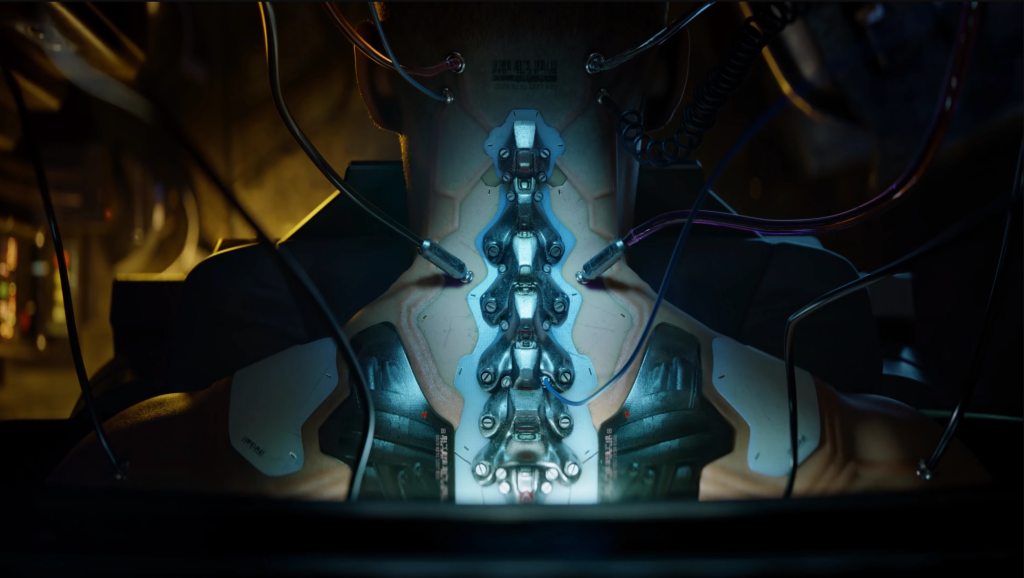
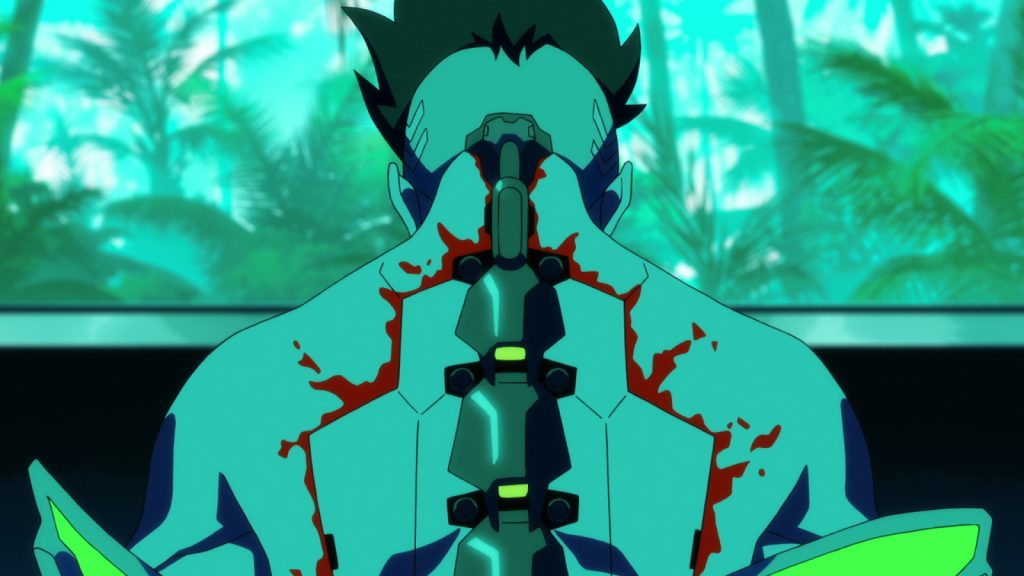
Cyberpunk: Edgerunners. Kenn as David Martinez in Cyberpunk: Edgerunners. Cr. COURTESY OF NETFLIX © 2022
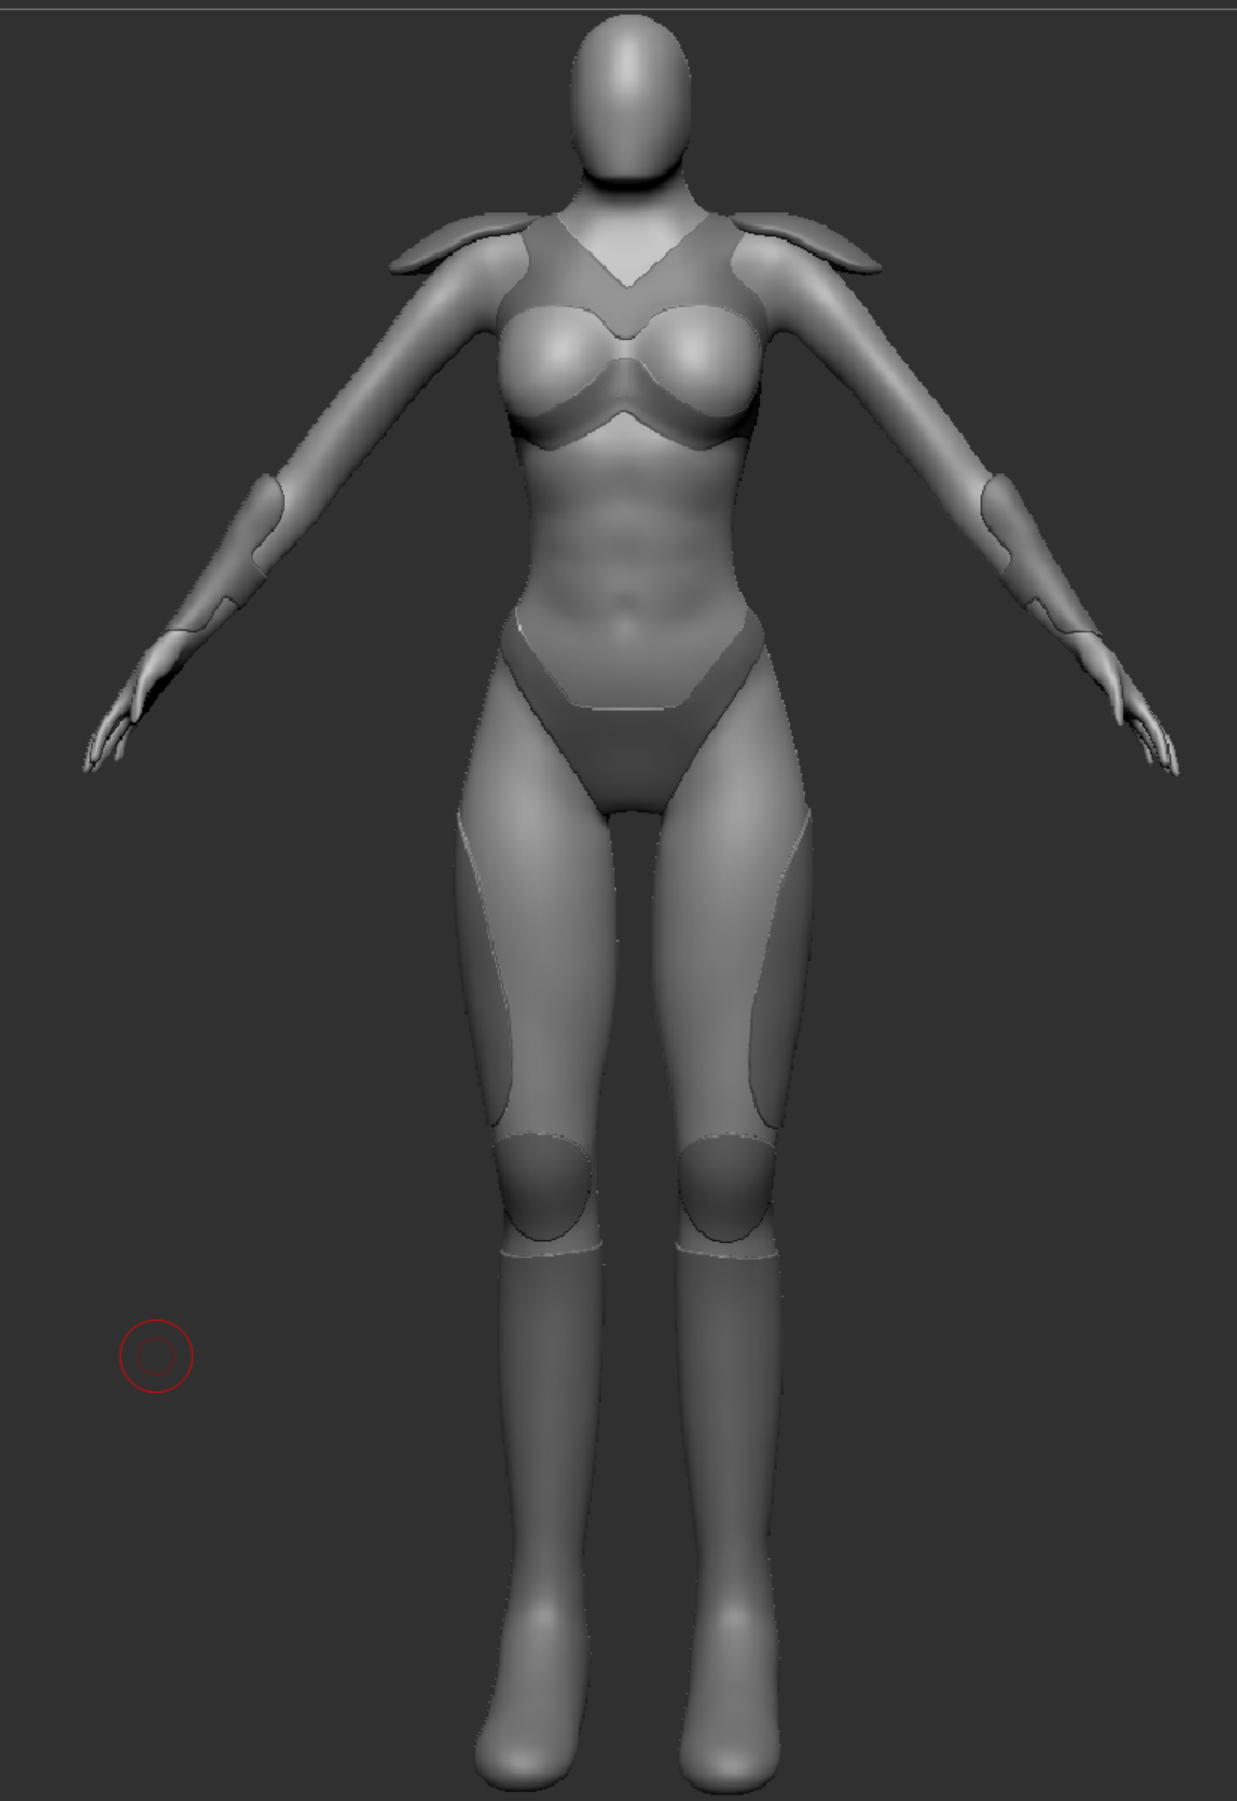
It was then at this point where I started questioning if I was happy with how this character was developing and started to wonder if I had swayed too far from the idea of this being a semi futuristic army soldier like I first planned. So I made a list of what I would need to do for the rest of this character and if made changes to it to bring it back on the path of the army soldier, this helped me get a clear idea of what would need to be done & changed. I also did a quick block out just to get a idea for the clothes.
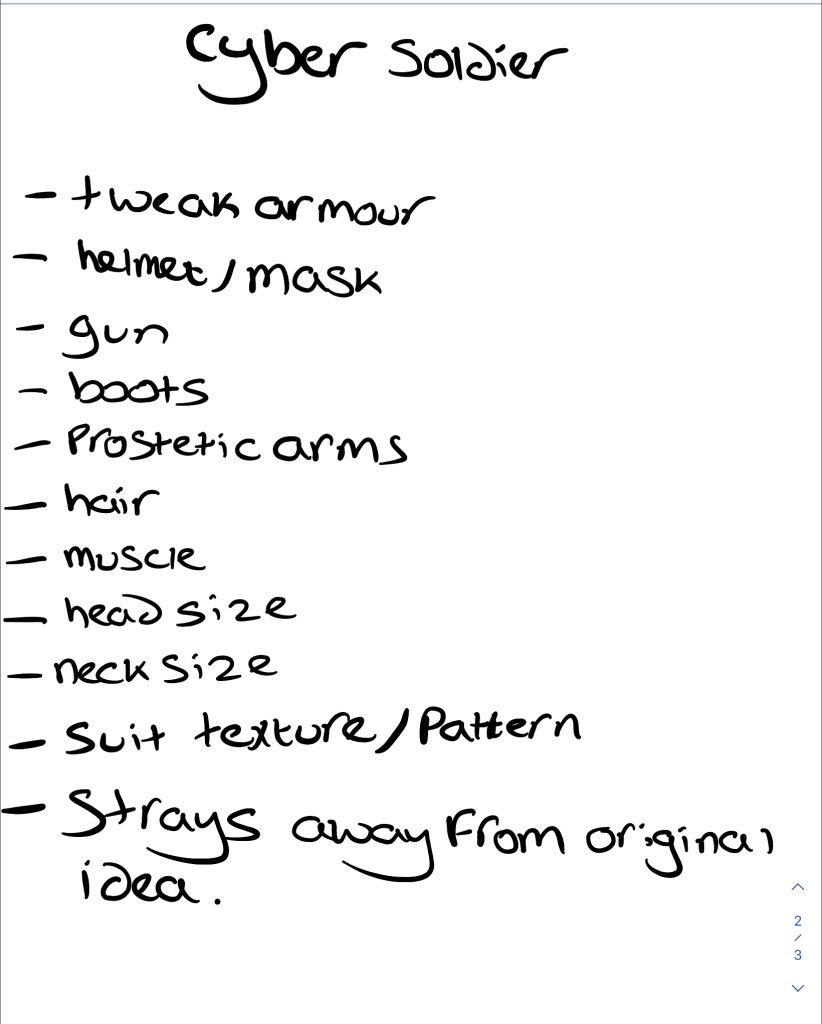
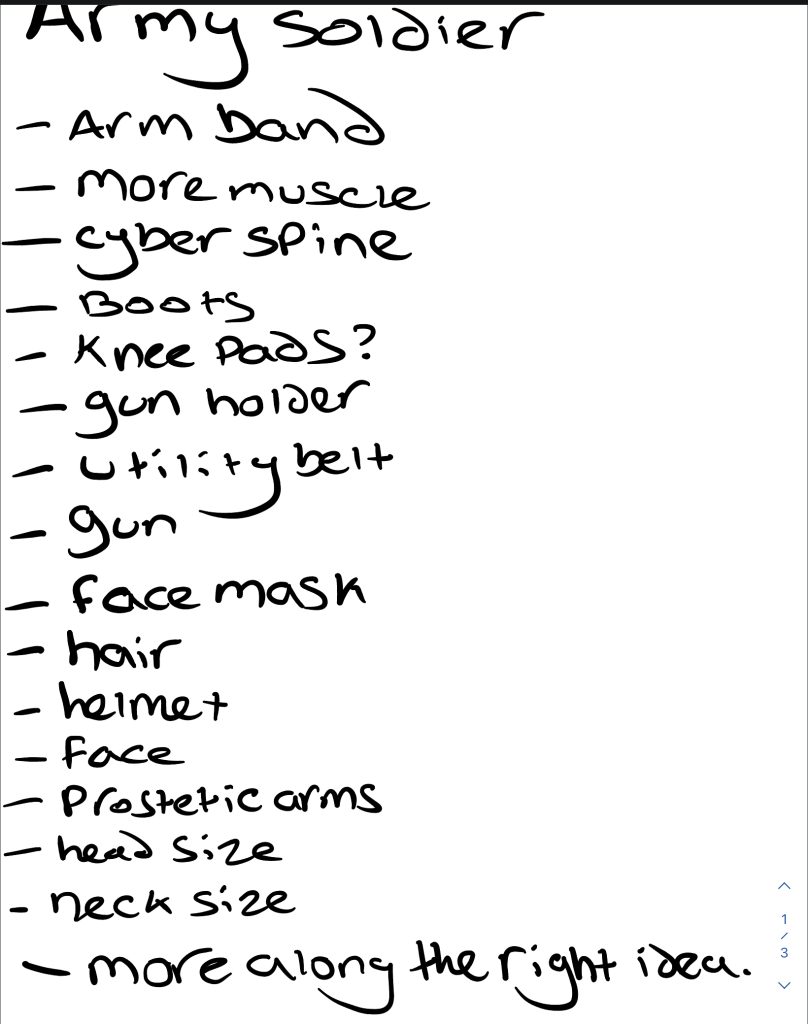
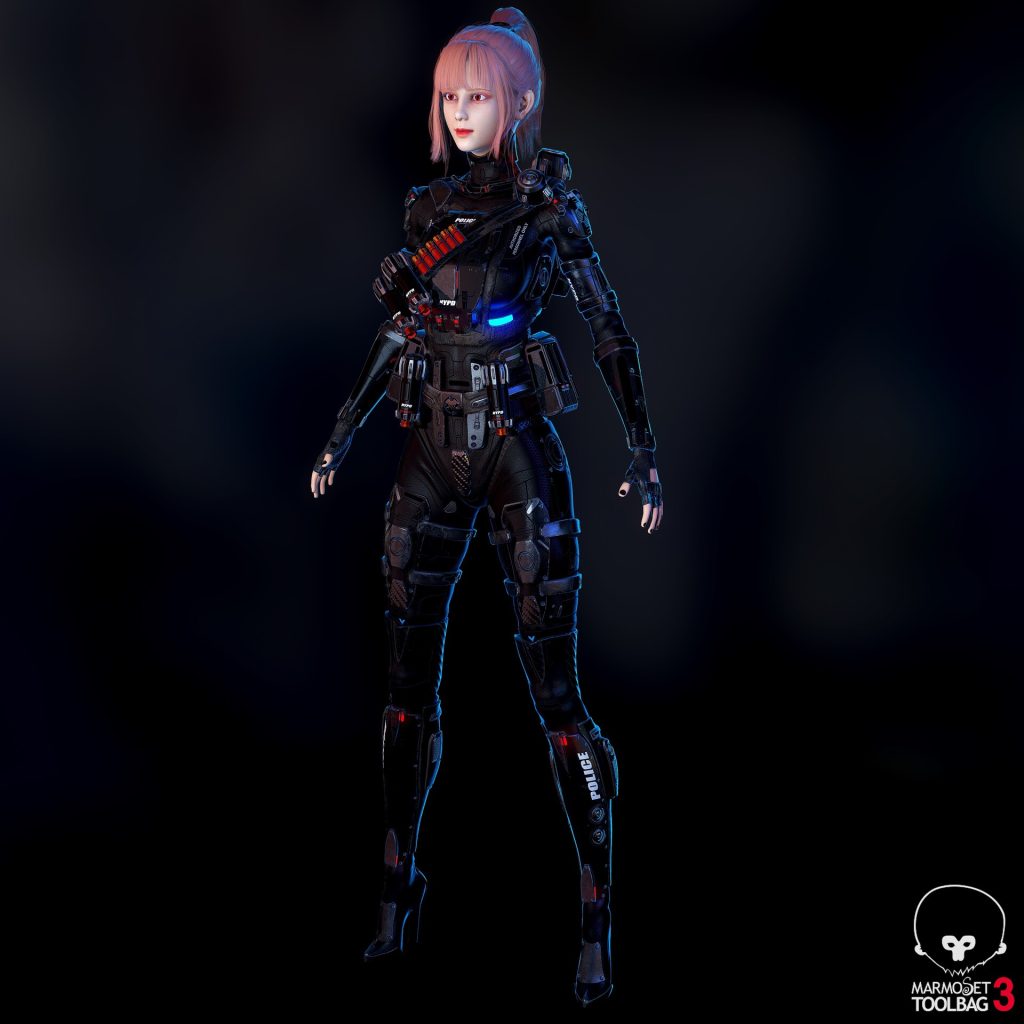
Based on this and how I felt about it I decided to go with the army soldier route with the sci-fi/prosthetic limb(s) since that’s what I originally planned and I just was not happy with how the current development of the character. So I started doing some research for references.
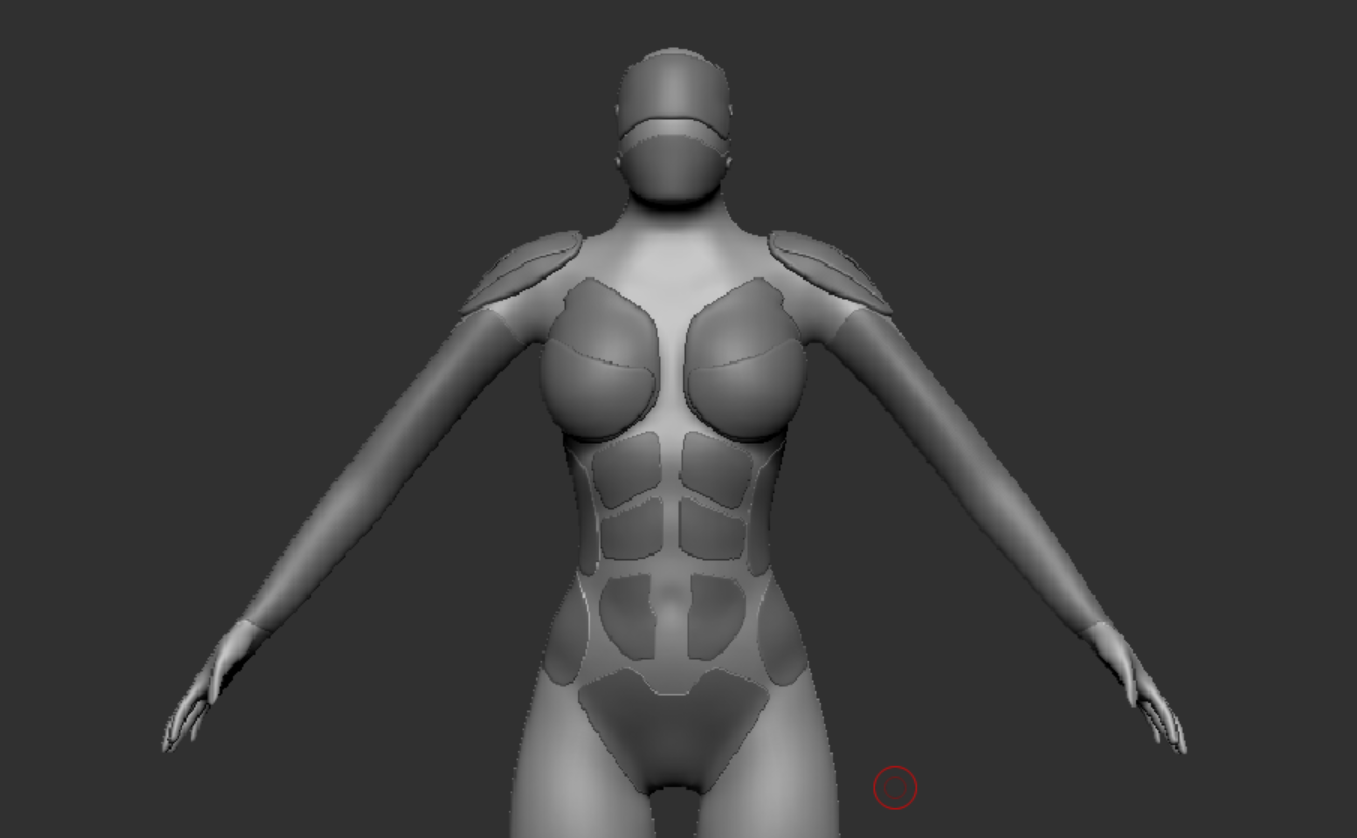
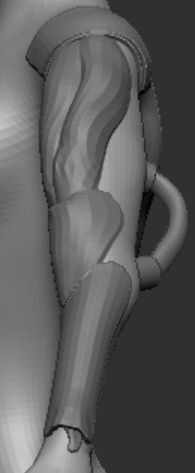
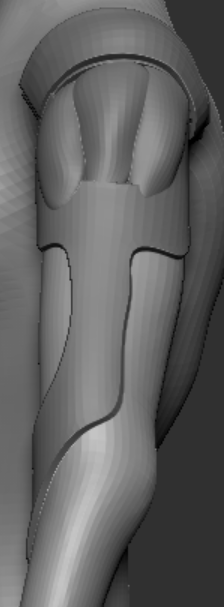
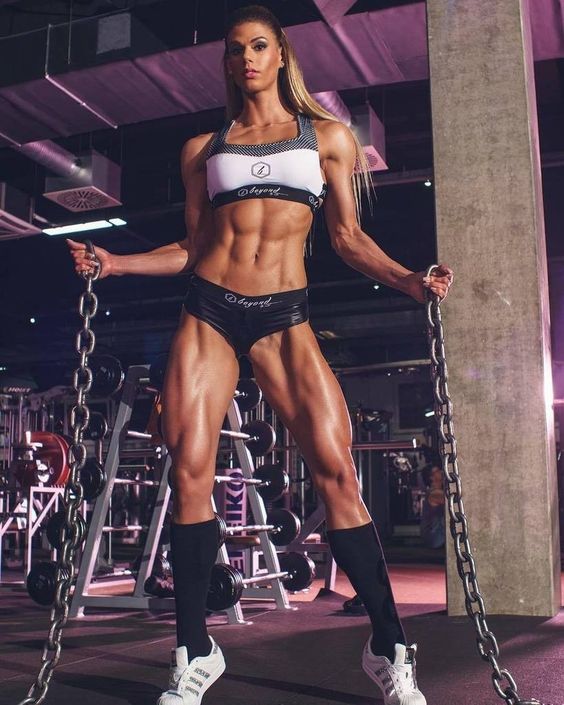
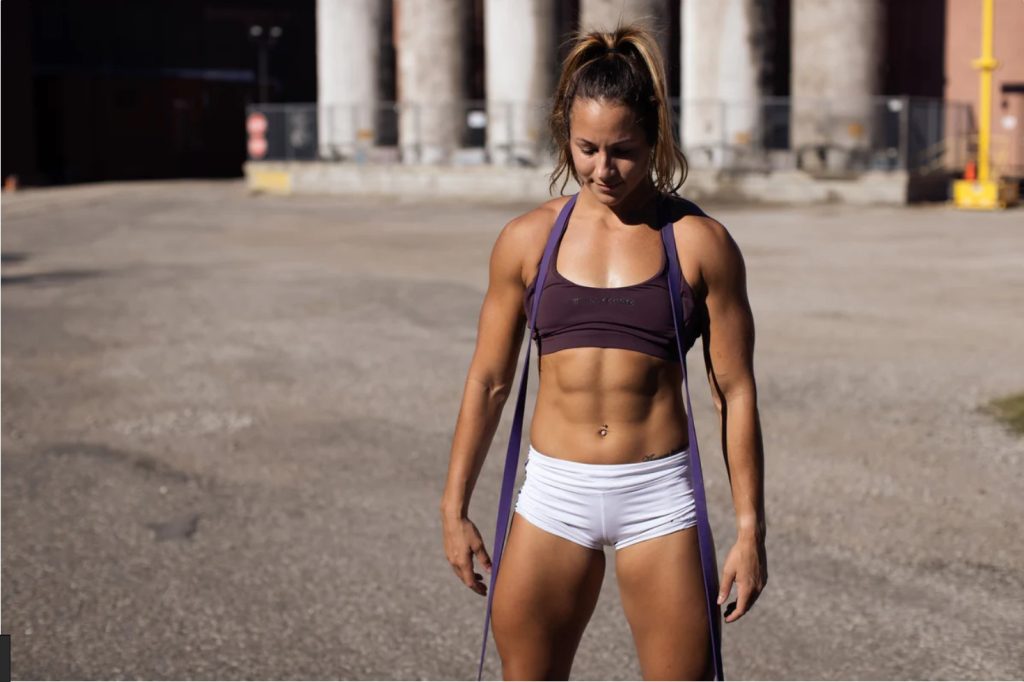
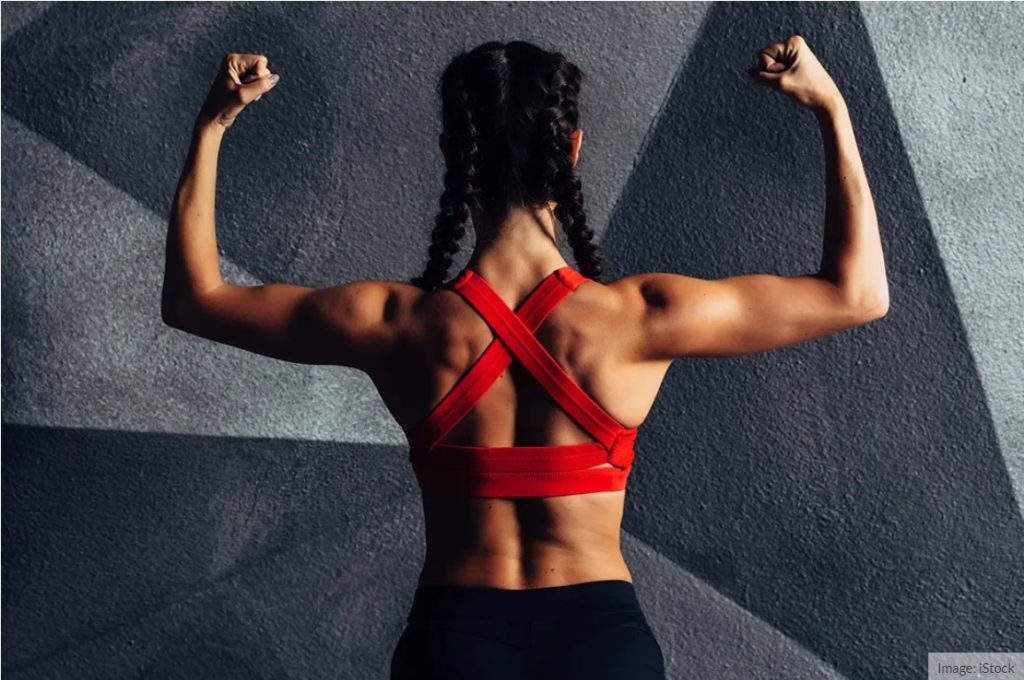
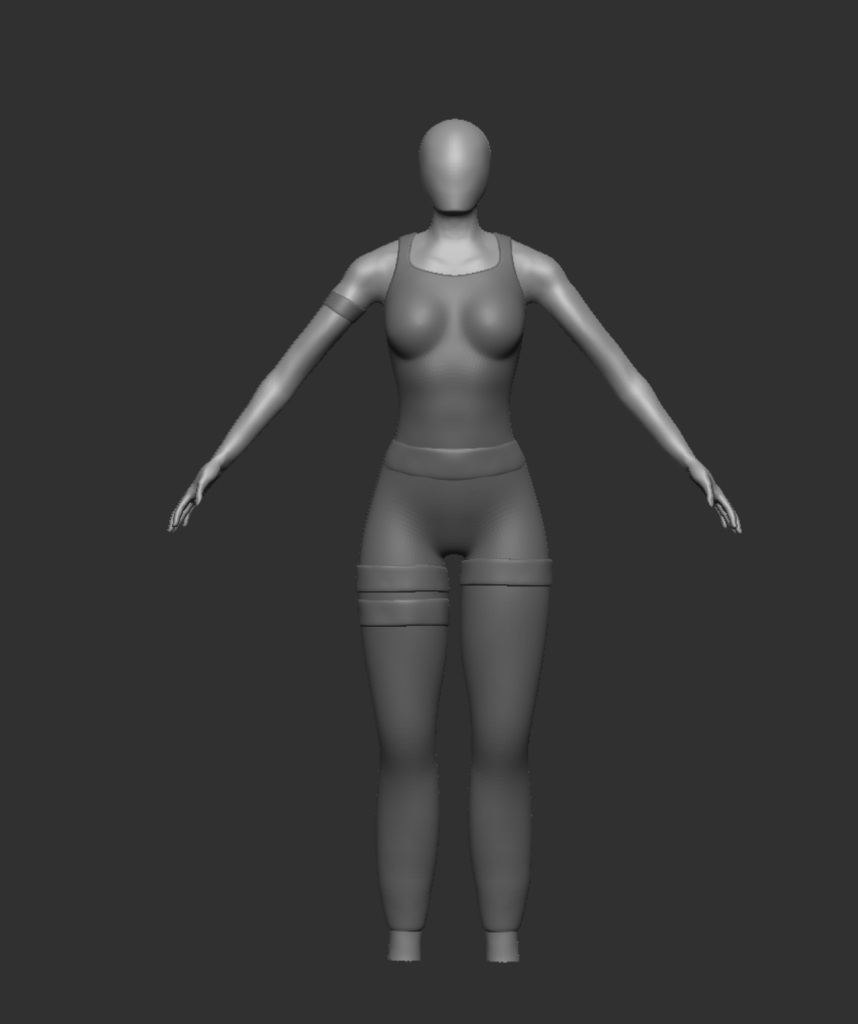
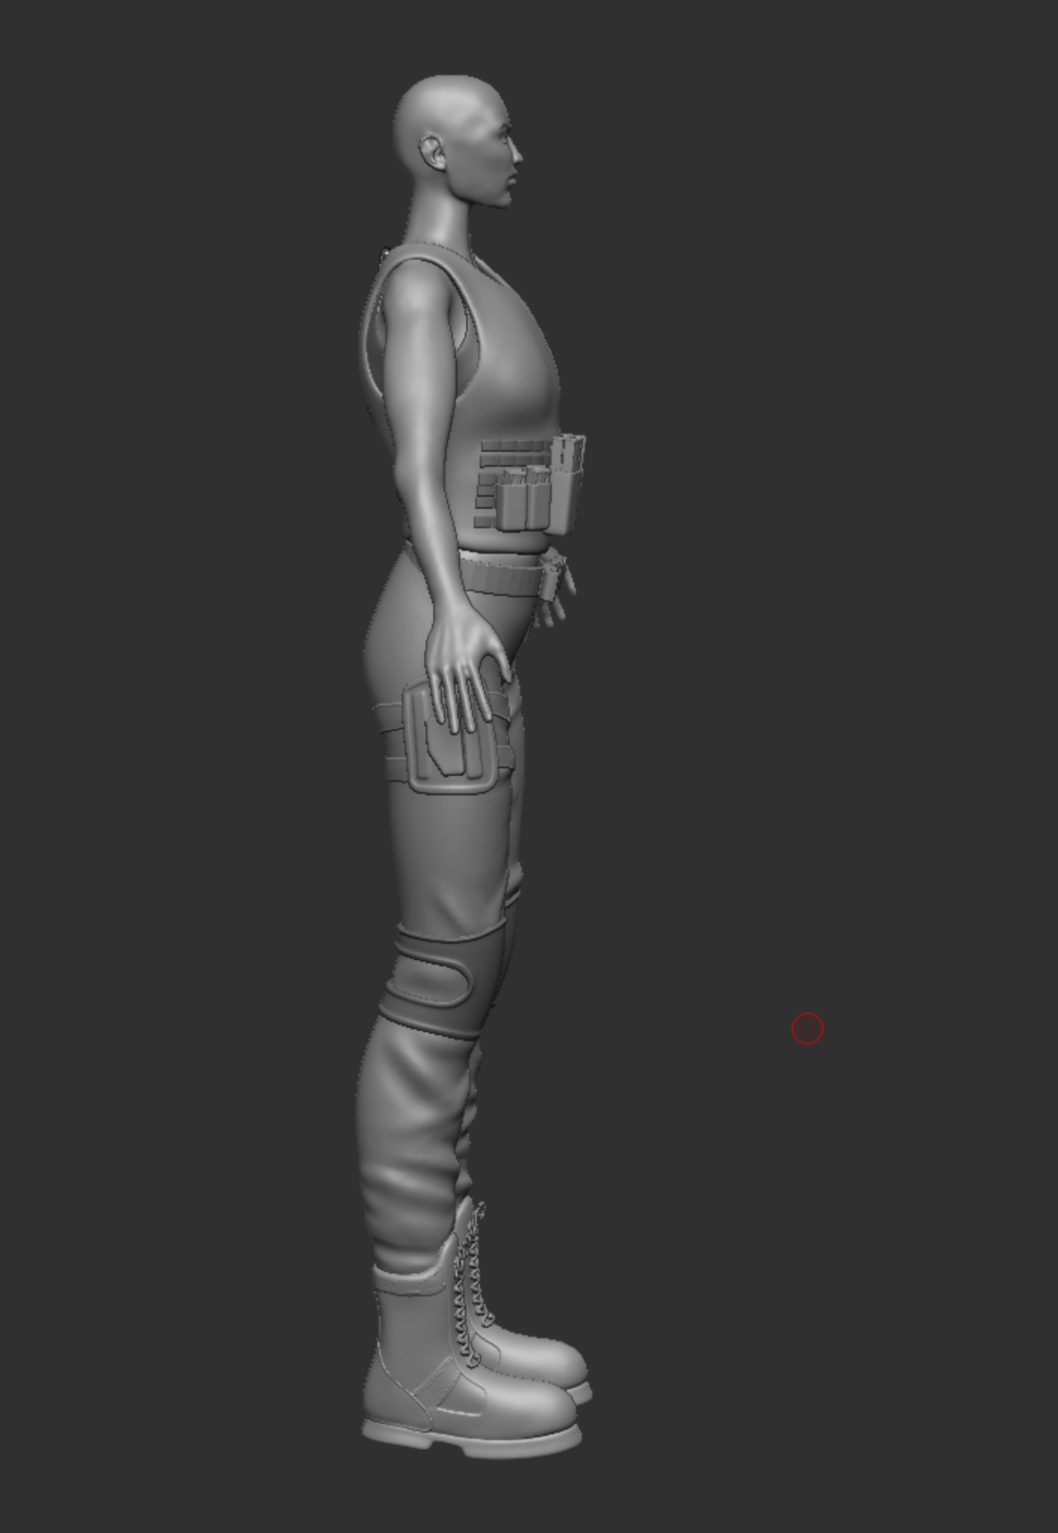
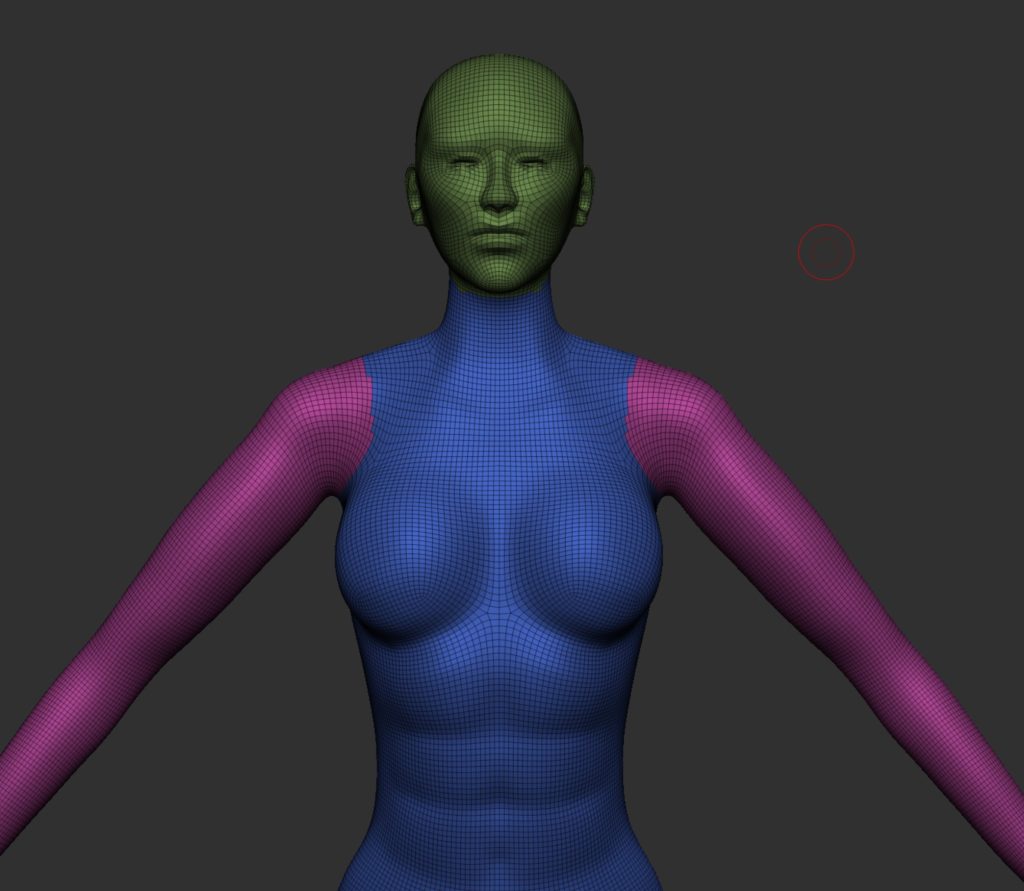
I then started to build on the block out and make changes to the body as a soldier would have more muscle then they currently had, again I used multiple references to help shape the muscle similar to my other character. The arms and abs were given more definition as they were the least defined, I then made the neck slightly thinner, head bigger and shaped it to look more like a human head and made the neck longer too as it was quite stumpy before.

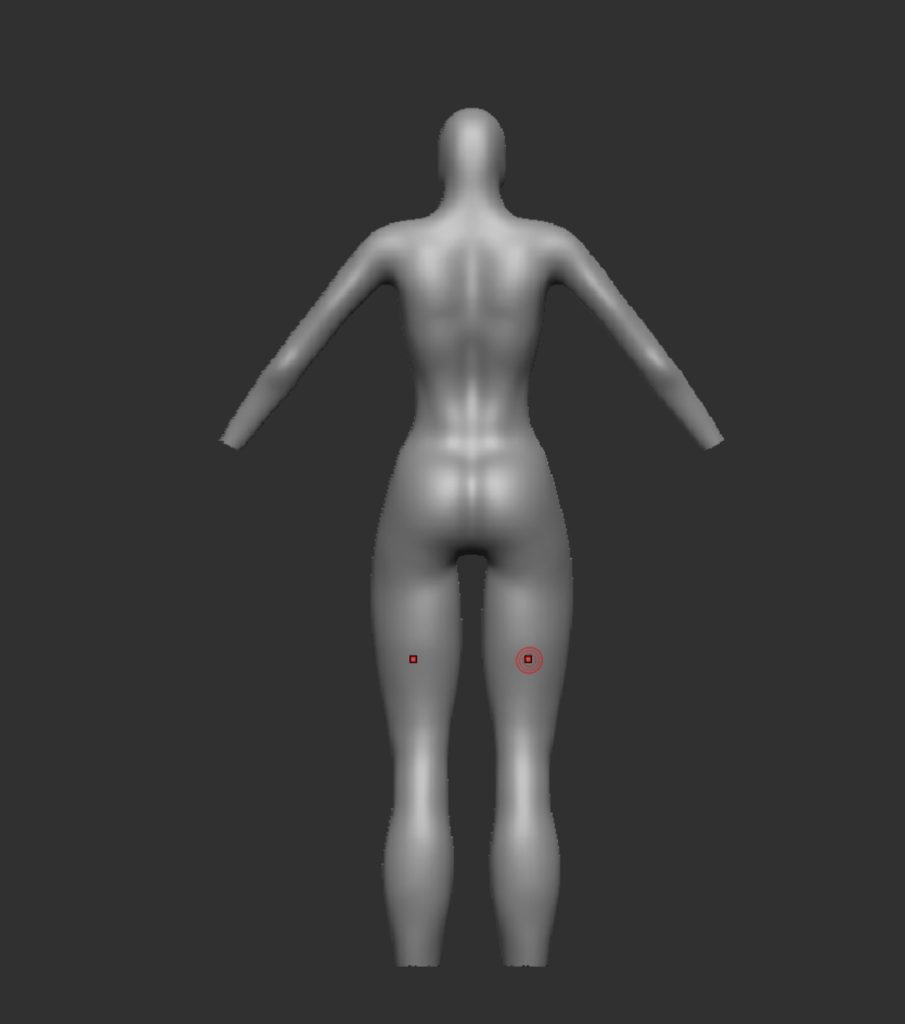
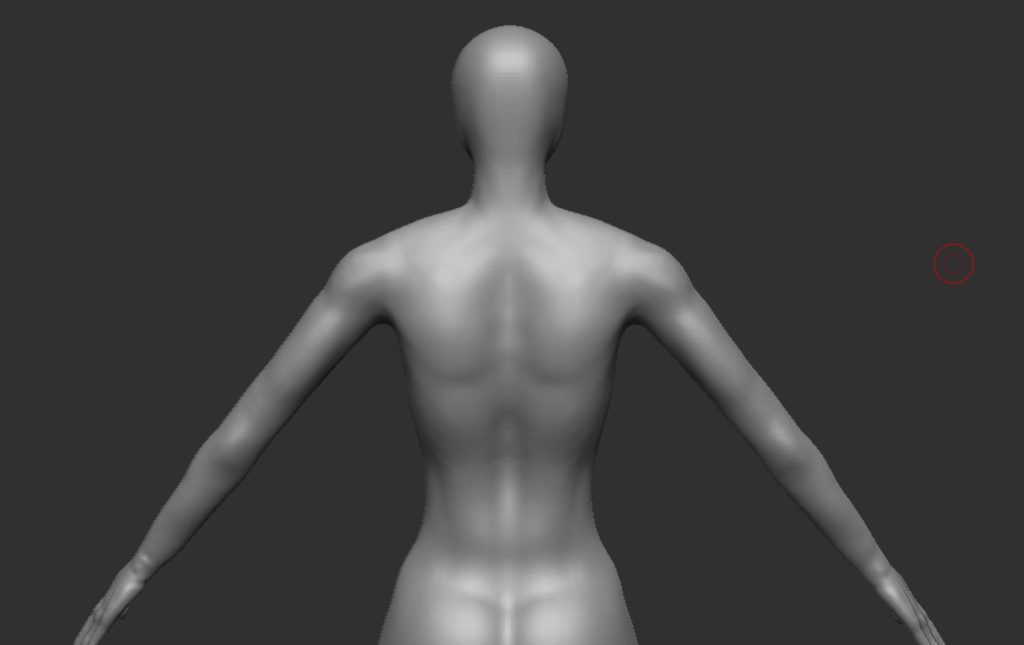
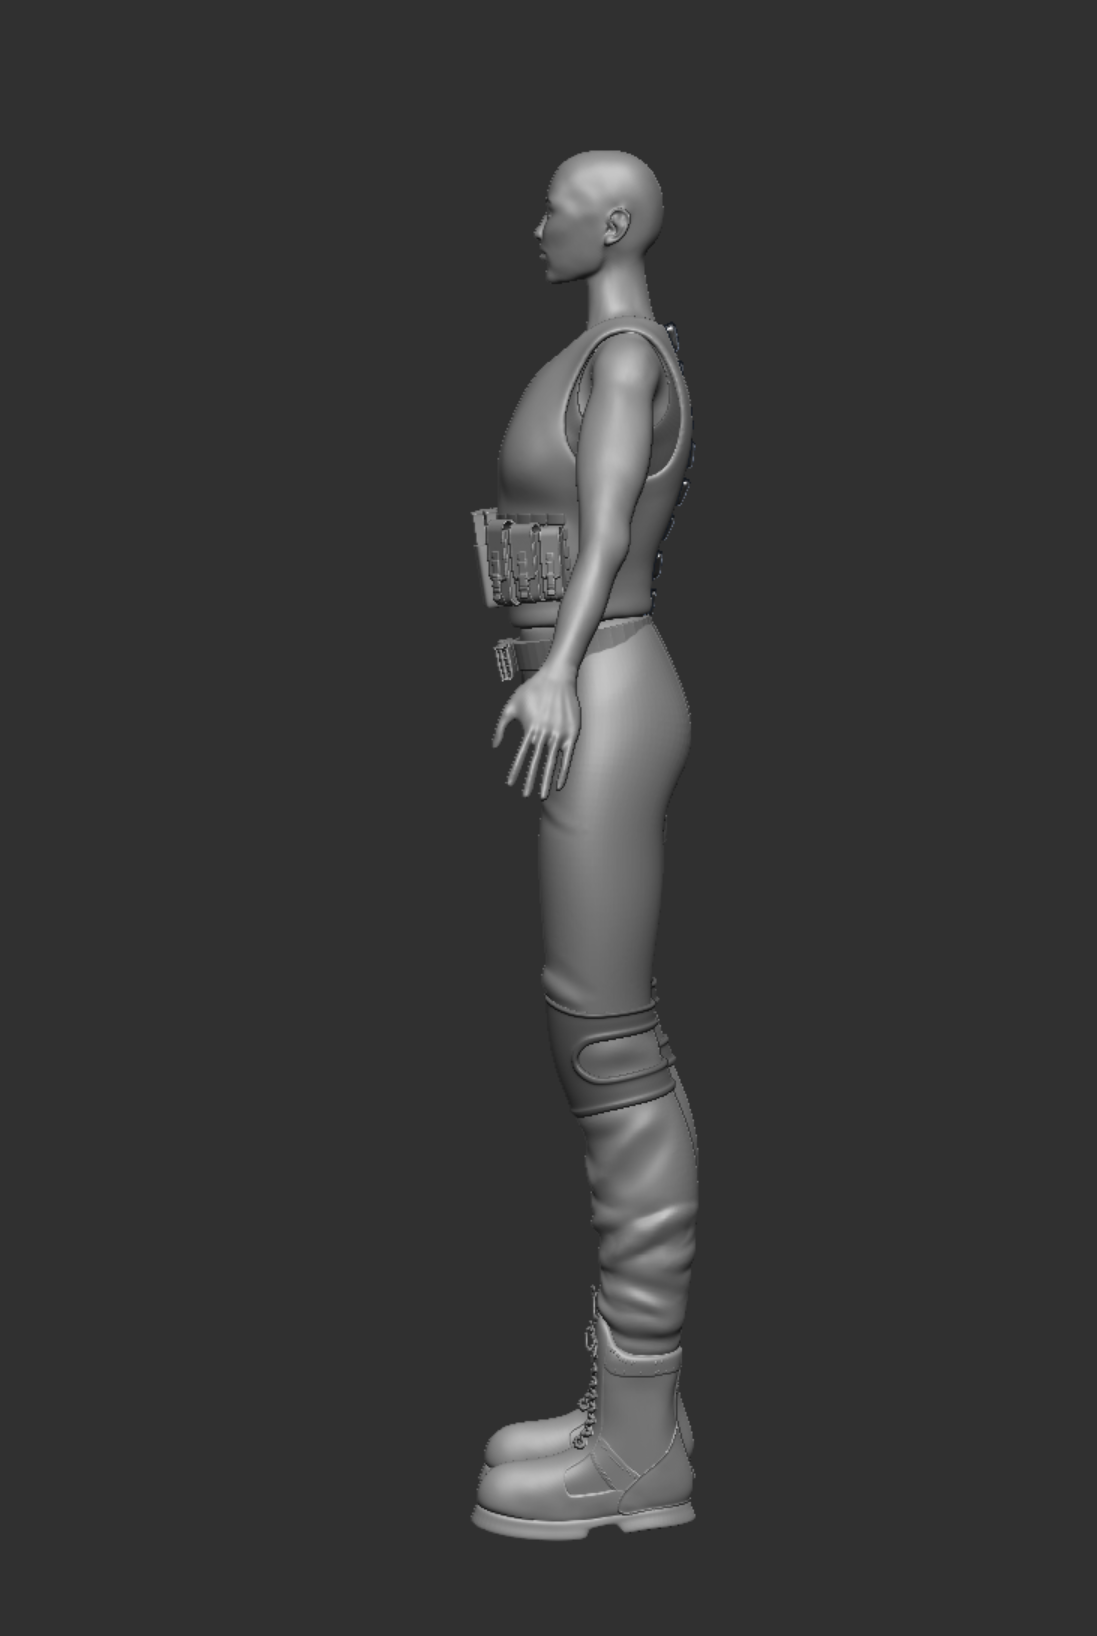
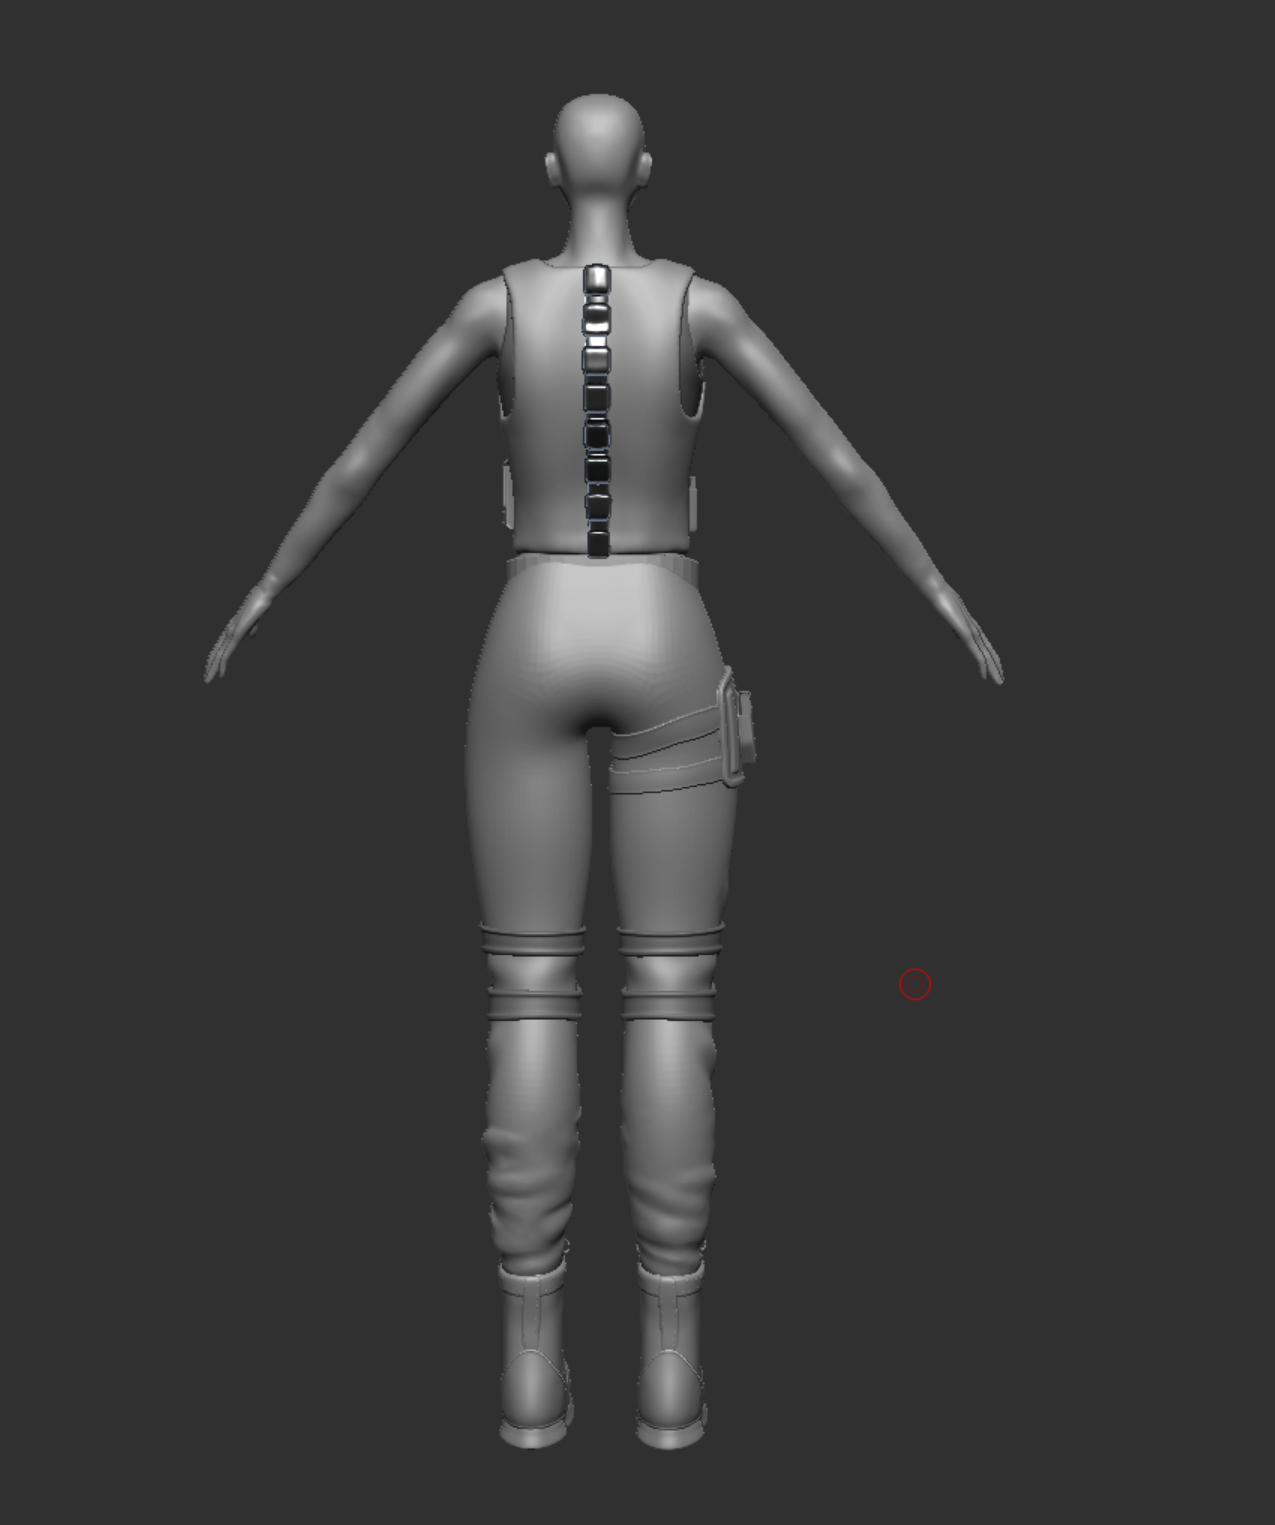
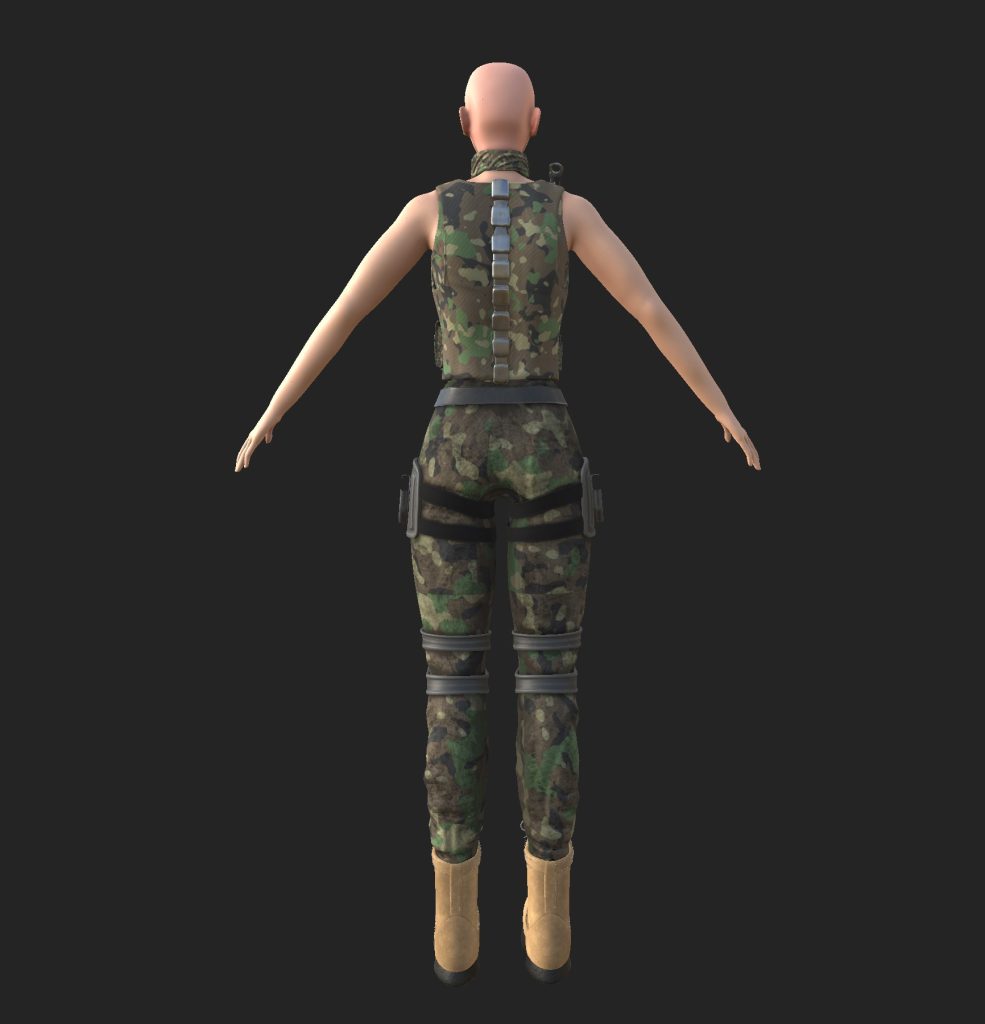
I then moved onto the back where I did not change too much as I was happy with how it looked, the next thing will be the spine implant, however the muscle definition might change in the future.
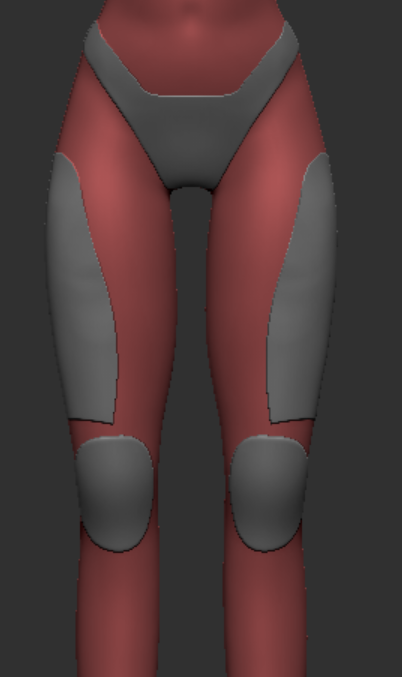
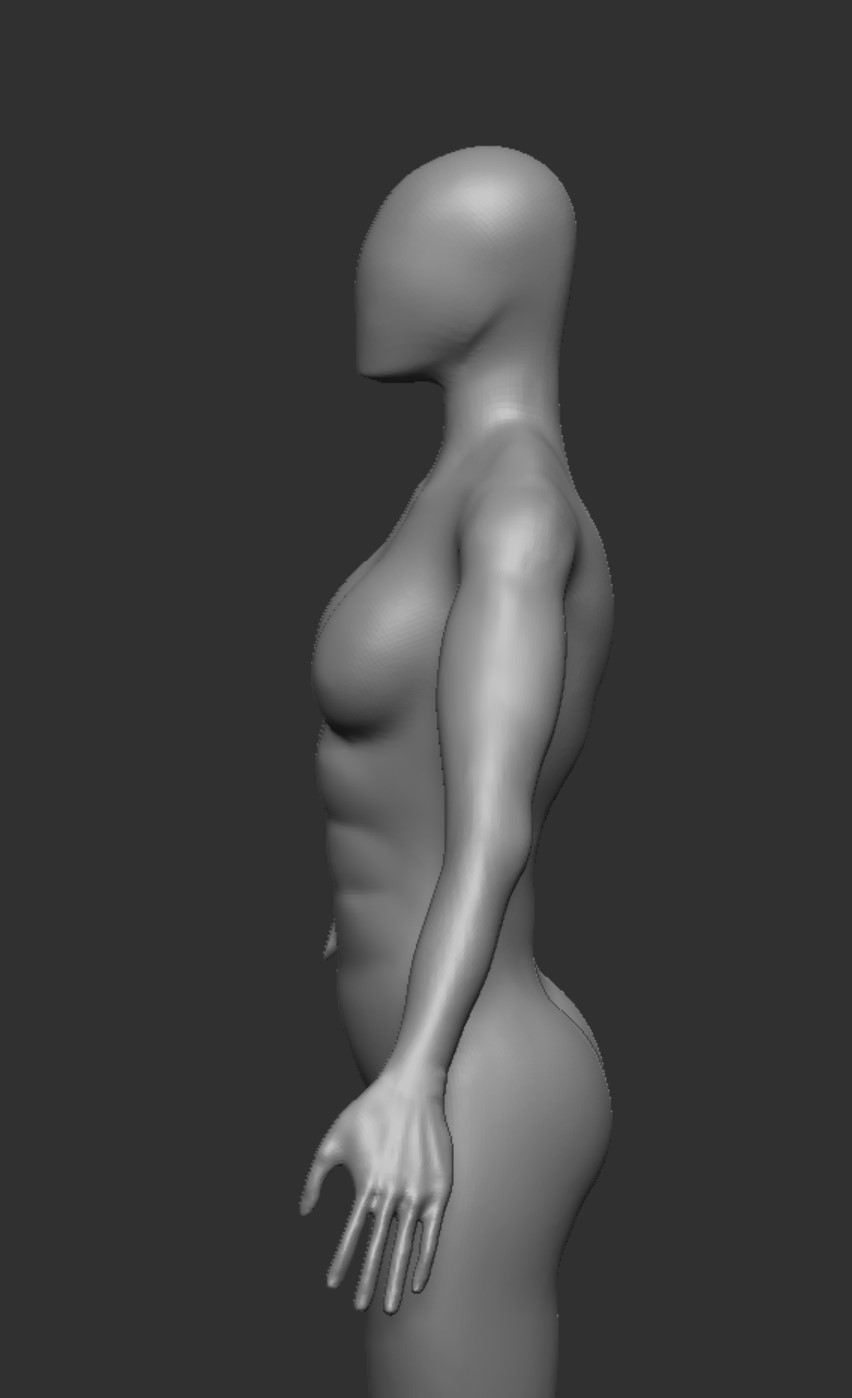
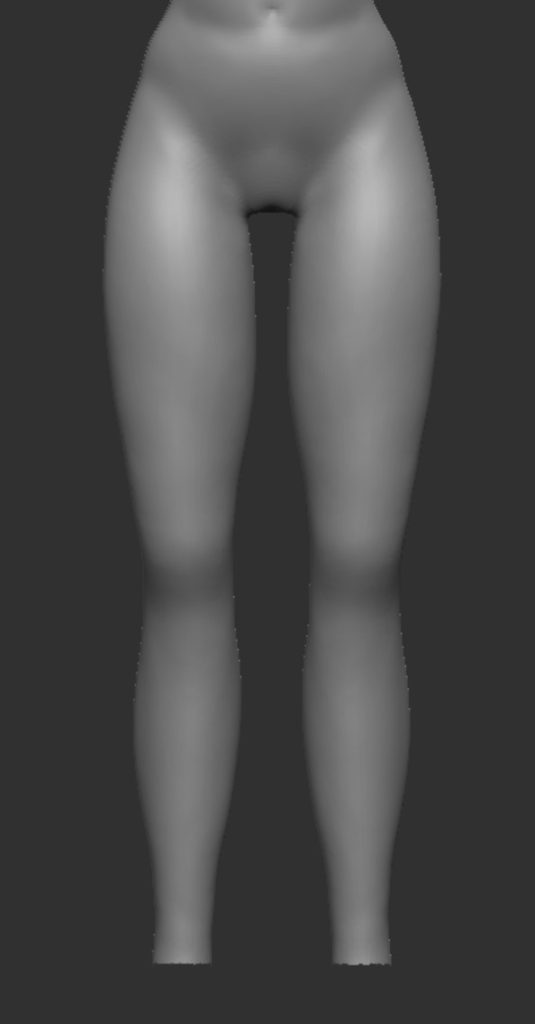
And finally the legs, i was pretty happy with these too and since they are covered i just made changes to the calves as they were too thin and had no definition which did not suite this character.
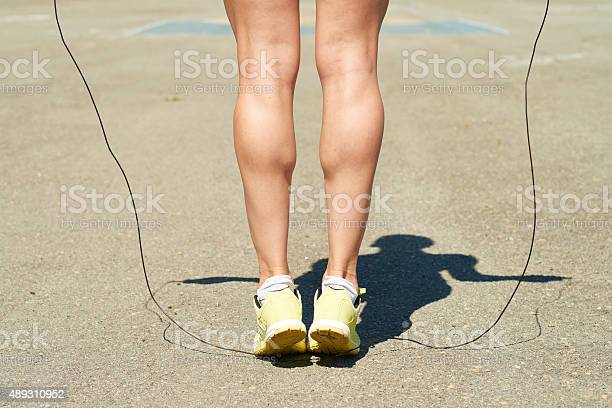
Woman exercising outdoors to strengthen her leg muscles 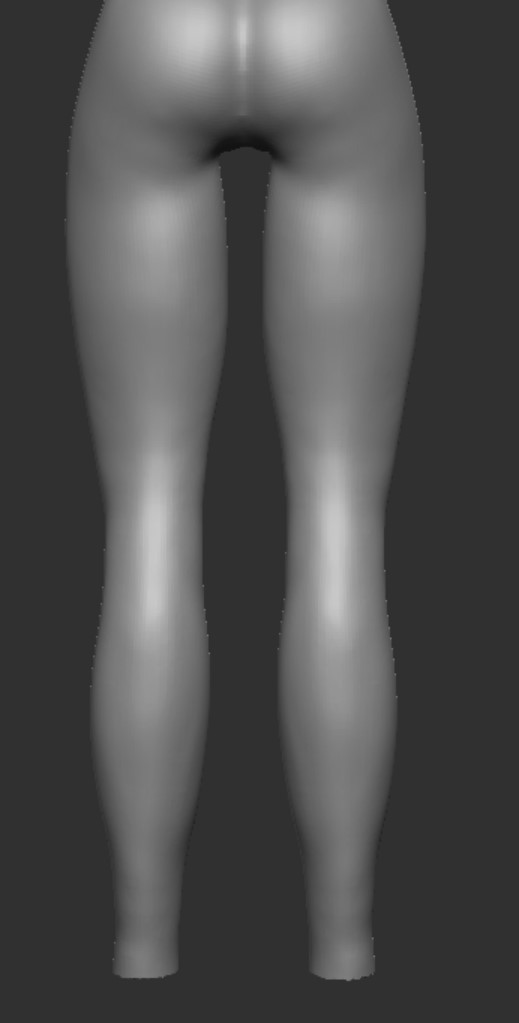
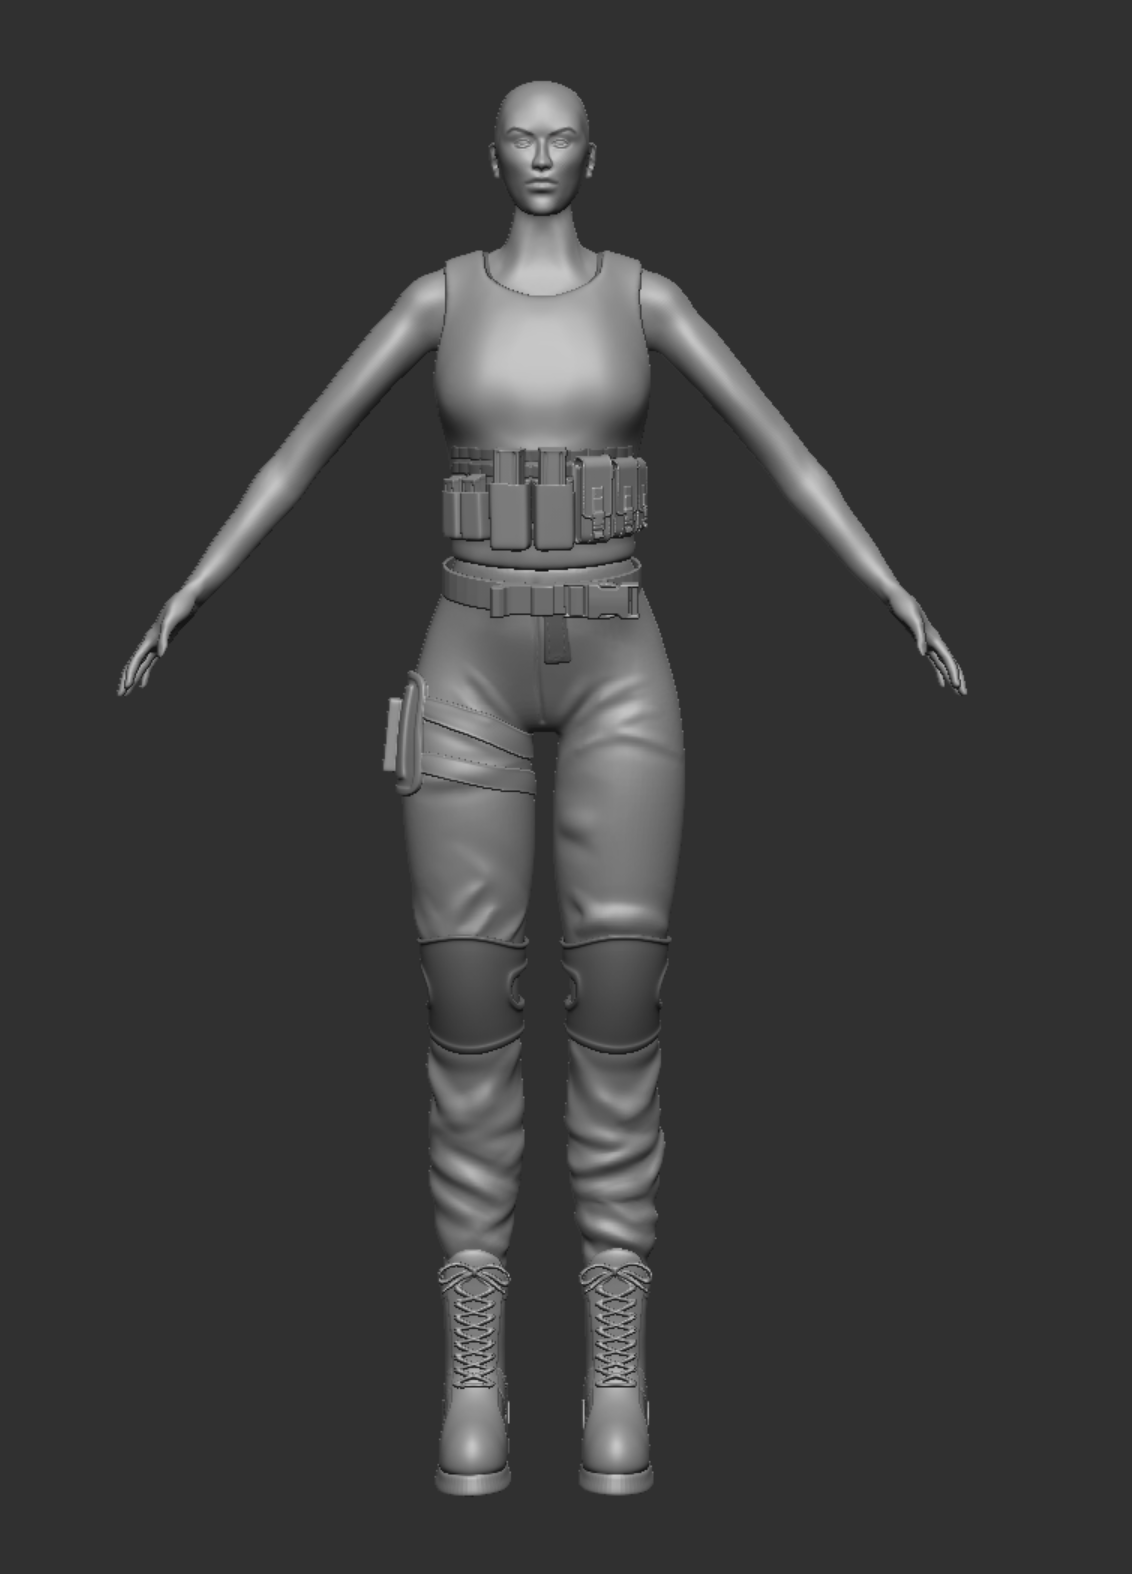
Now that the body was sorted I wanted to get some clothes added that suite the character, they are very simple right now and were done by masking and extracting but details will come a little later, I just want to get the shape etc right first. I also cut off the feet as I will be making some boots and struggle with sculpting feet.
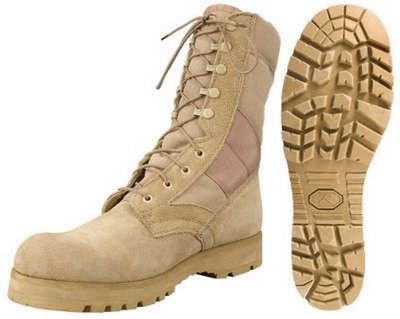
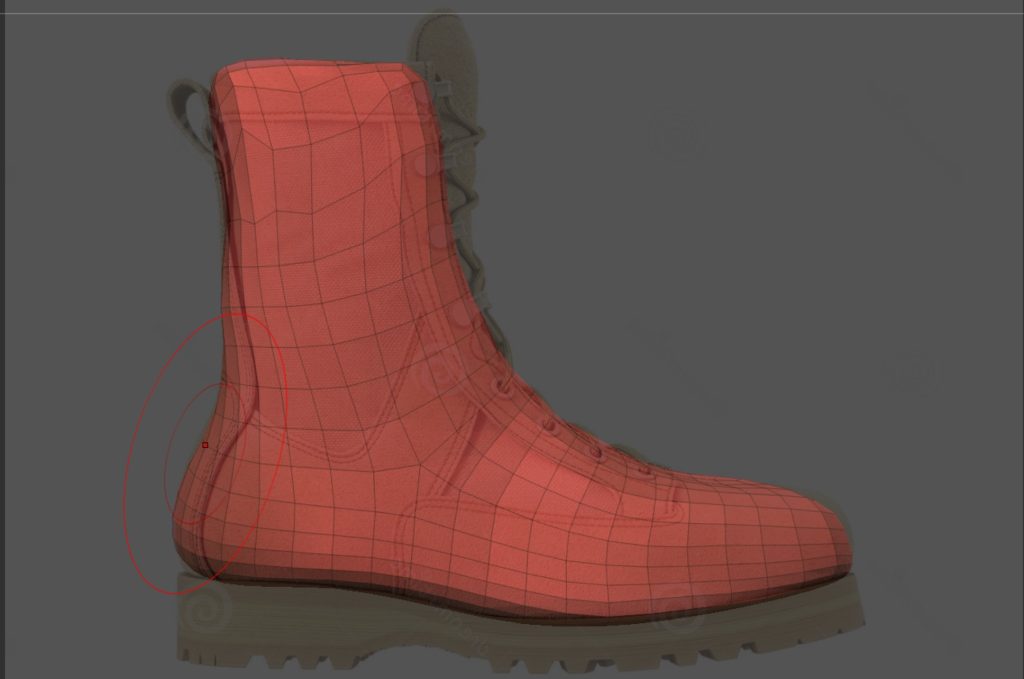
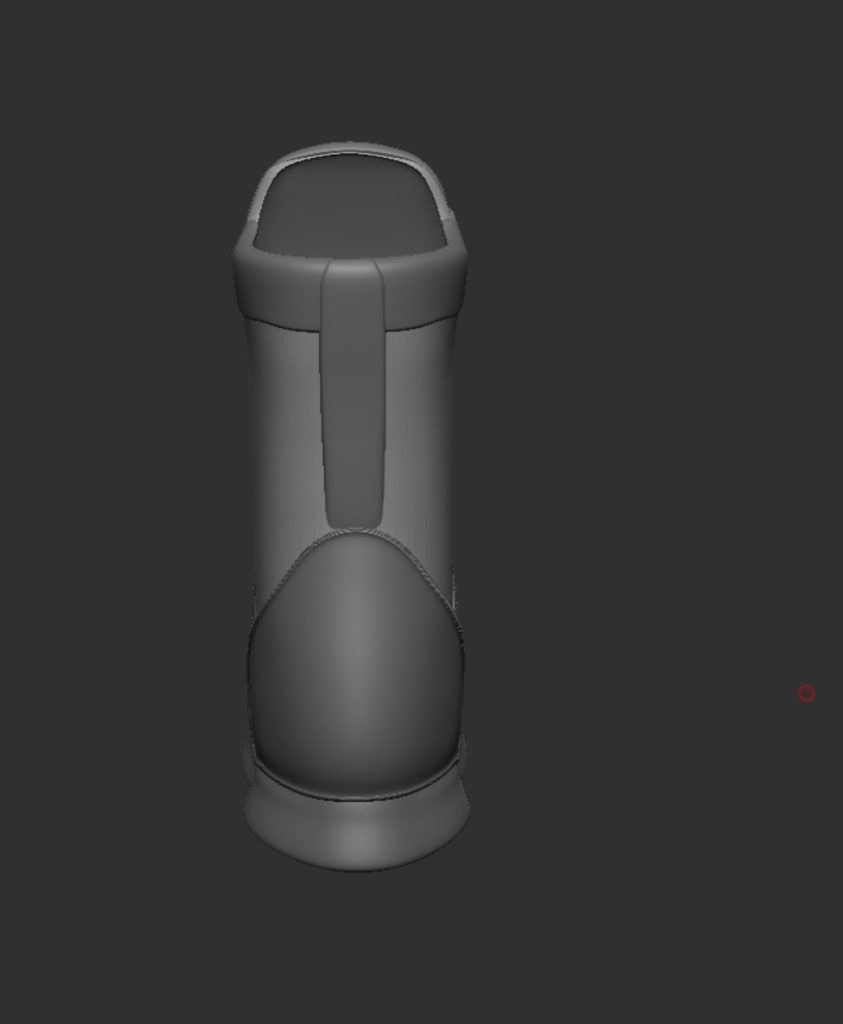
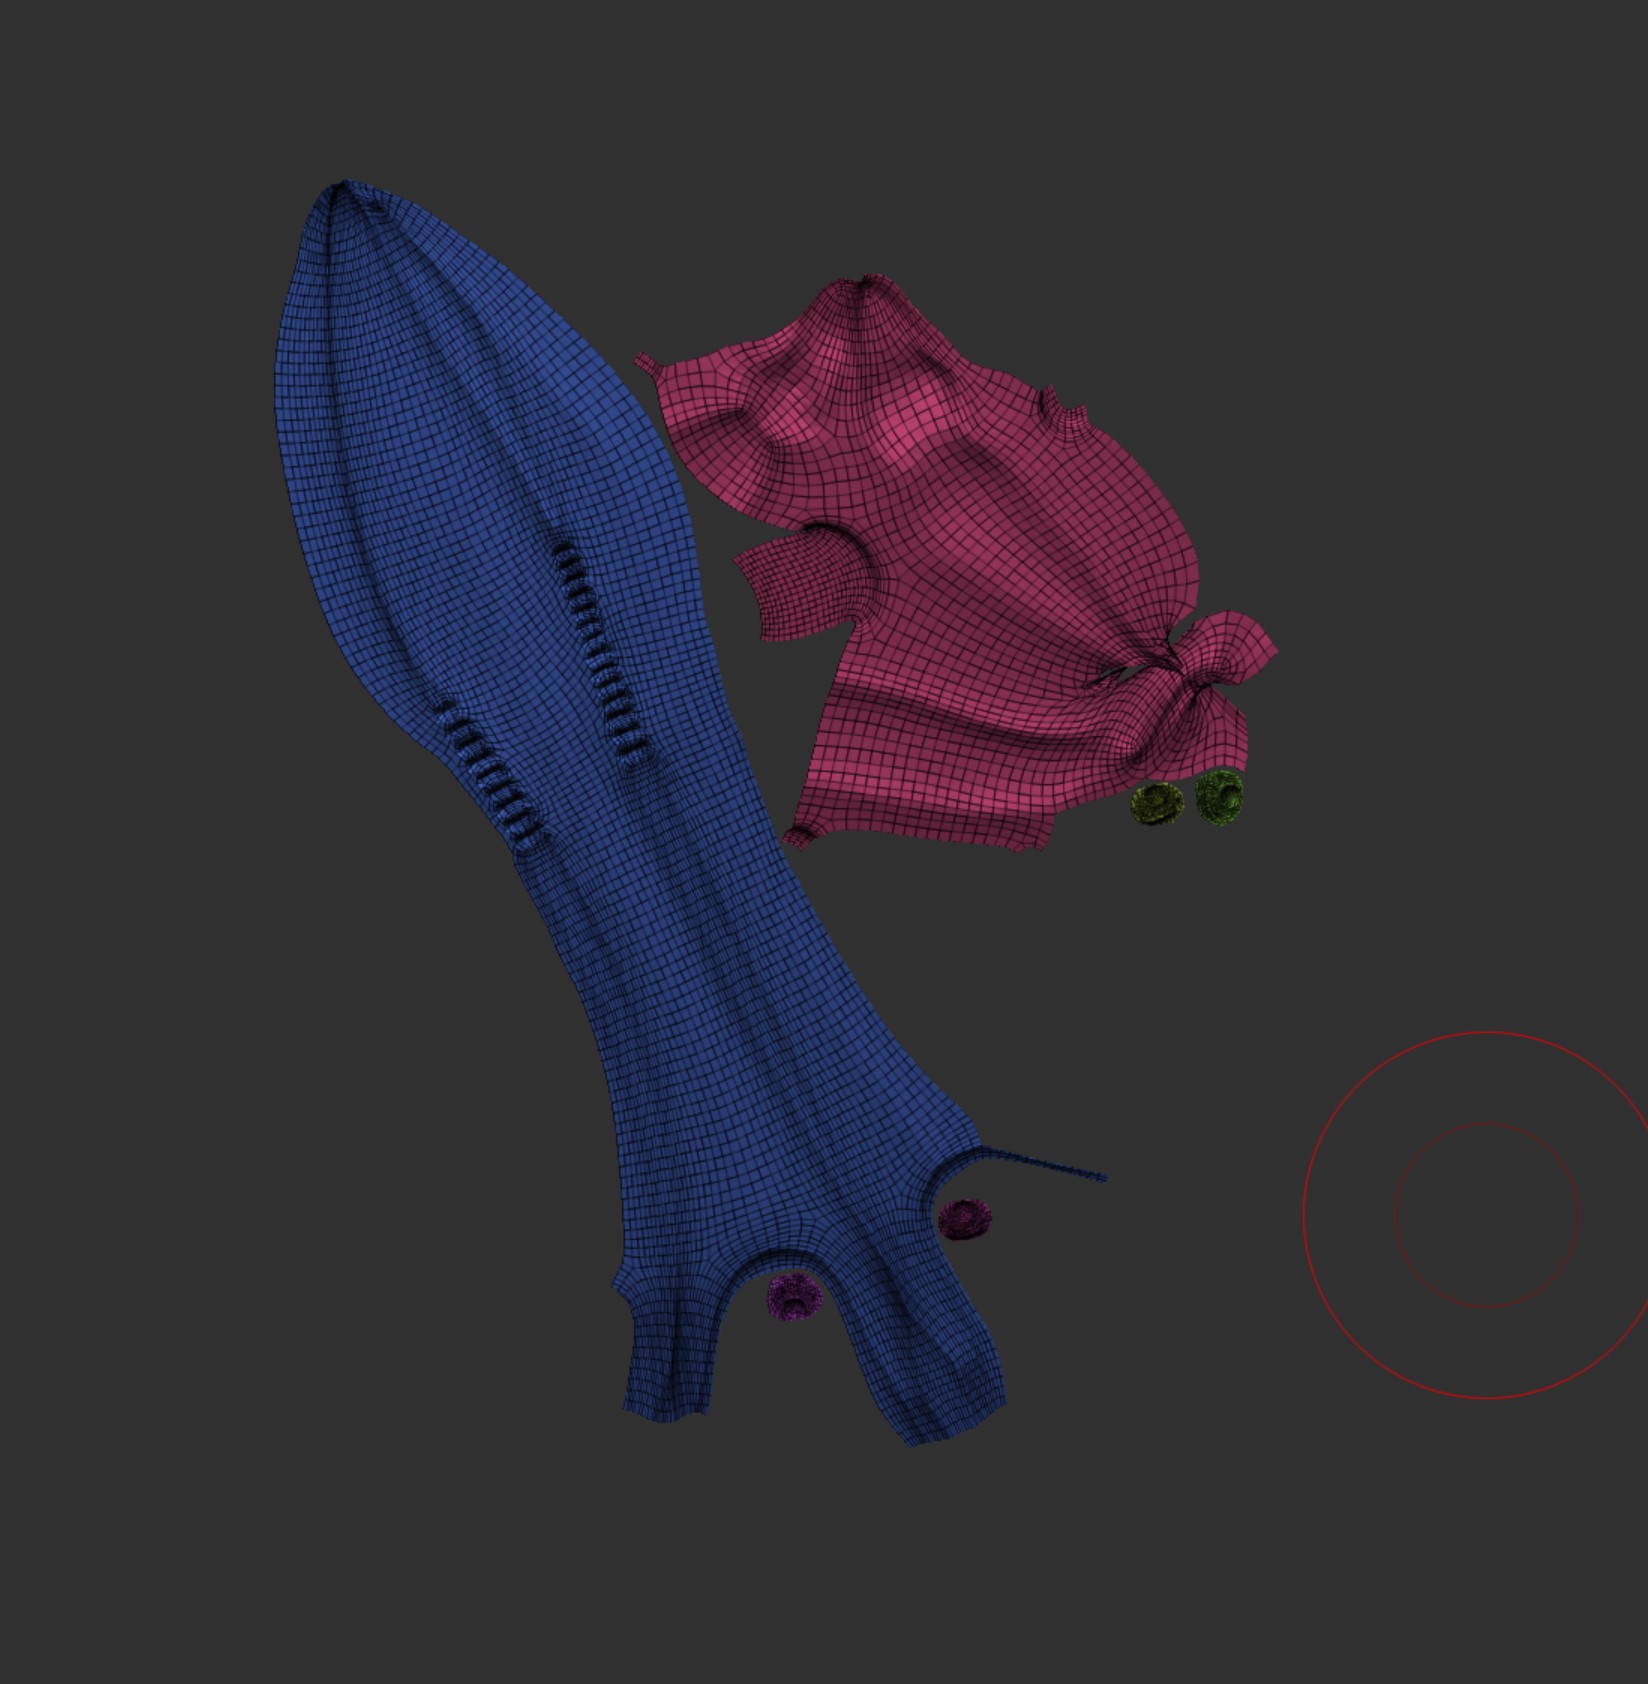
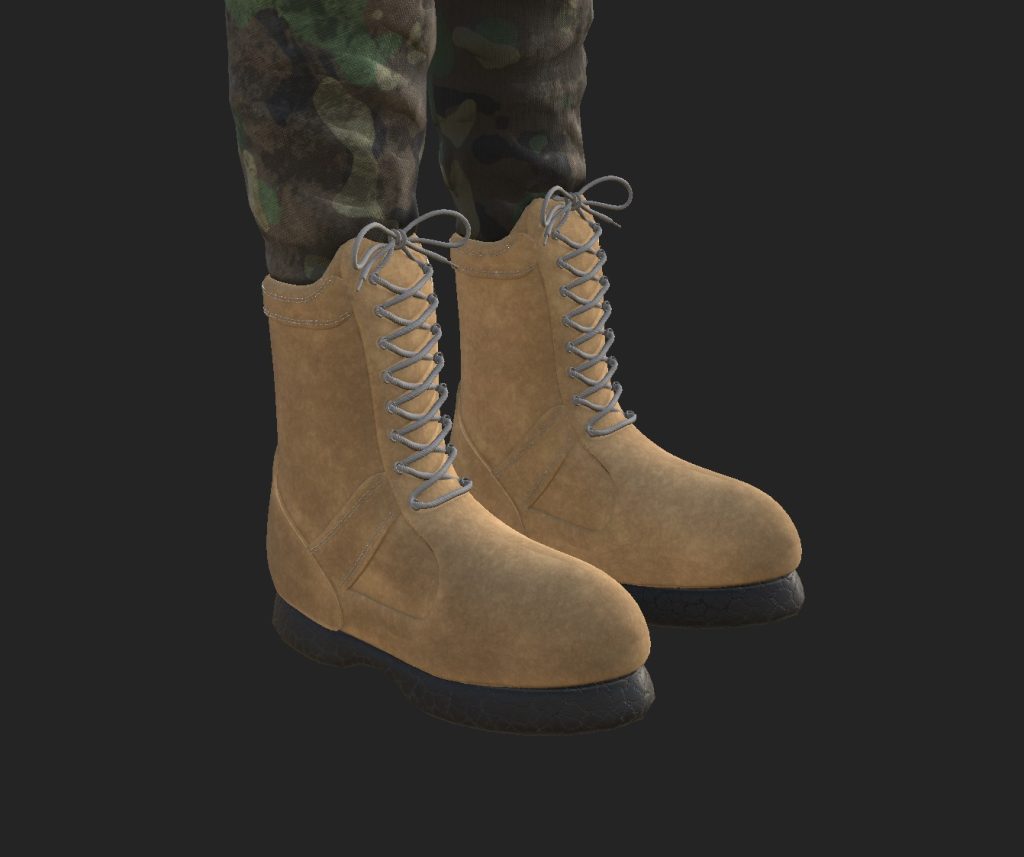
Now it was time for the boots, I haven’t sculpted boots before so i looked up a few tutorials, one by someone called folygon and his was the one I watched the most as it was a really in depth tutorial. The next one I looked at was by someone called musashidanmcgrath who had some great methods and tips. These videos really helped me understand how to make boots before trying to make them myself. I first started with getting some reference images, and added them to the spotlight to help get the general shape of the base. This was done using the bend curve setting in the move tool.
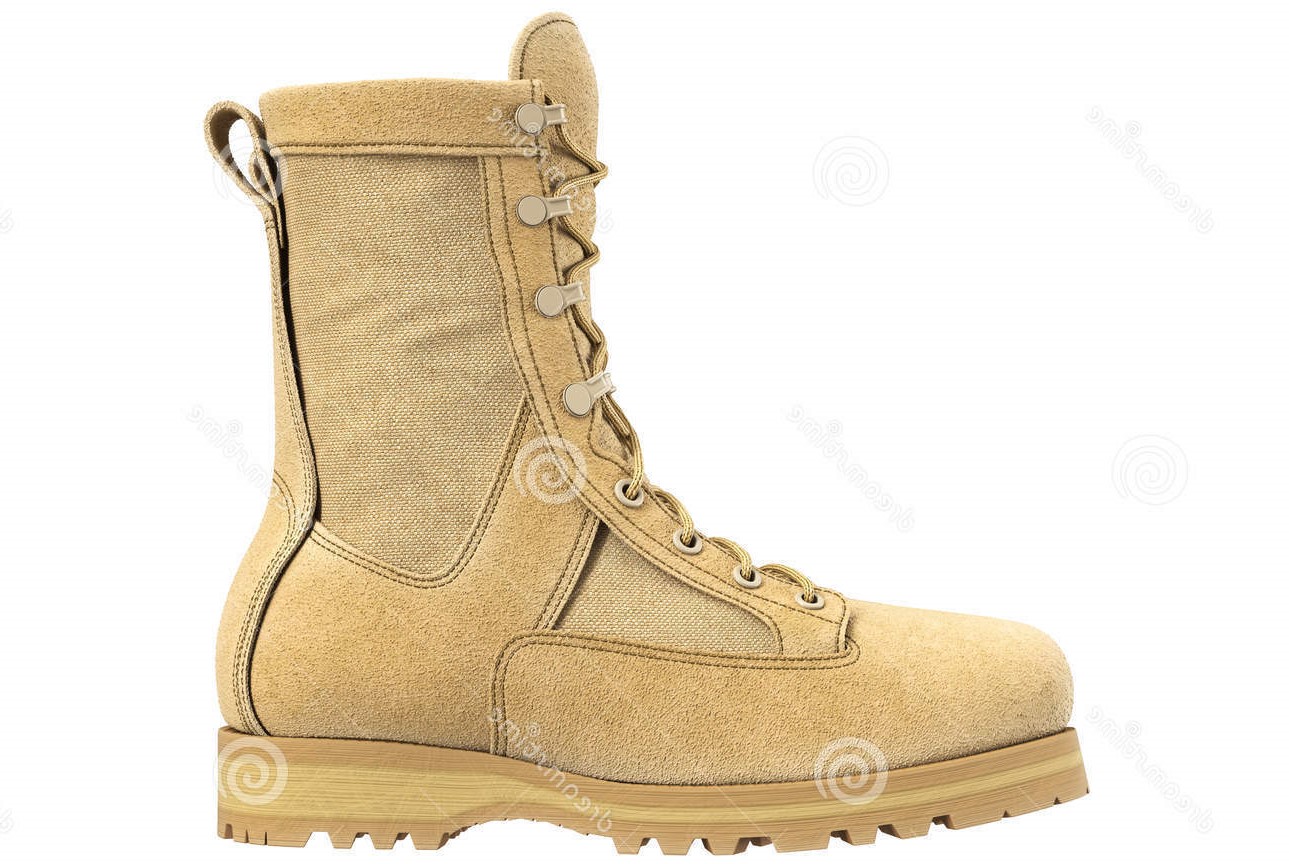
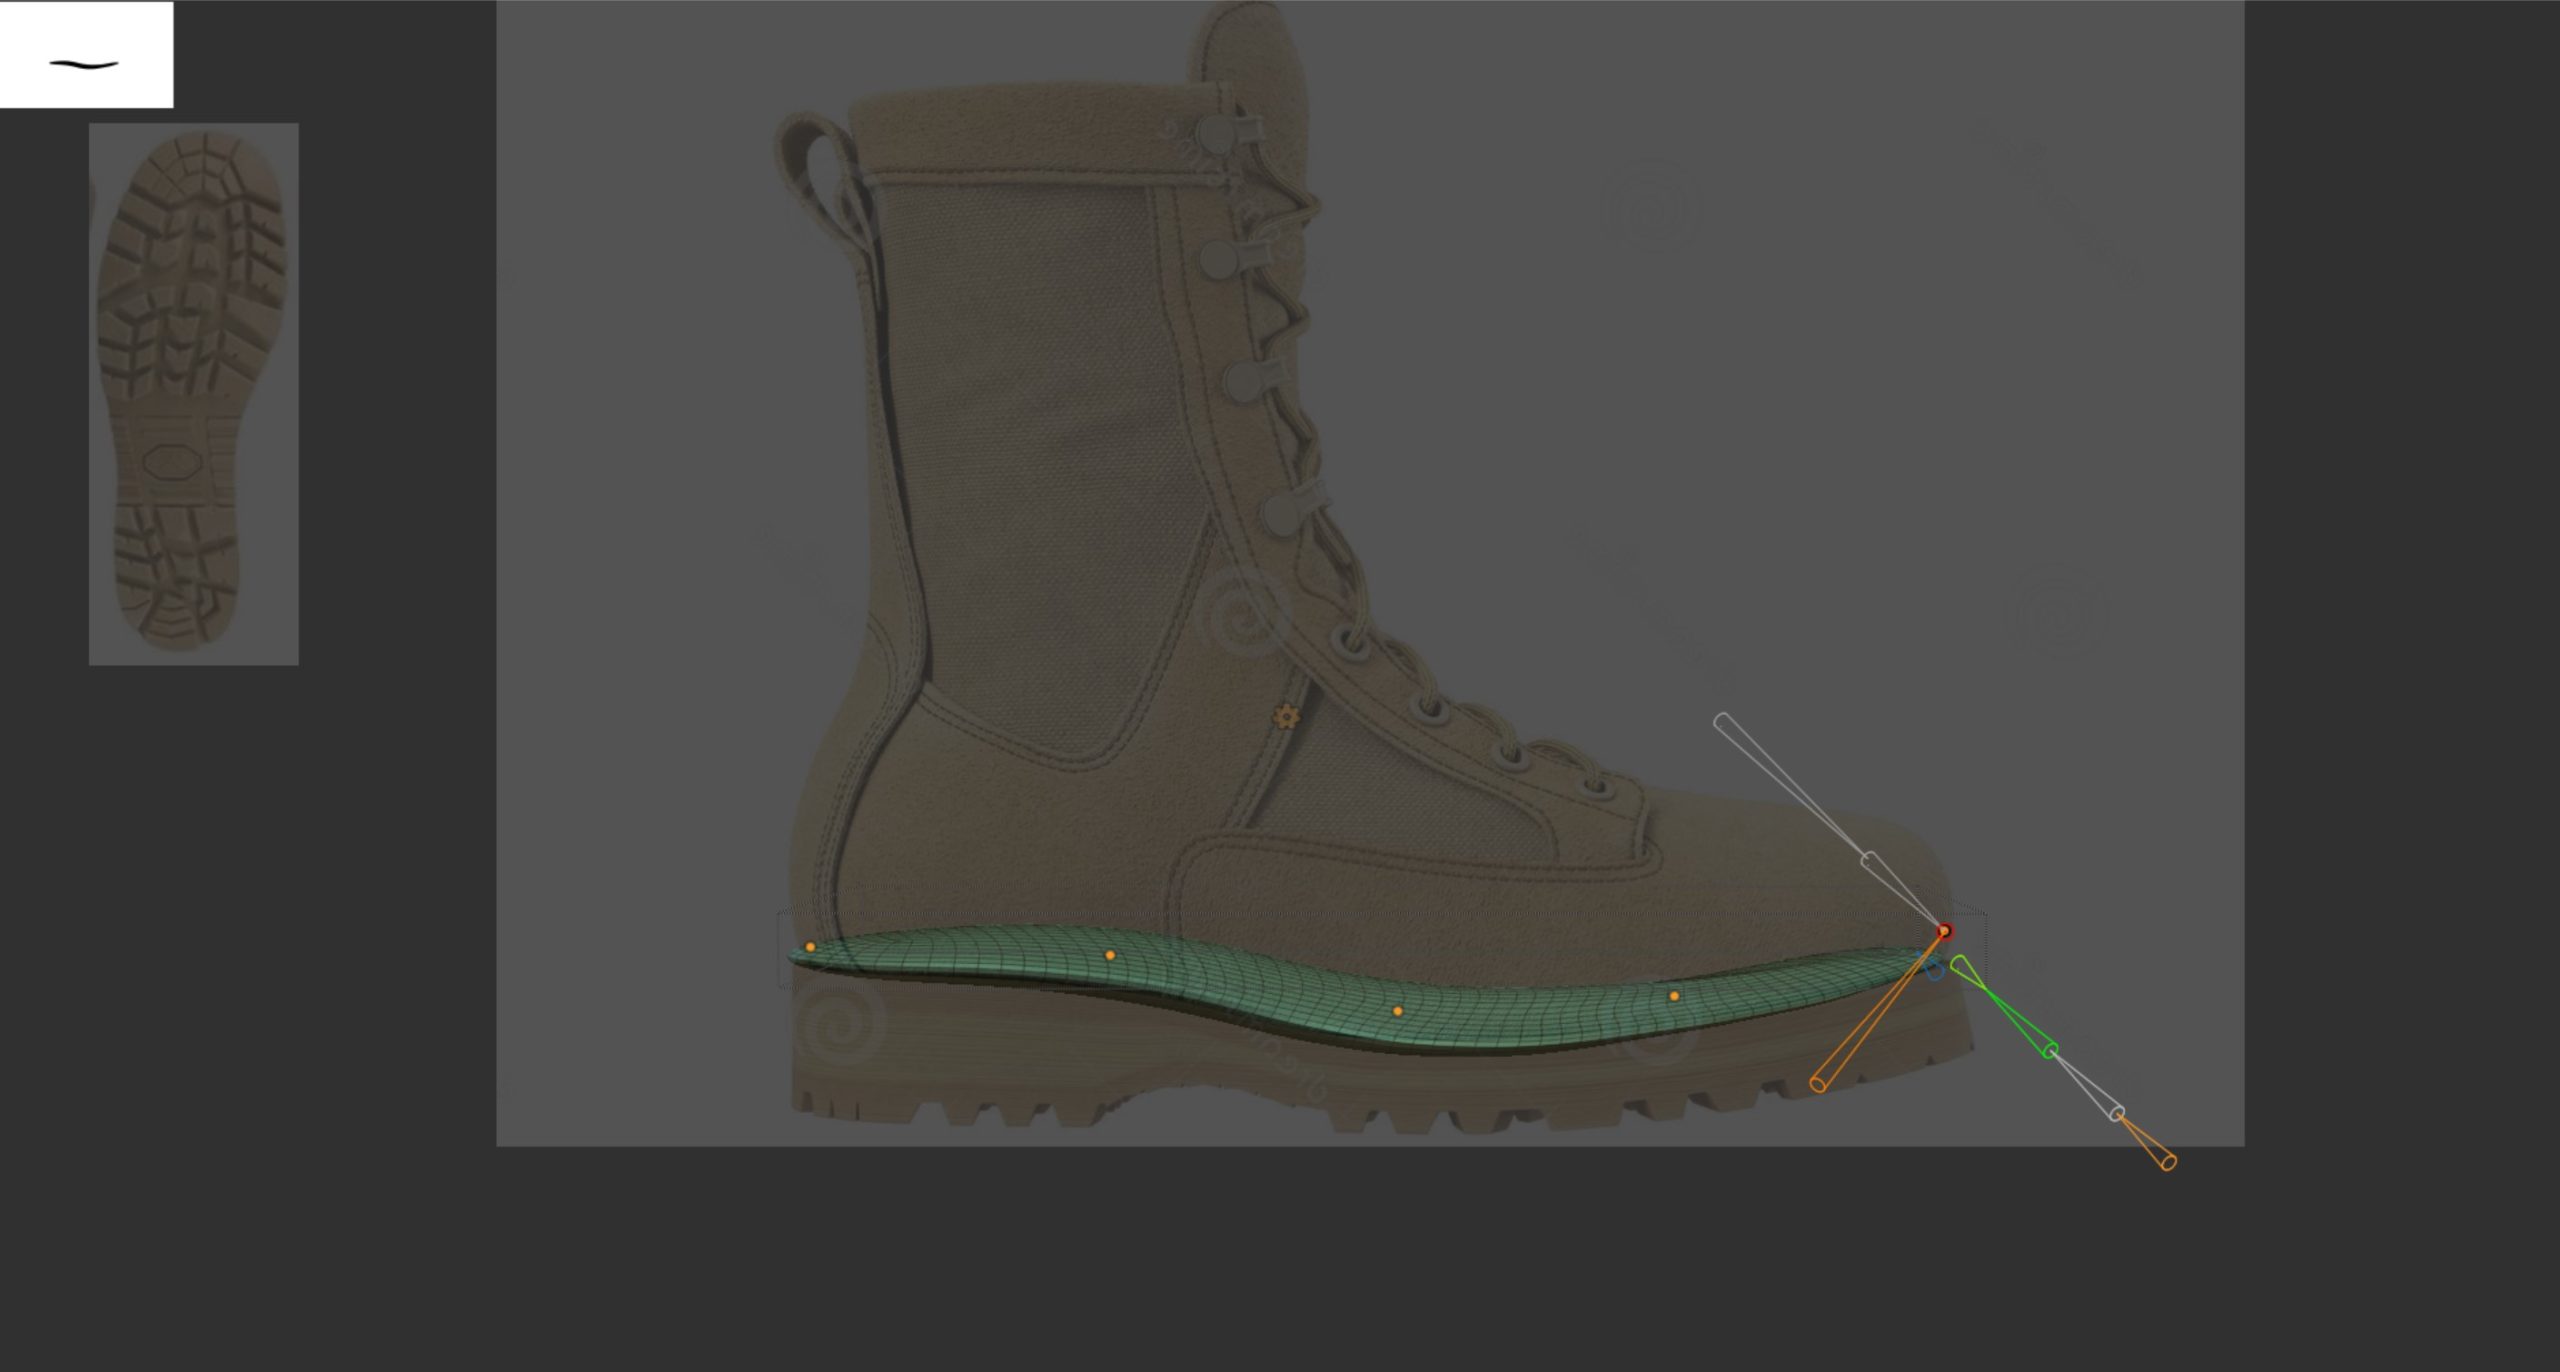
Using the move brush with back face masking turned on you are able to move the top geometry on its own, allowing you to fill out the boot and follow the shape of the spotlight image, once i was happy with it I then used Zremesher to sort the geometry out as it gets quite messy with pully and smoothing it.
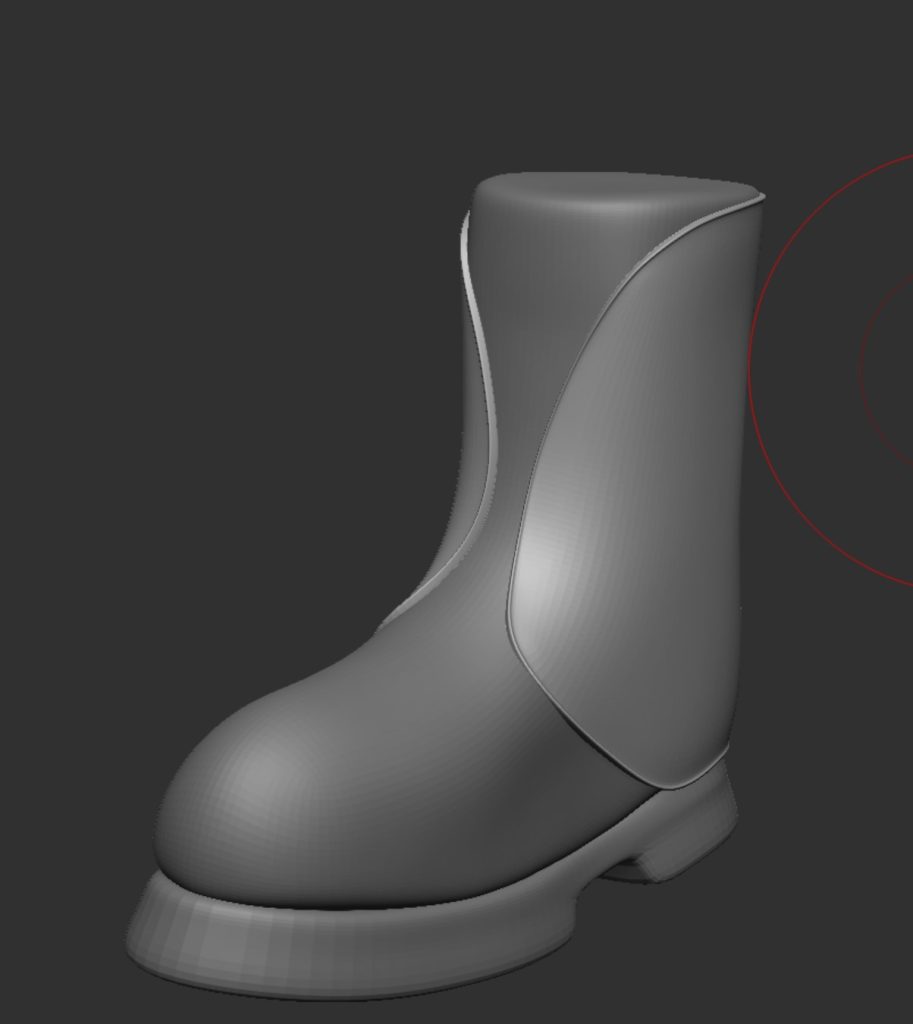
The thicker base was then made by masking the base and extruding it, I then smoothed it before using Zmodeler to extrude certain faces to create the part near the heel and the front of the foot, making sure to leave a space to create a arch similar to the one in the image.
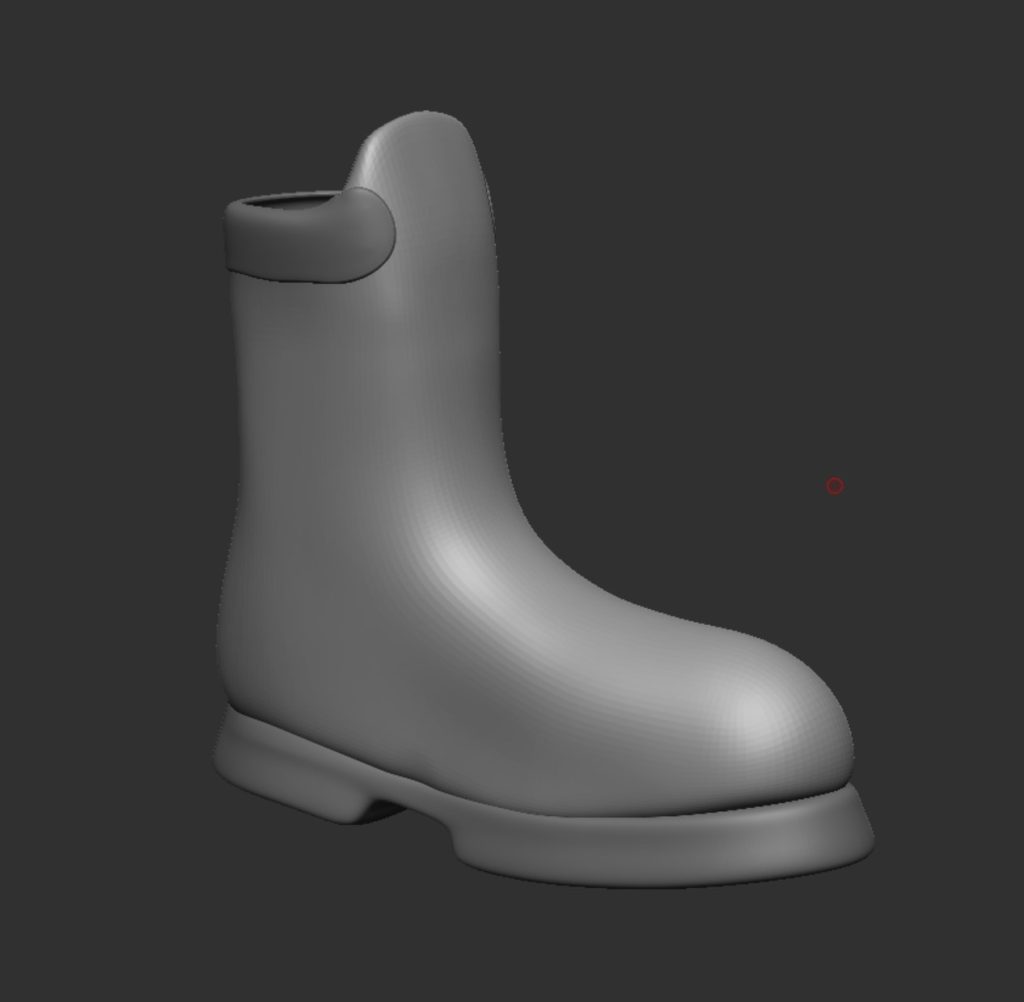
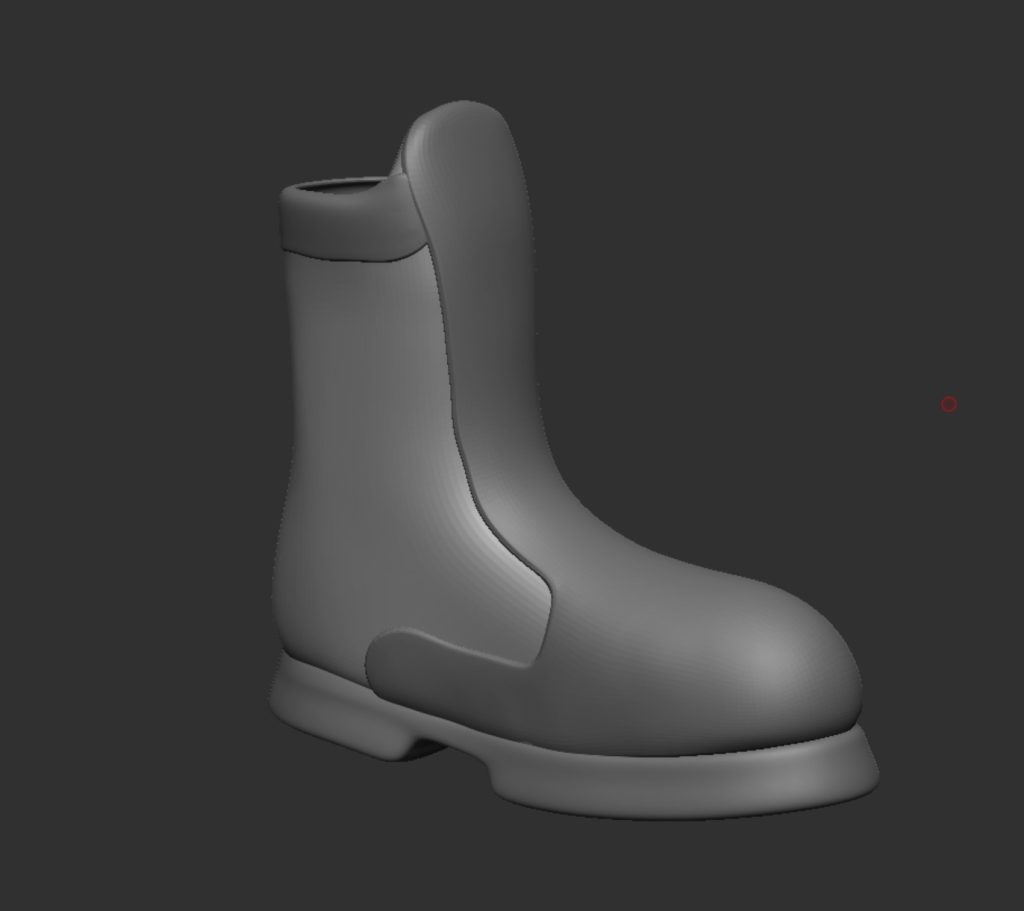
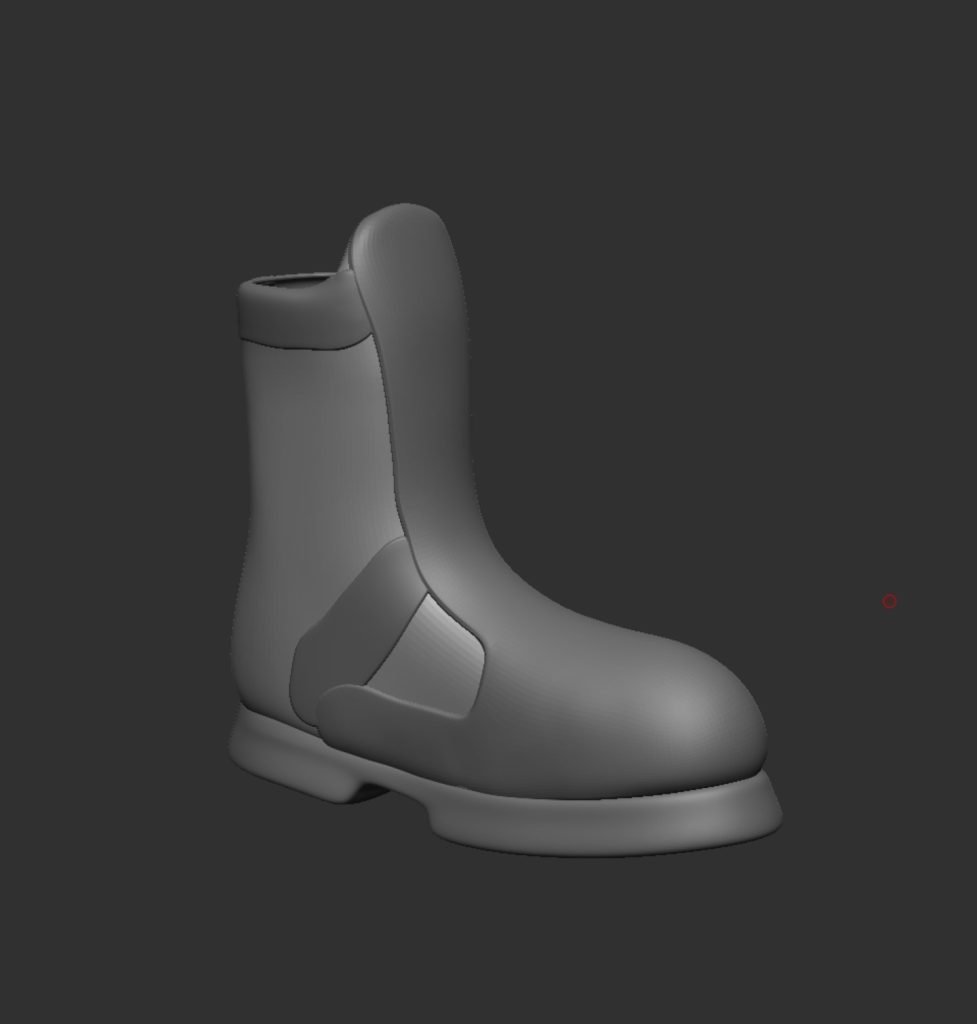
It was now time to add some of the extruding parts of the boot, again this was done by making the area needed and then using the deformation settings to smooth and inflate it to how thick it needed to be. I also used Zmodeler to add a border to the back piece of the boot. The first image design was not kept as I did not like how the masked piece look. I continued to add parts following the reference image before finishing off with the stiches and laces, these were from a IMM brushes from Artstation.

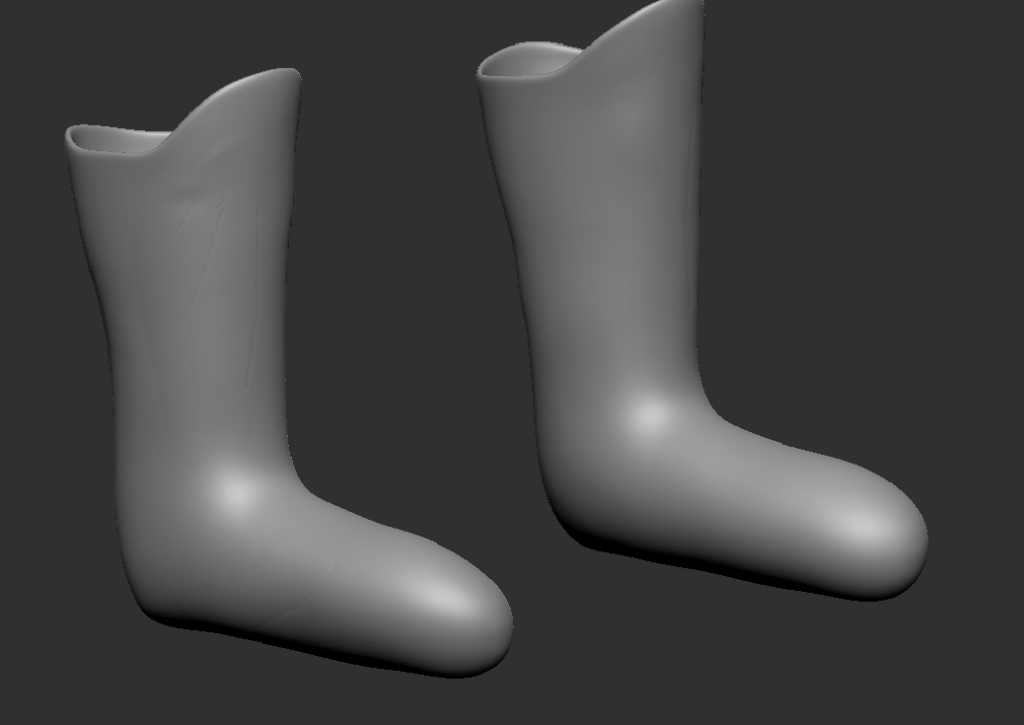
Looking at this boot and the first attempt I ever made at making a boot there is drastic improvement and a clear difference in understanding of the software. This is something I’m glad I can see as it shows I have improved with practice and research into different methods i have done. The image on the left is the boot I made for my first ever character in last years 3D character design which was just a mask of the leg and foot, compared to the one on the right made for this character.
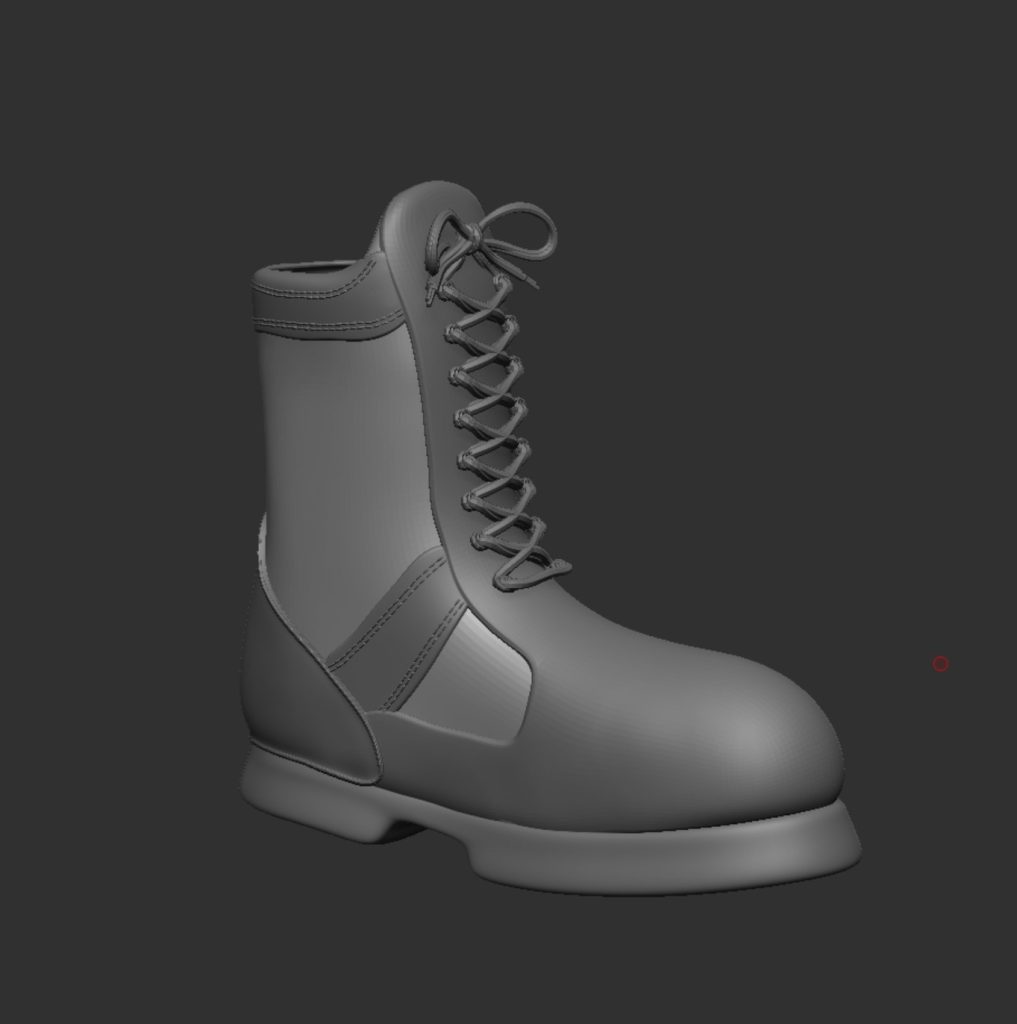
This is how the boots look on the character, i had to make slight adjustments to the top of the boot as it was clipping into the back of the leg and the shin.
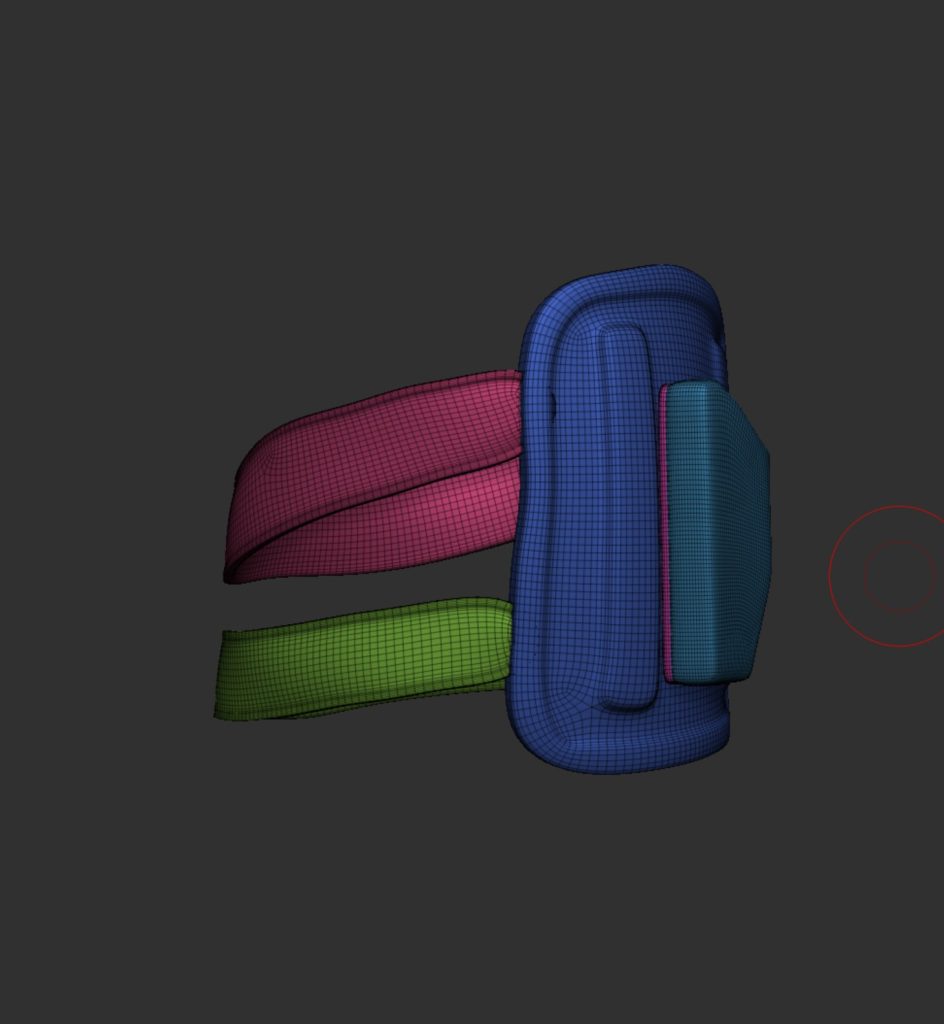
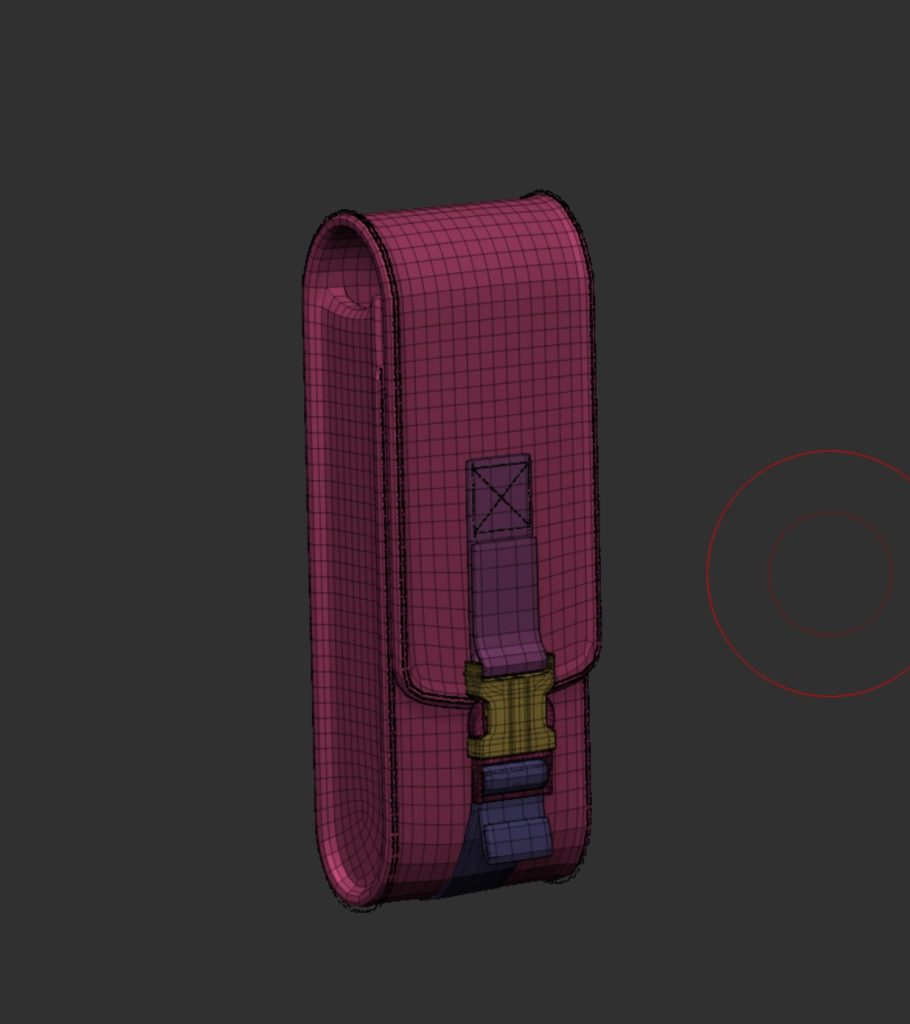
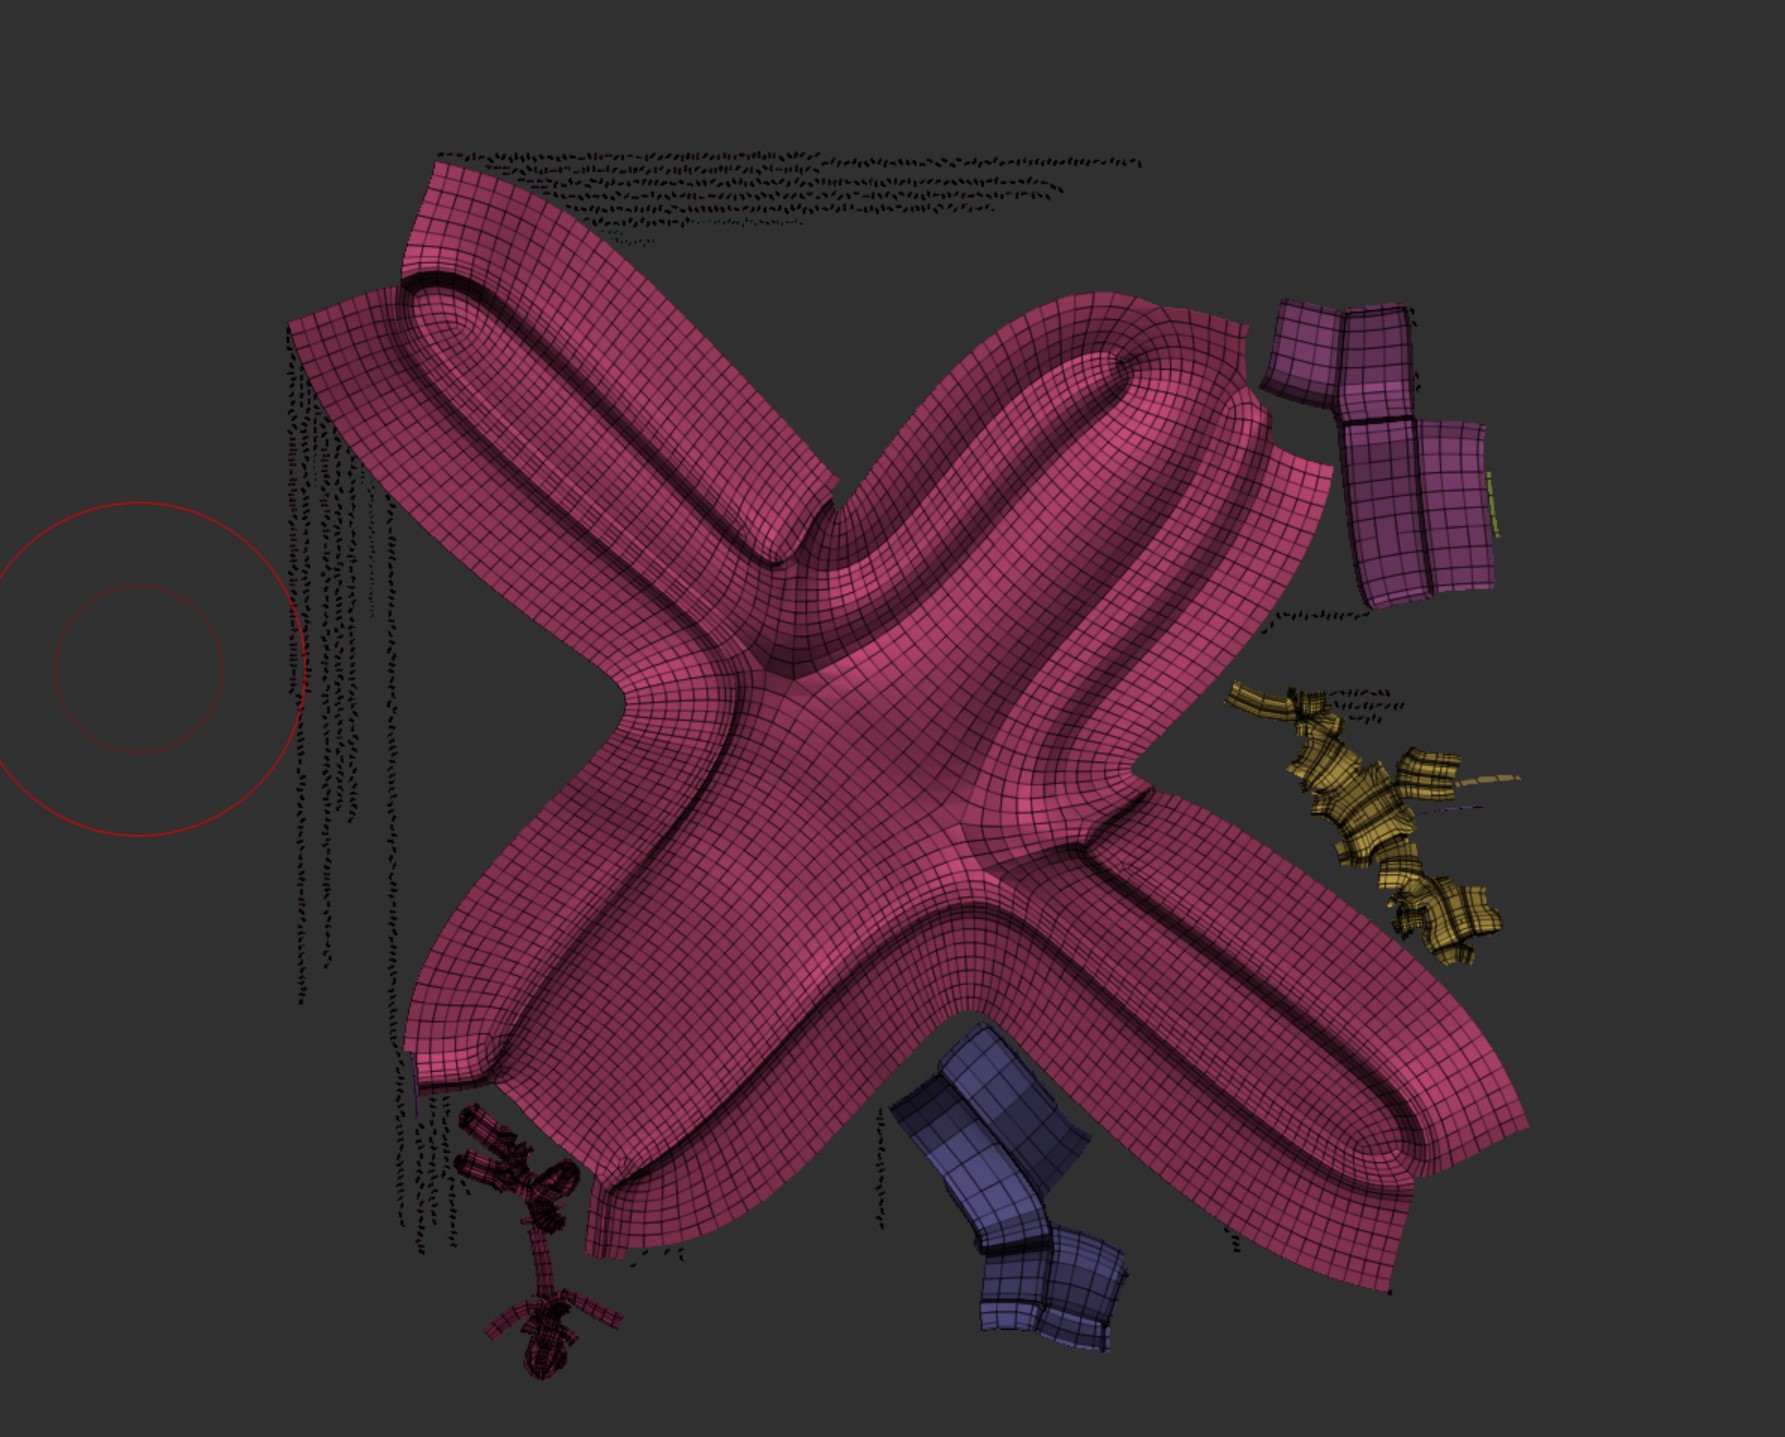
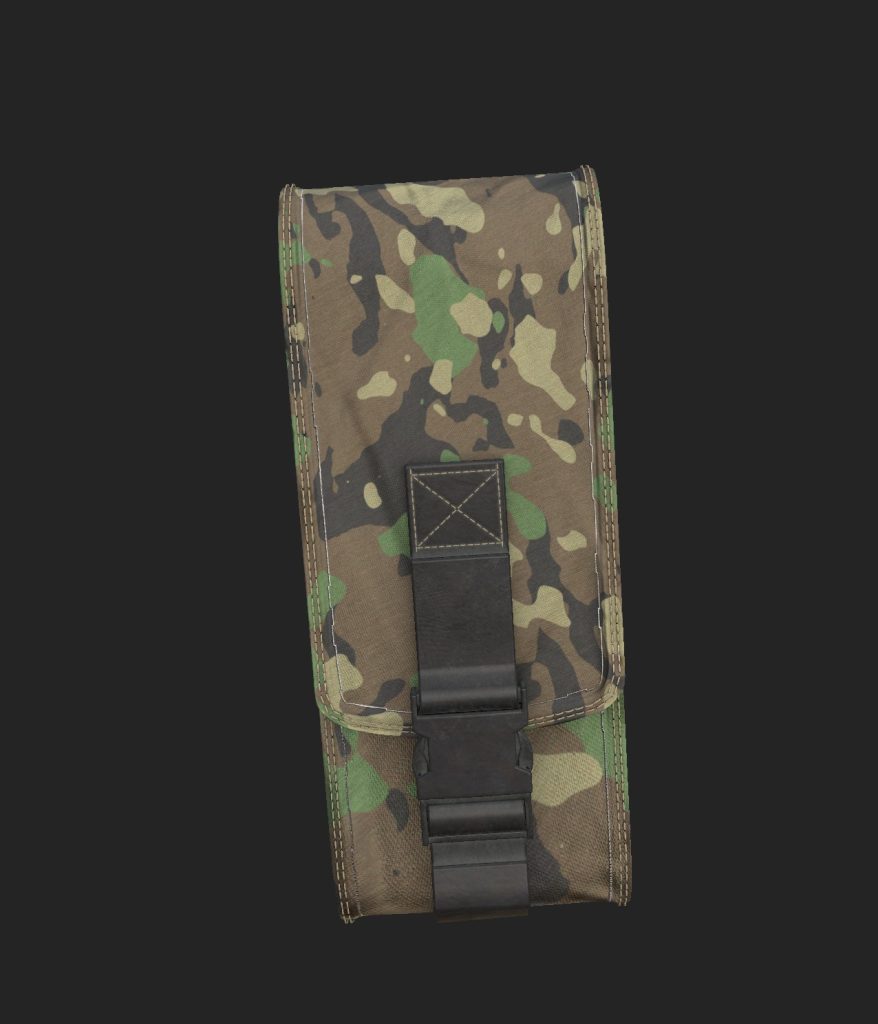
It was now time to do the utility pouch. I found some reference images (add images) and also used some of the earlier images to help get an understanding of how it should look. I also used a set of 3 mini tutorial videos from a woman called carol sung this was really helpful as i still struggled with a lot of the tools from Zmodeler and she covers quite a few and how to use them. One of the main ones is bridge which is how the top and bottom curves of the pouch is made. The other is using polyloops to select and extrude the outer edges to create a border.
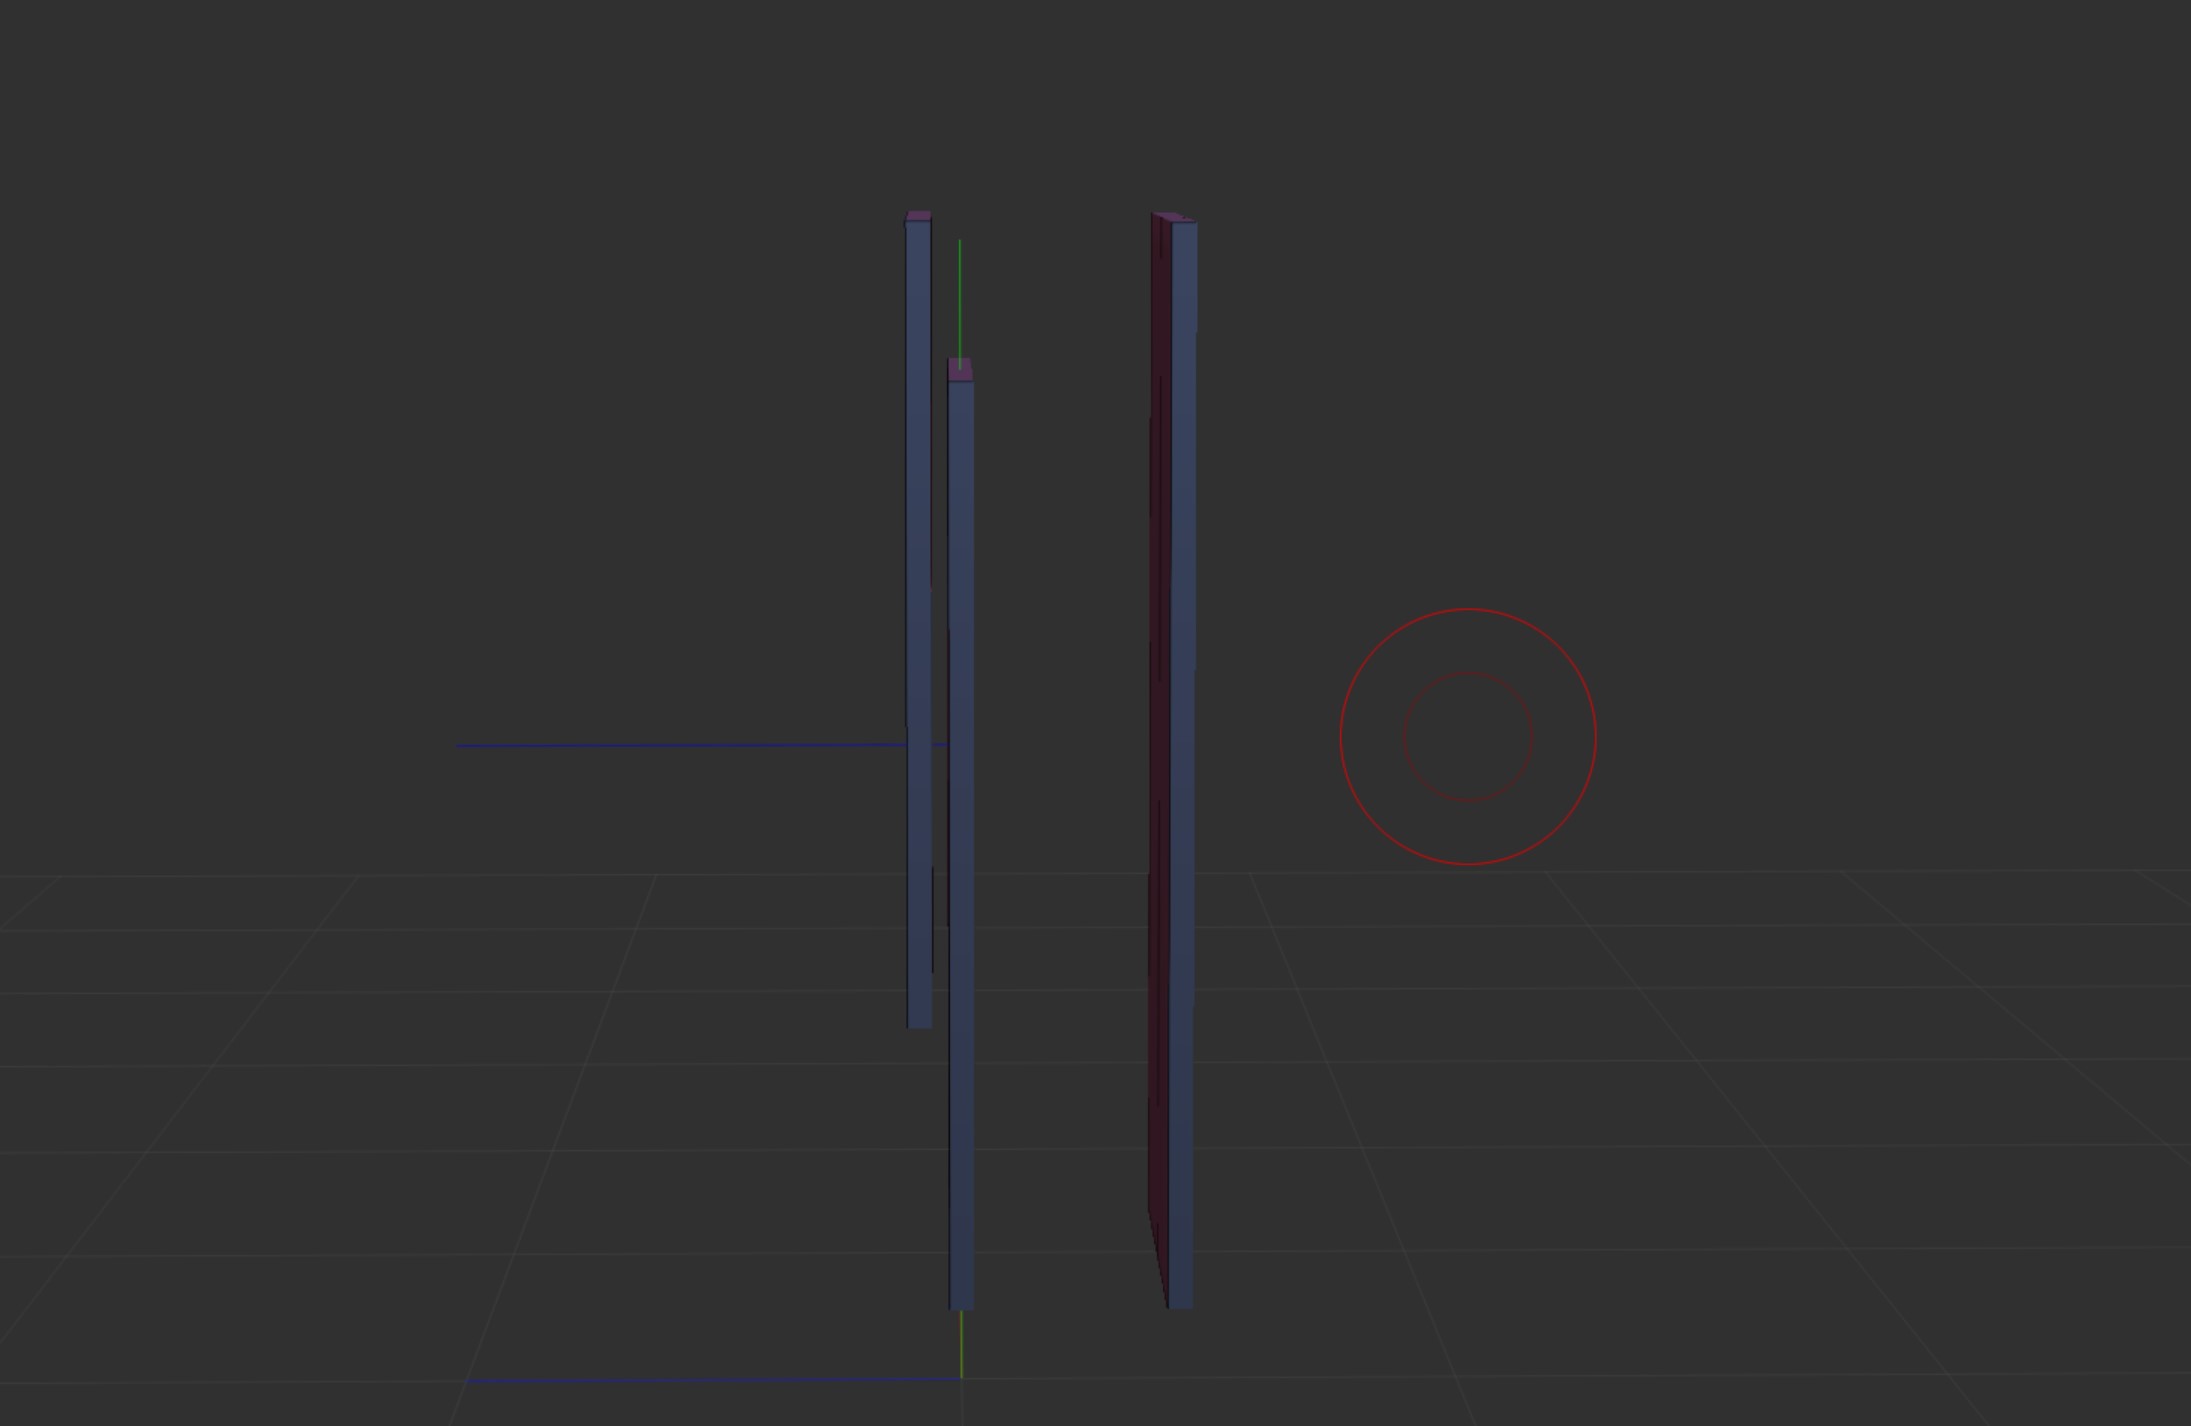

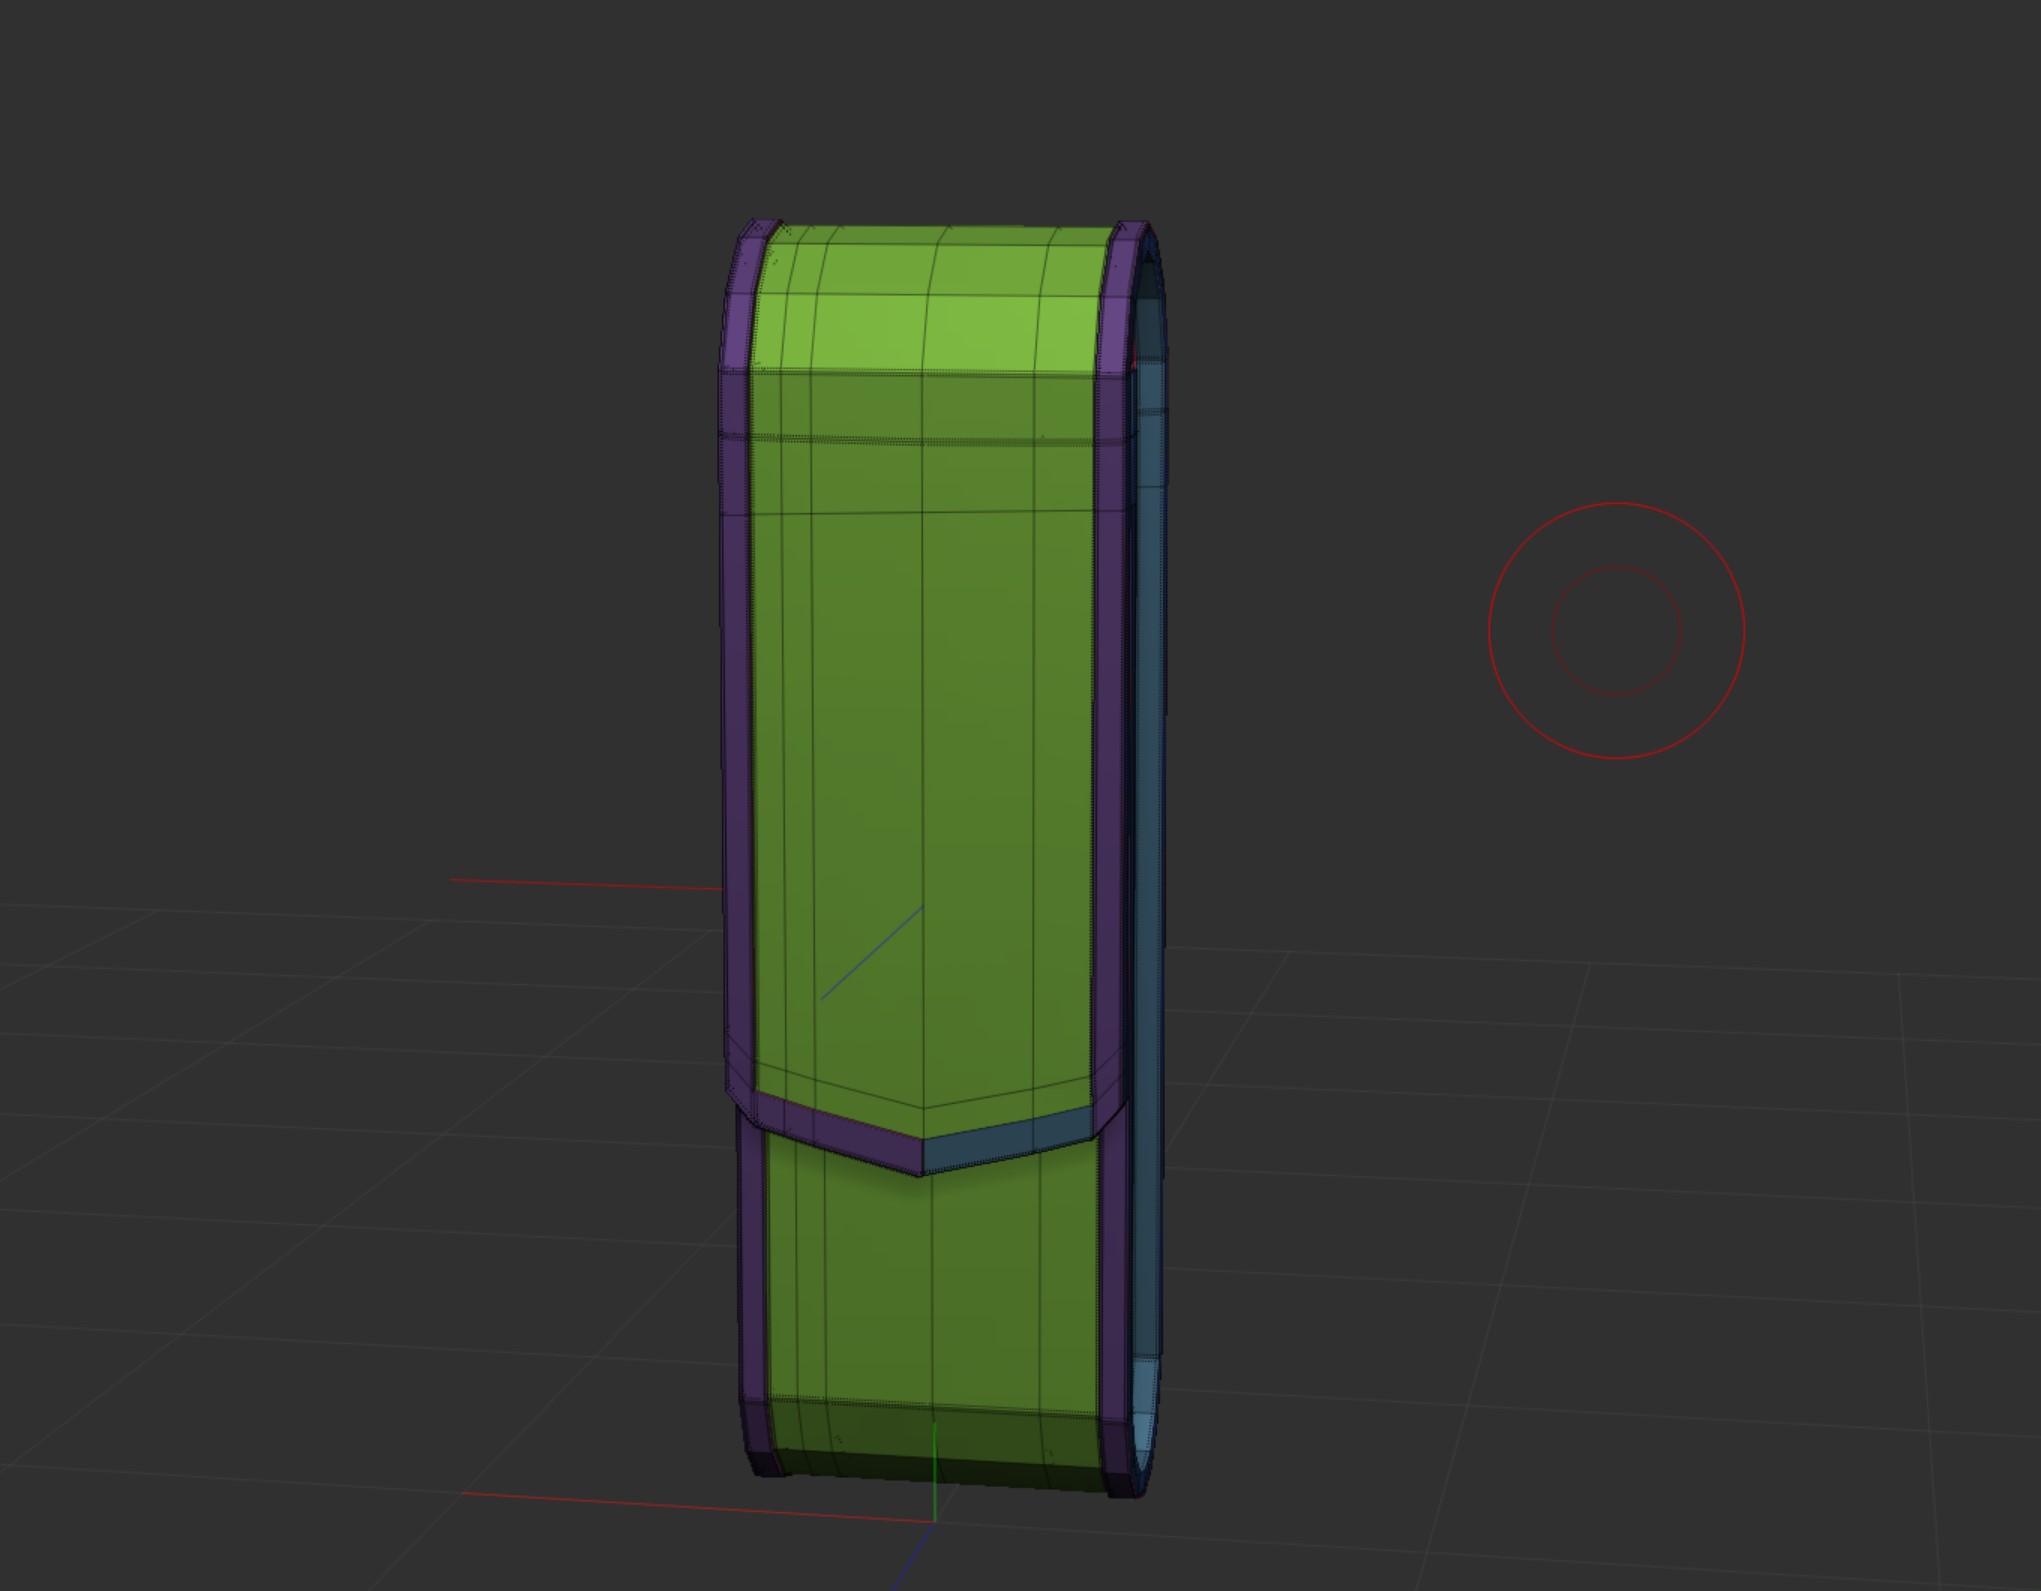
It was then masked and scaled out so it was wider this was then repeated so it was thicker too. Once the border was finished it was then just about tidying things up and making sure it was clean.
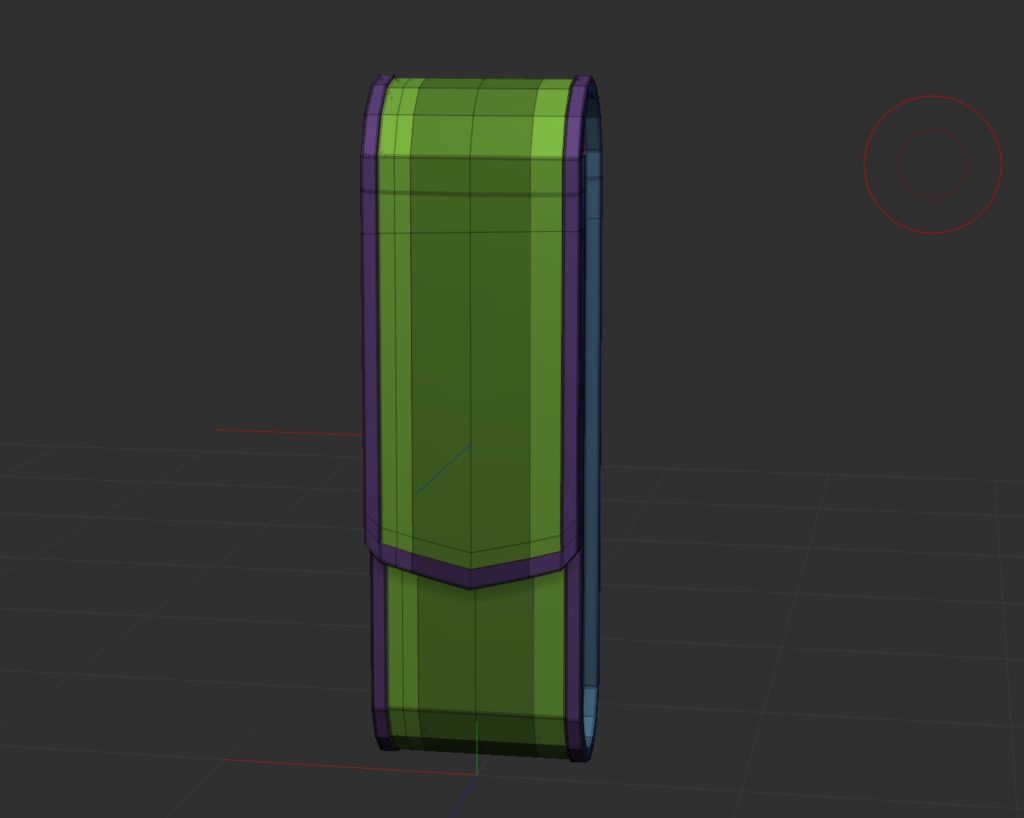
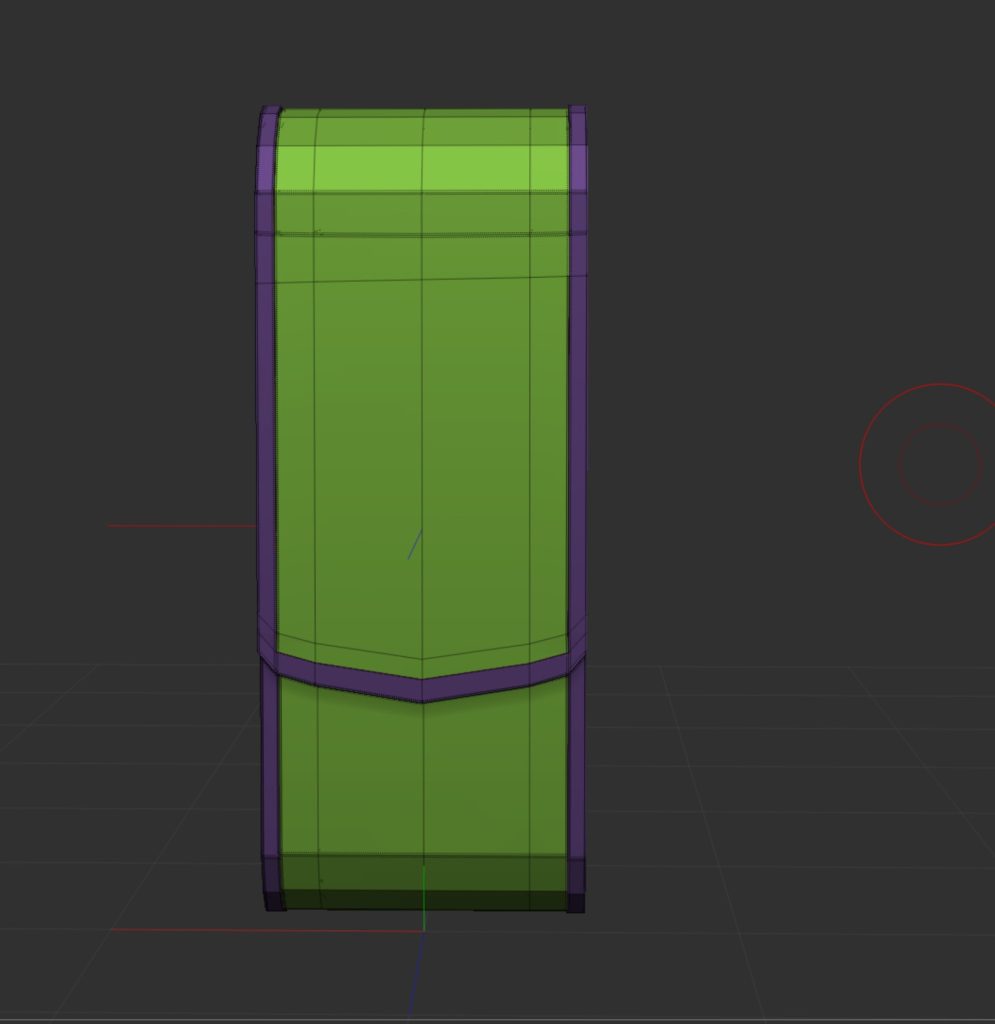
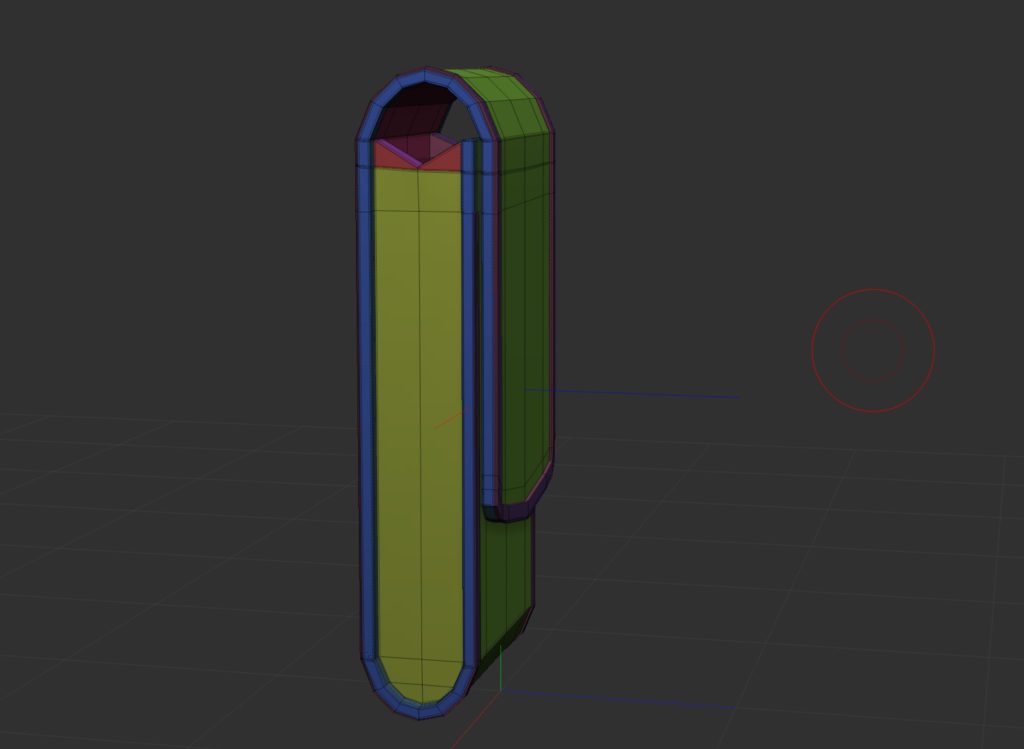
To finish off the mesh was duplicated before having the dynamic subdiv applied, and then the smaller details etc. were added. For example the stiches around the outer edge and the the clip that holds the pouch closed. Both of those are free IMM brushes and will be linked within the reference list.

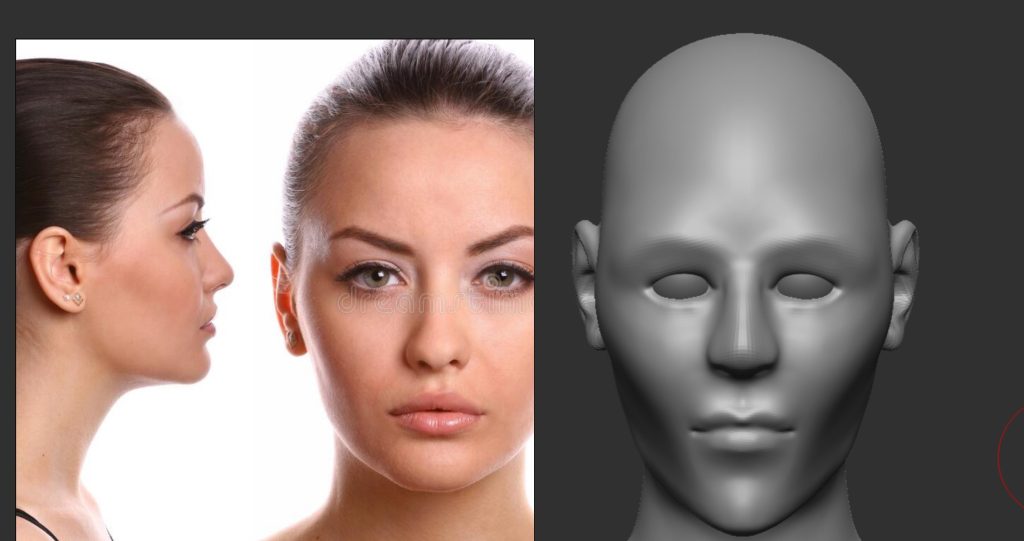
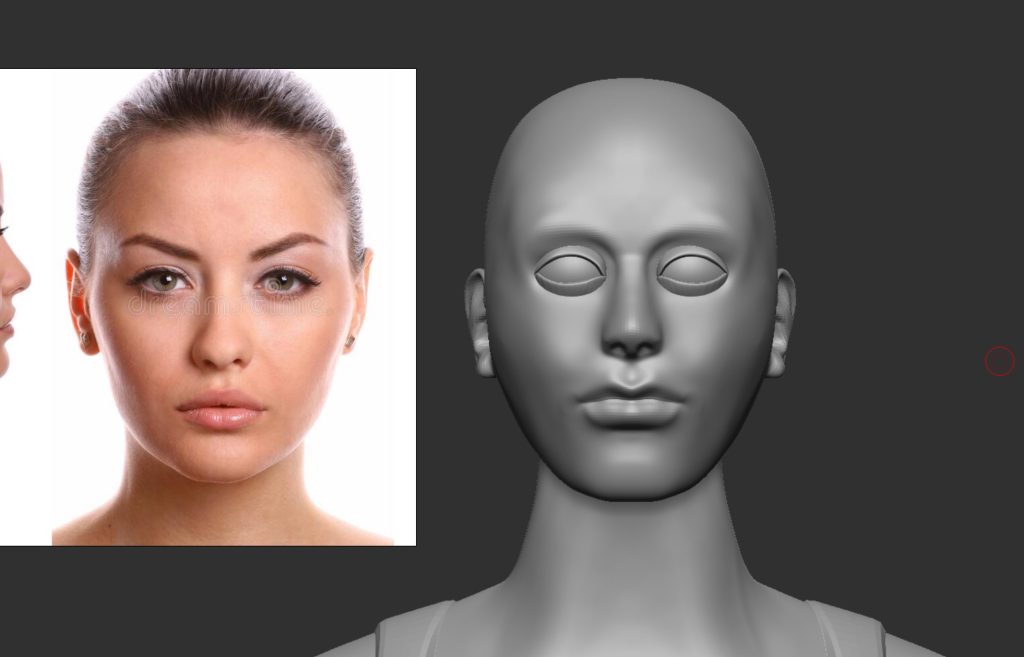
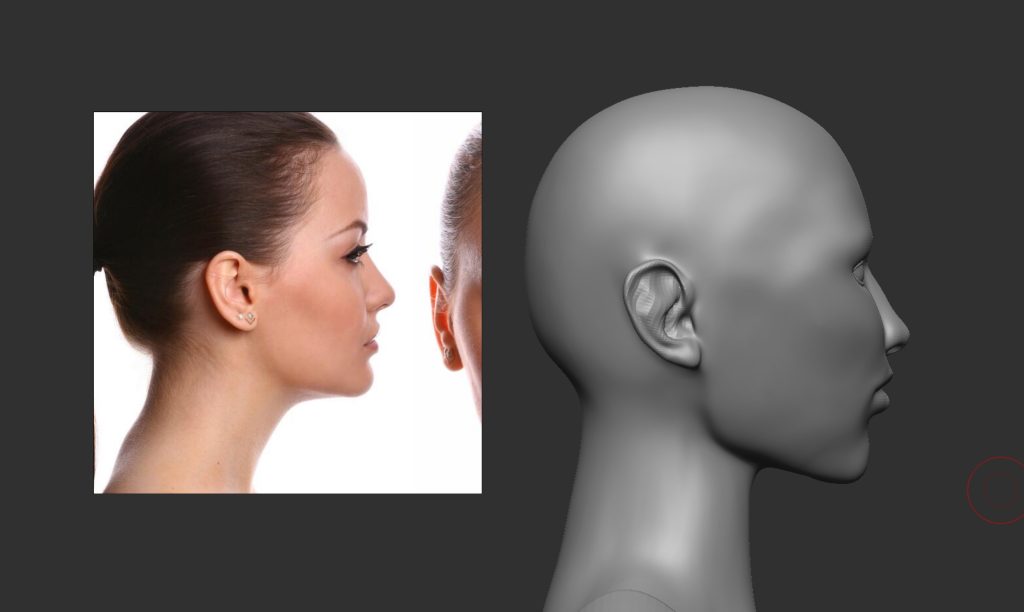
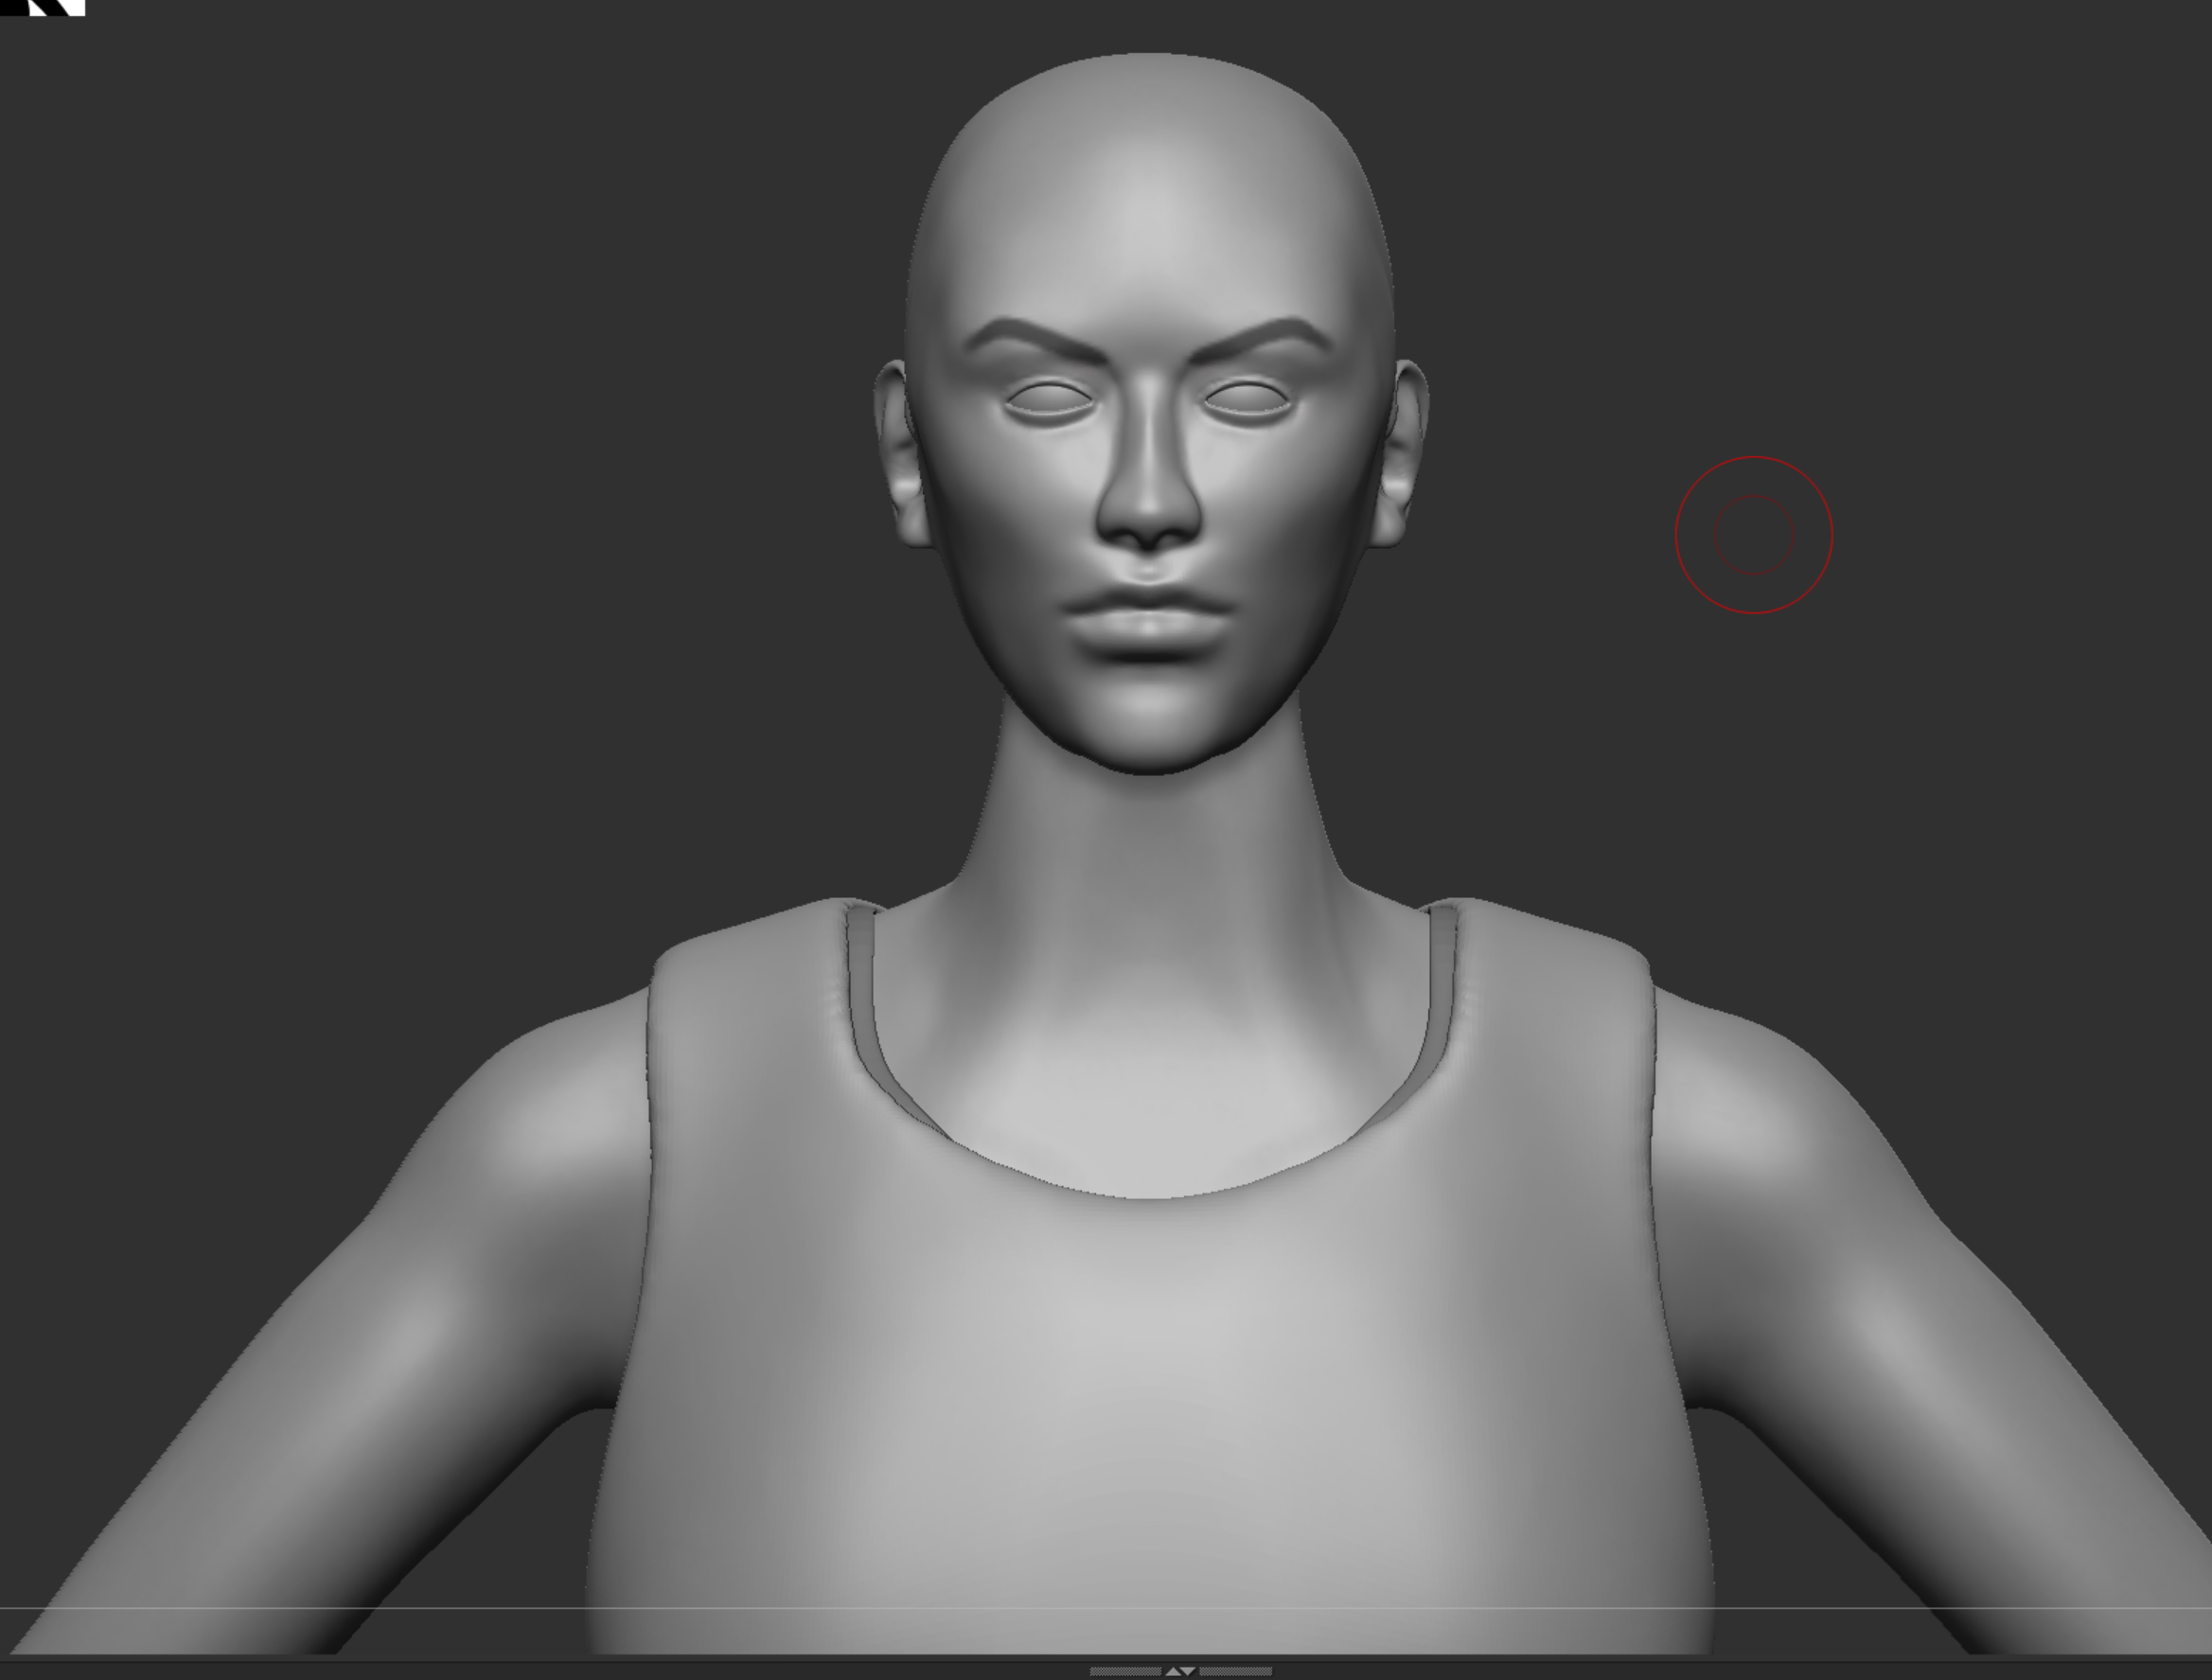
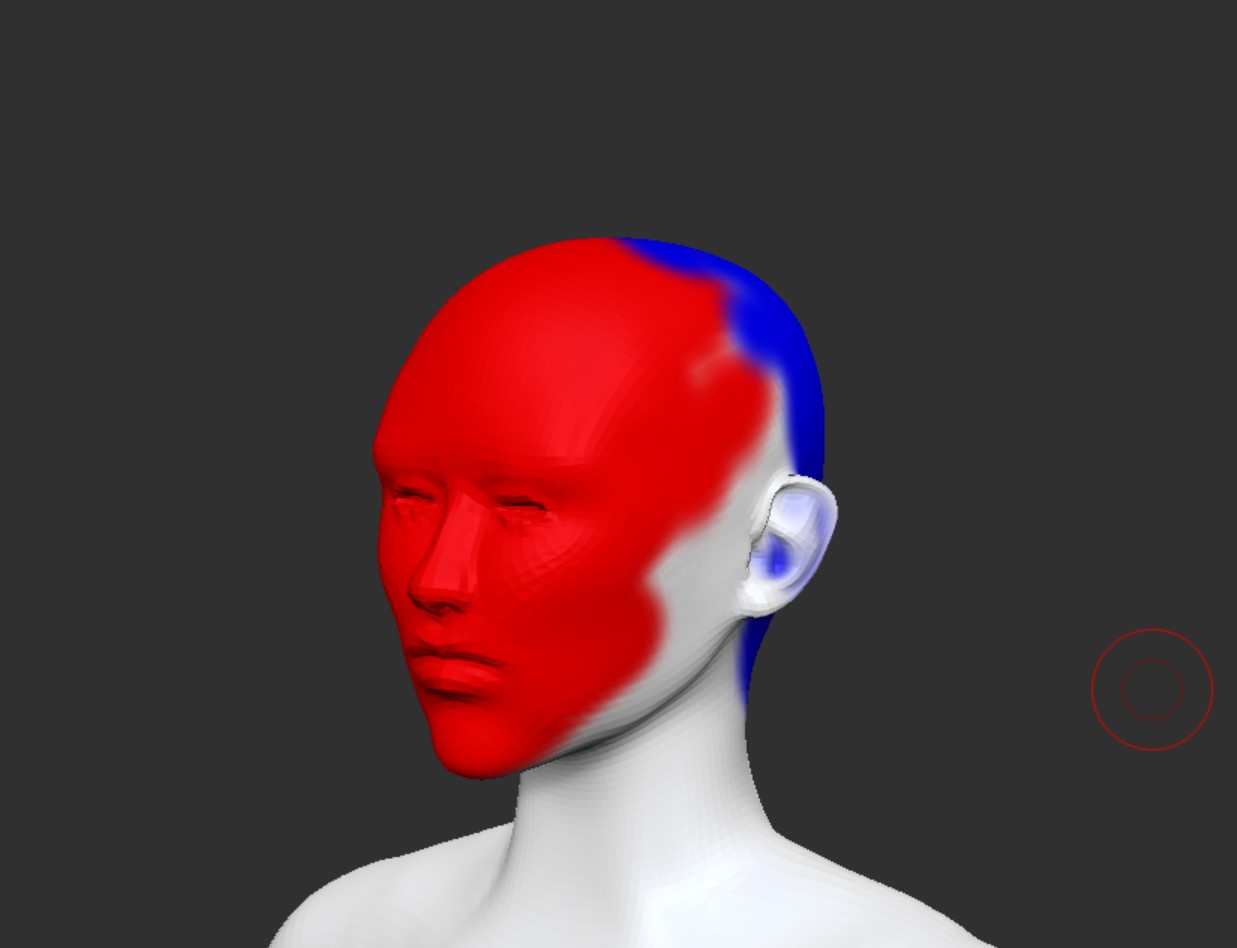
The face was the next thing i needed to do. This is something I have only ever tried once and that was during second year which went horribly. So this time i have done lots of research into methods for creating and blocking out the initial shape of the face and how reference image are a huge factor, so I first picked out a selection of front, side pictures of a female face which helped me build from my blocked out features.
this is how it first looked after the first attempt, certain features like the cheek bones were too prominent and the cheeks were too thin.
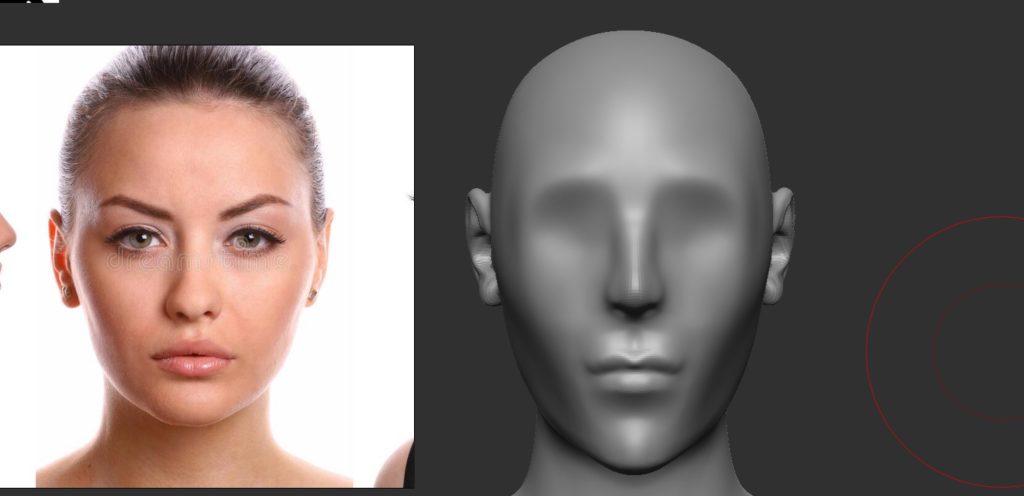
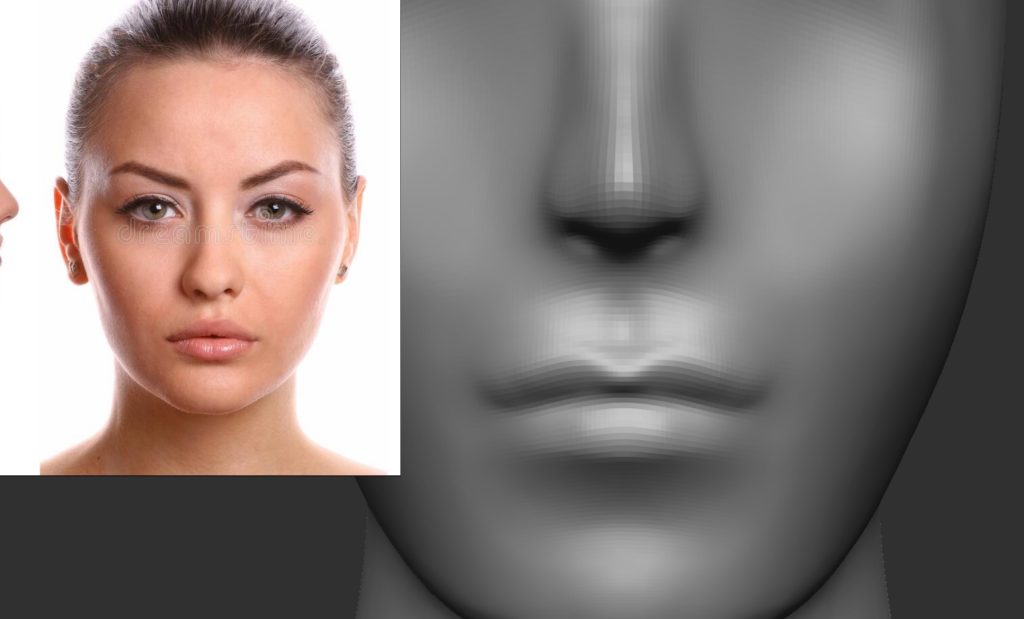
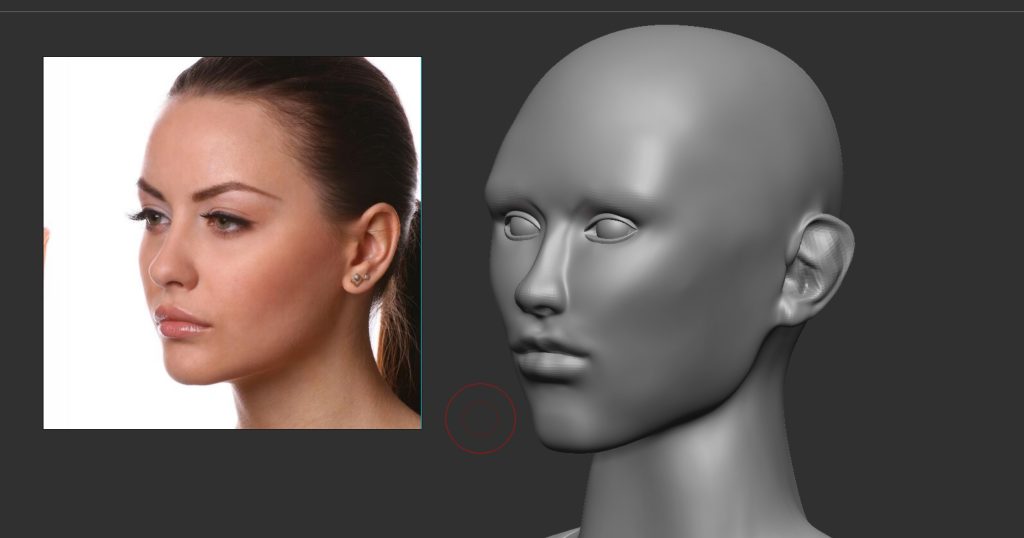
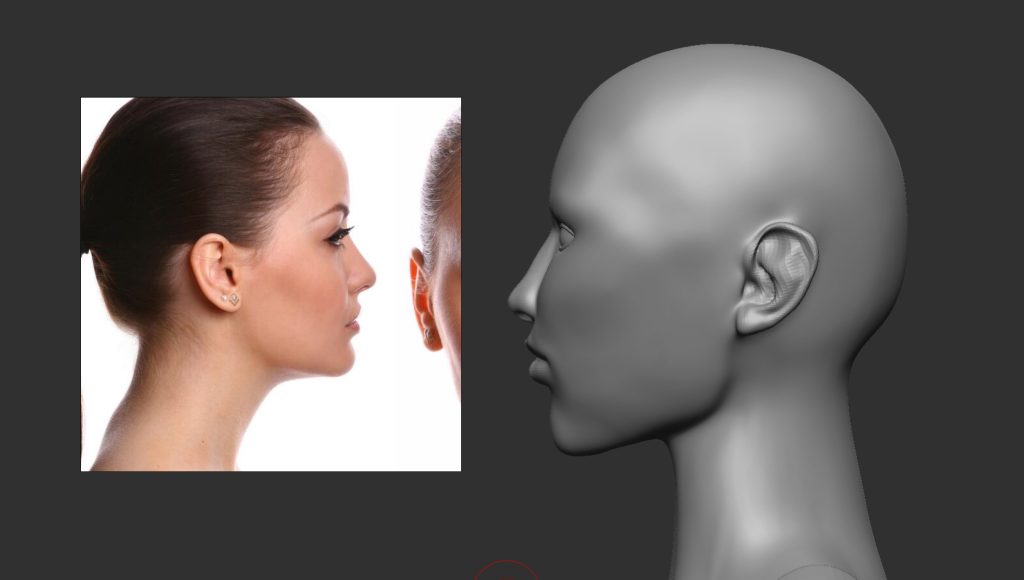
After some feedback I then adjusted the cheeks, head shape and the jaw, this gave the face much better look and closer looking to the reference images. I also touched up the eyelids and the eyes.


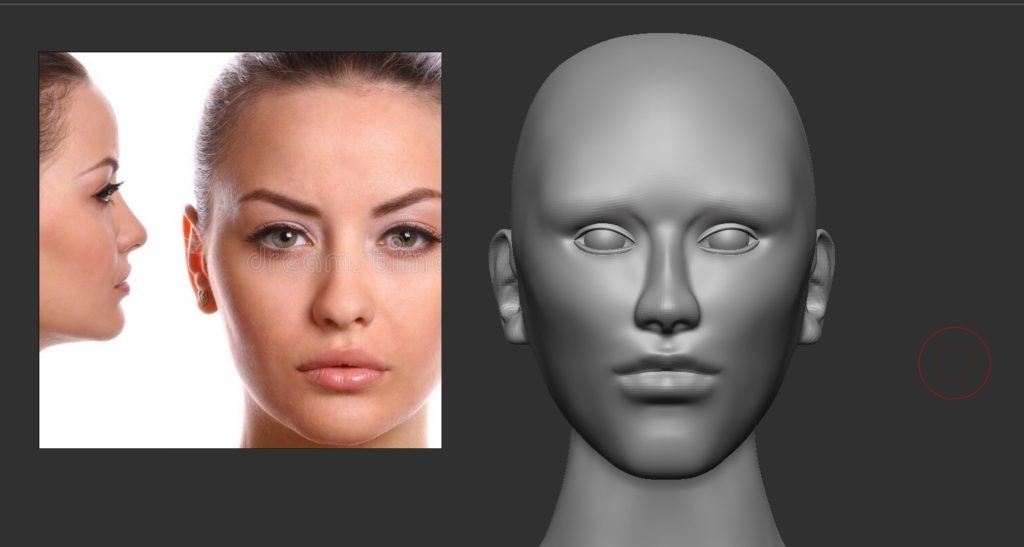
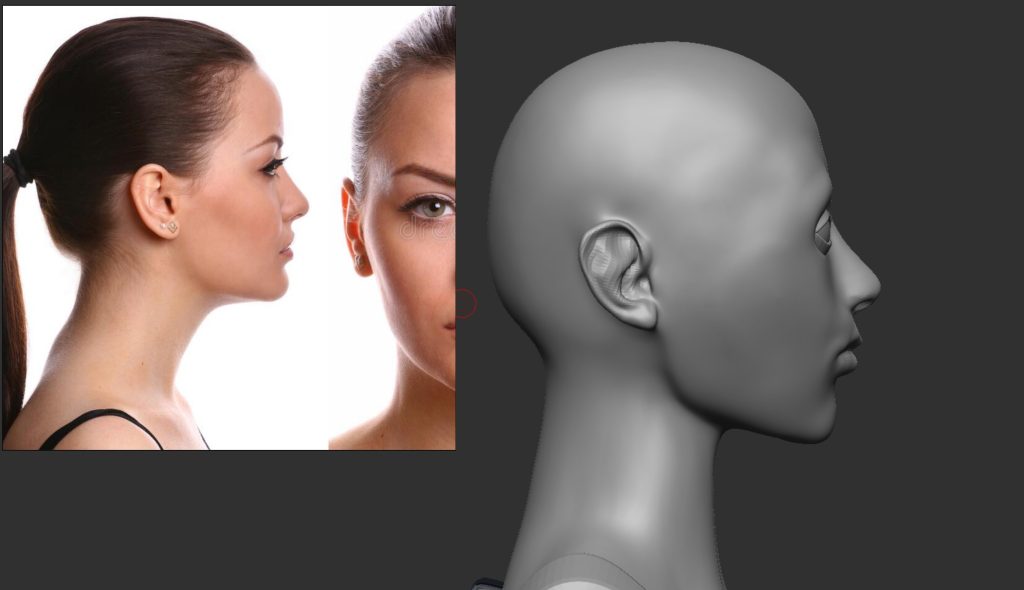
Following up on some more feedback and taking time away so I can properly judge my work, I made a few more adjustments to the jaw, lips, eyes and the brow ridge.
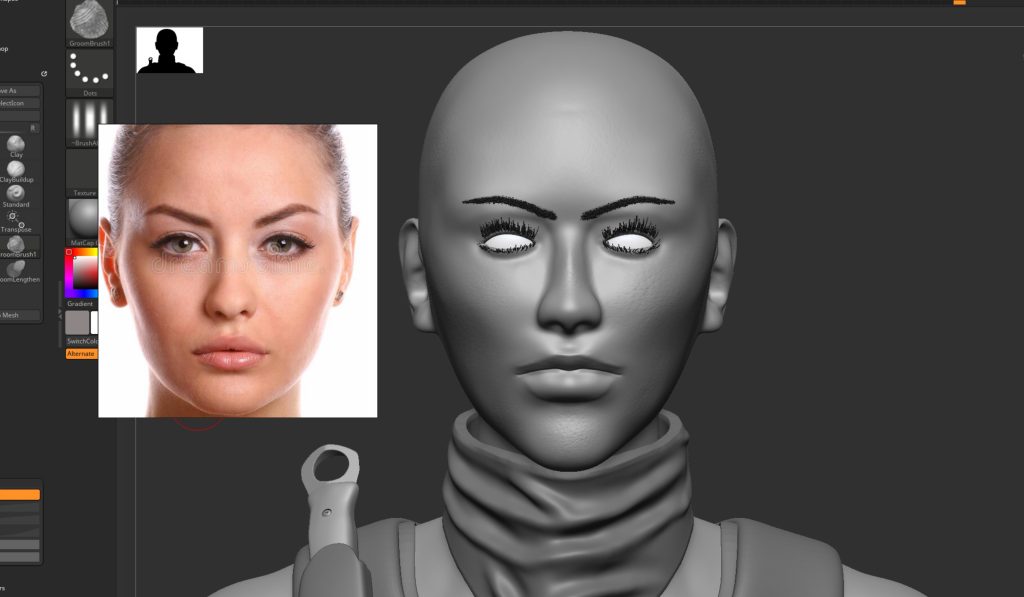
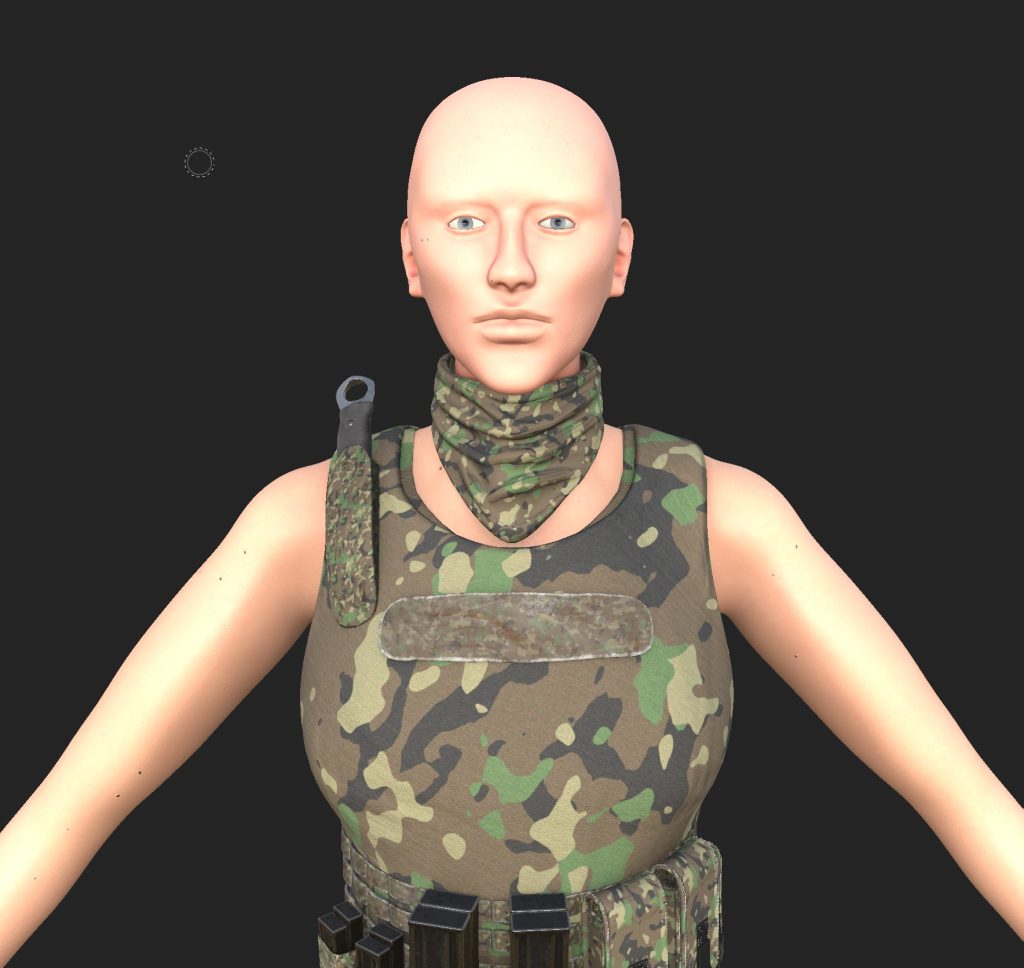
The final version of the face with some added eyebrows, these were painted on purely just to see how they would look. I am extremely pleased with how it came out especially since I struggled so much with making a face during second year. I have also gone back and added eyebrows and eyelashes using the fibremesh system within Zbrush, these help with getting across any emotion she might be feeling but it also just helps with the general shape and look of the character.

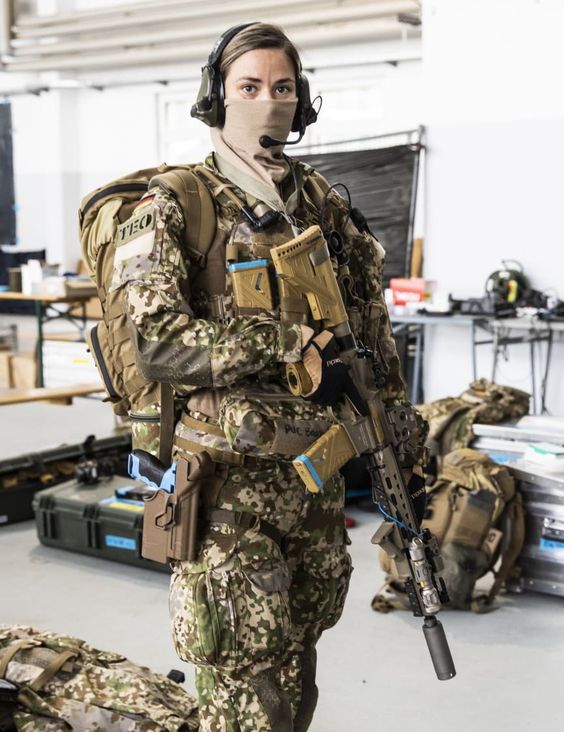
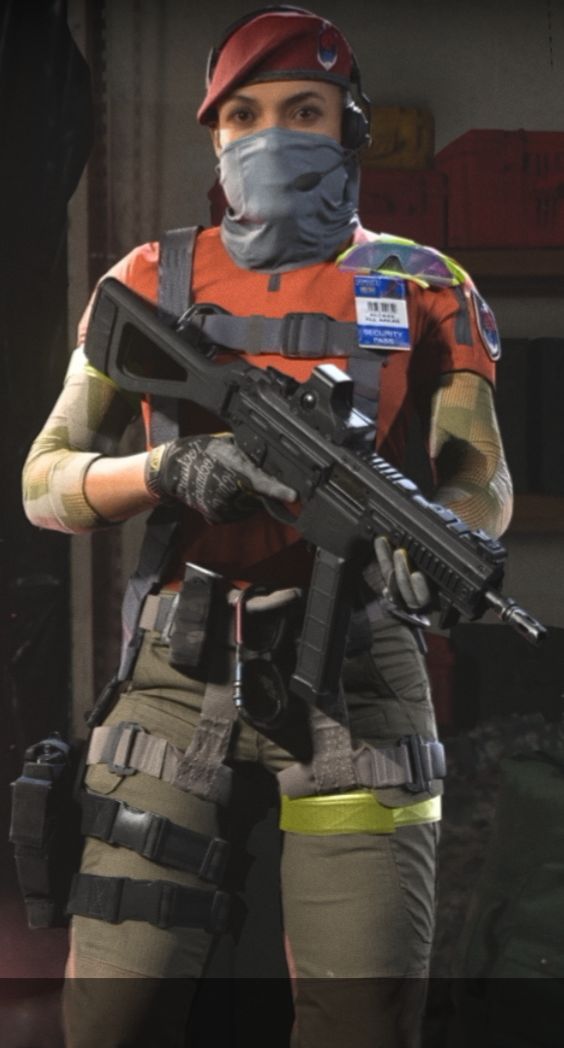
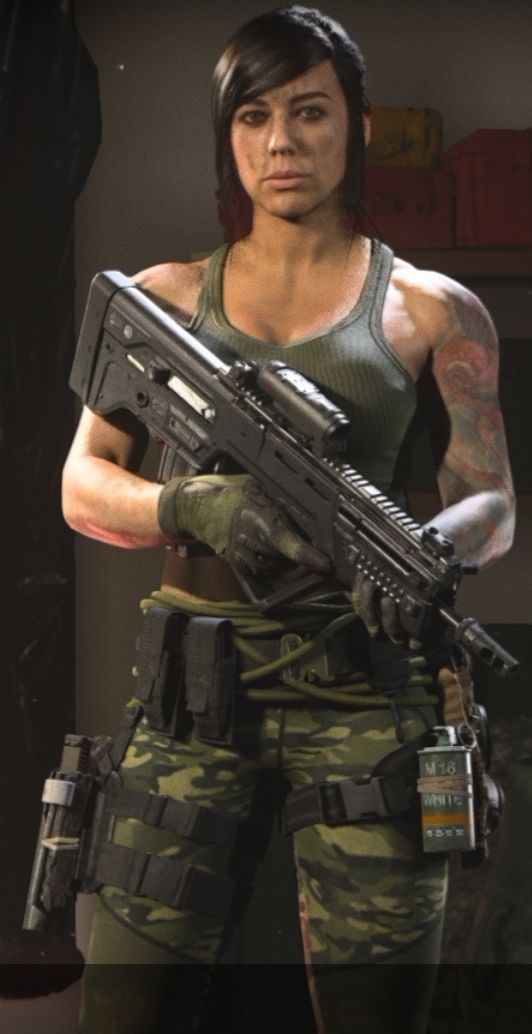
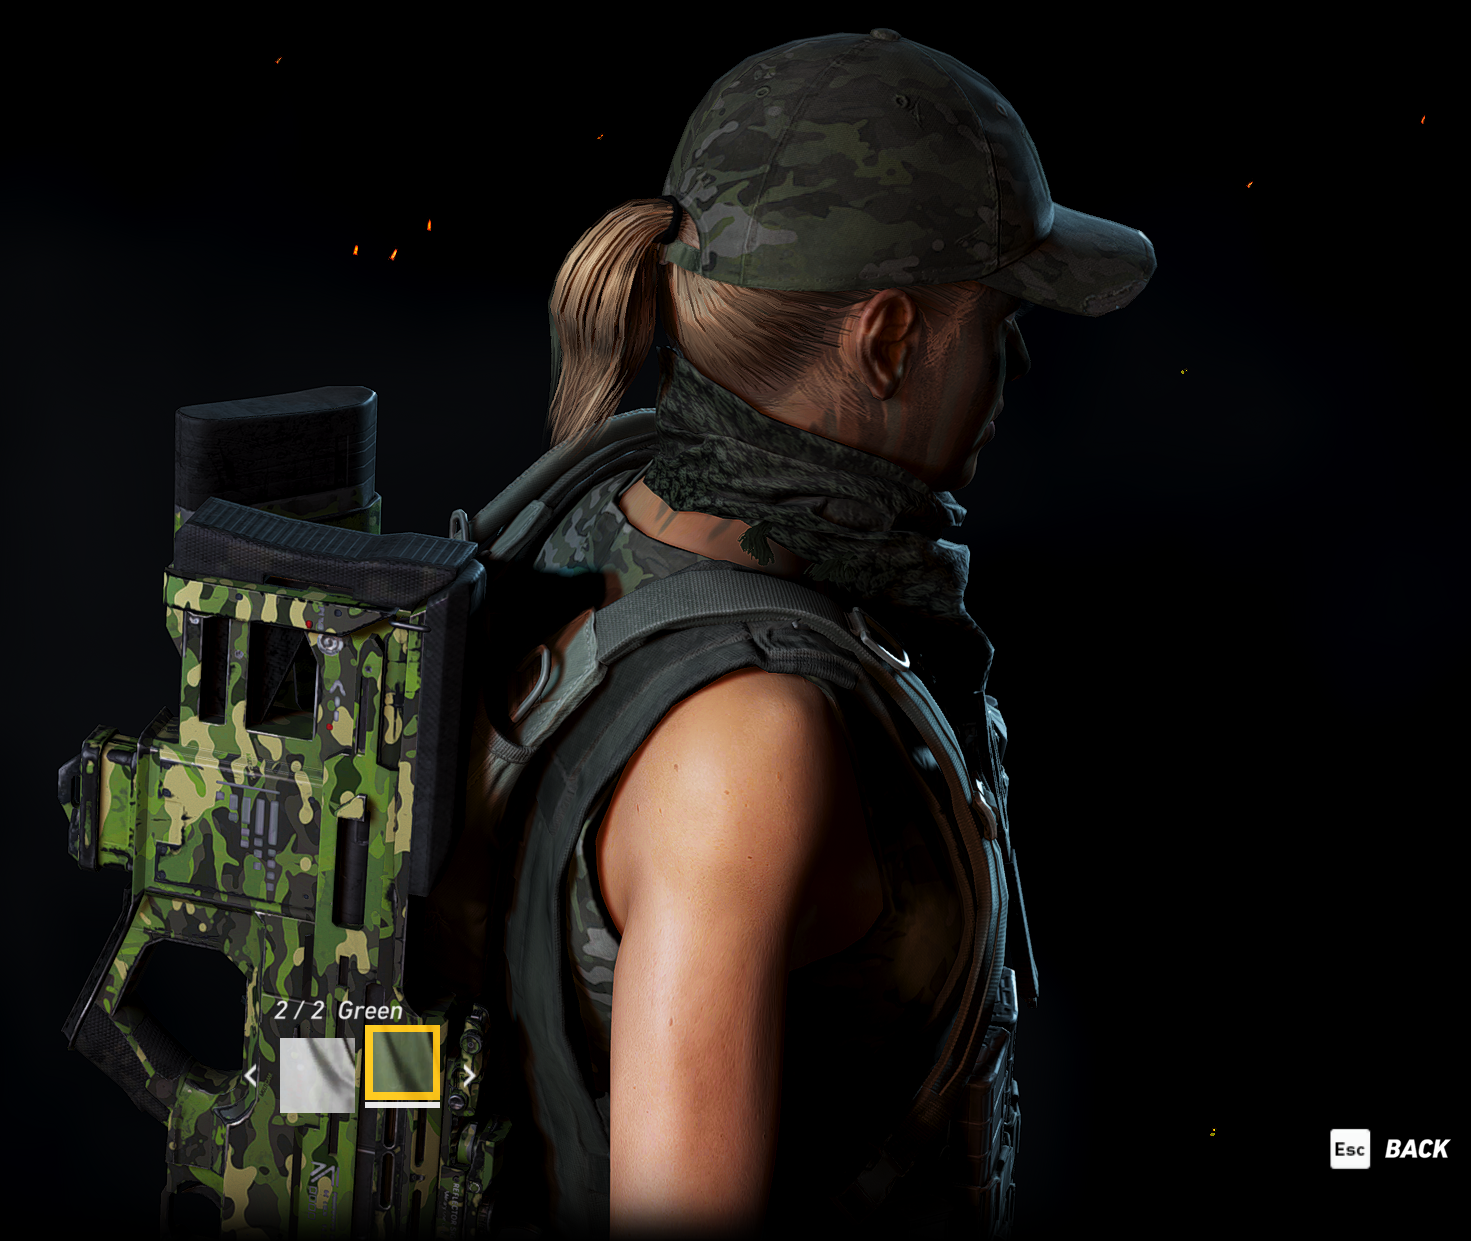
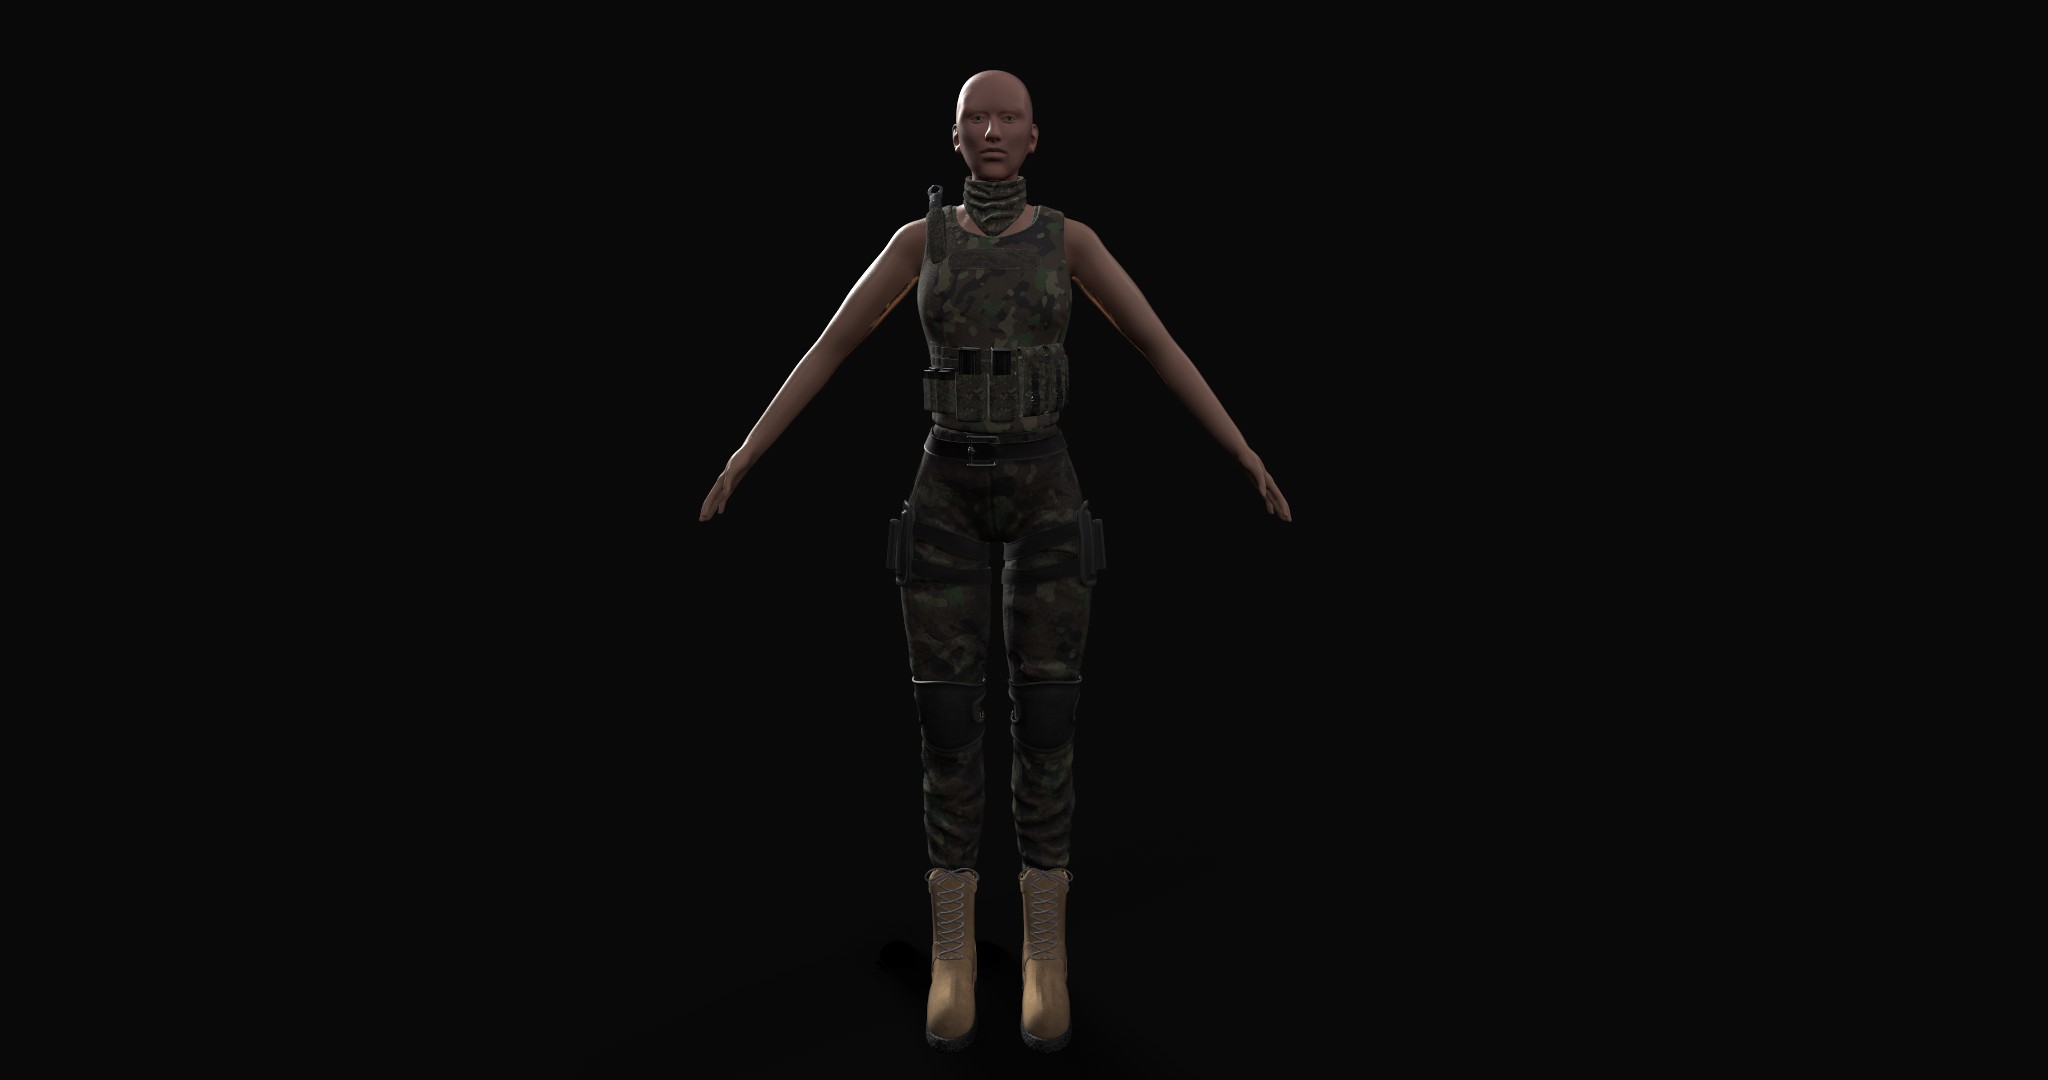
I now wanted to build on the block out of the clothing, so I started with finding reference images closer to what my vision for this character is. I decided to get different clothing examples and from different angles from the game Ghost Recon Wildlands, which have been really helpful to see how similar characters have been made.
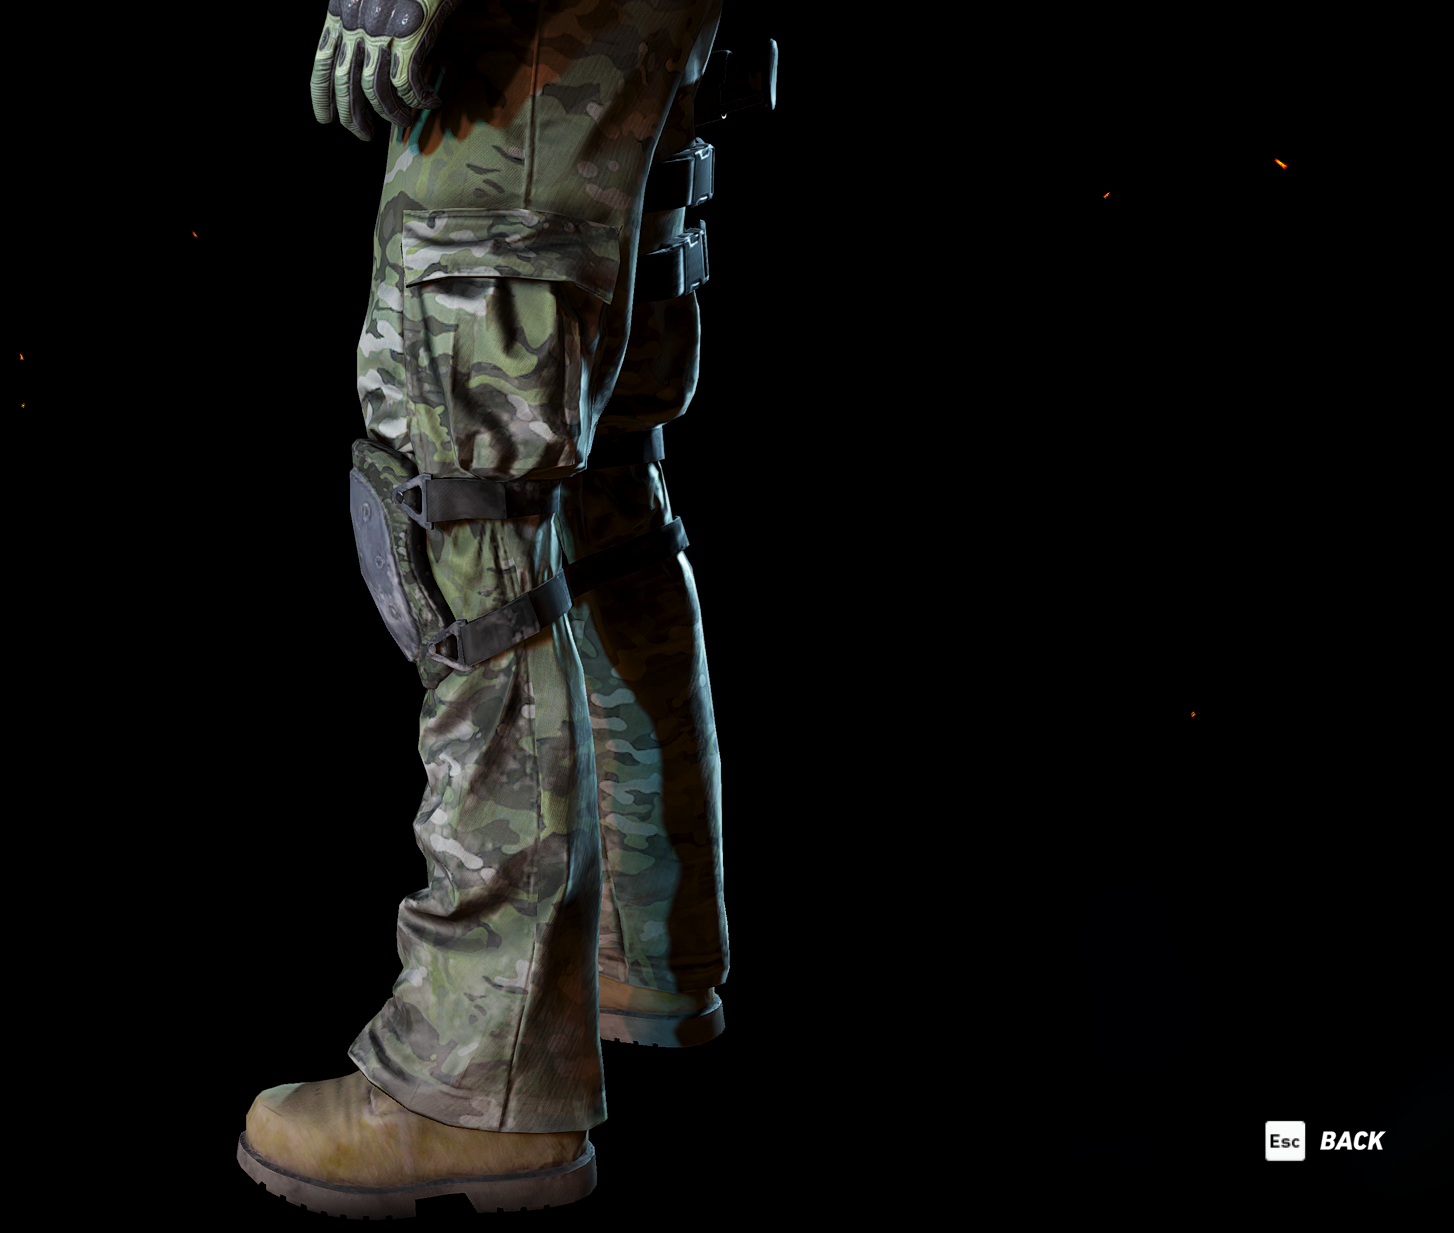
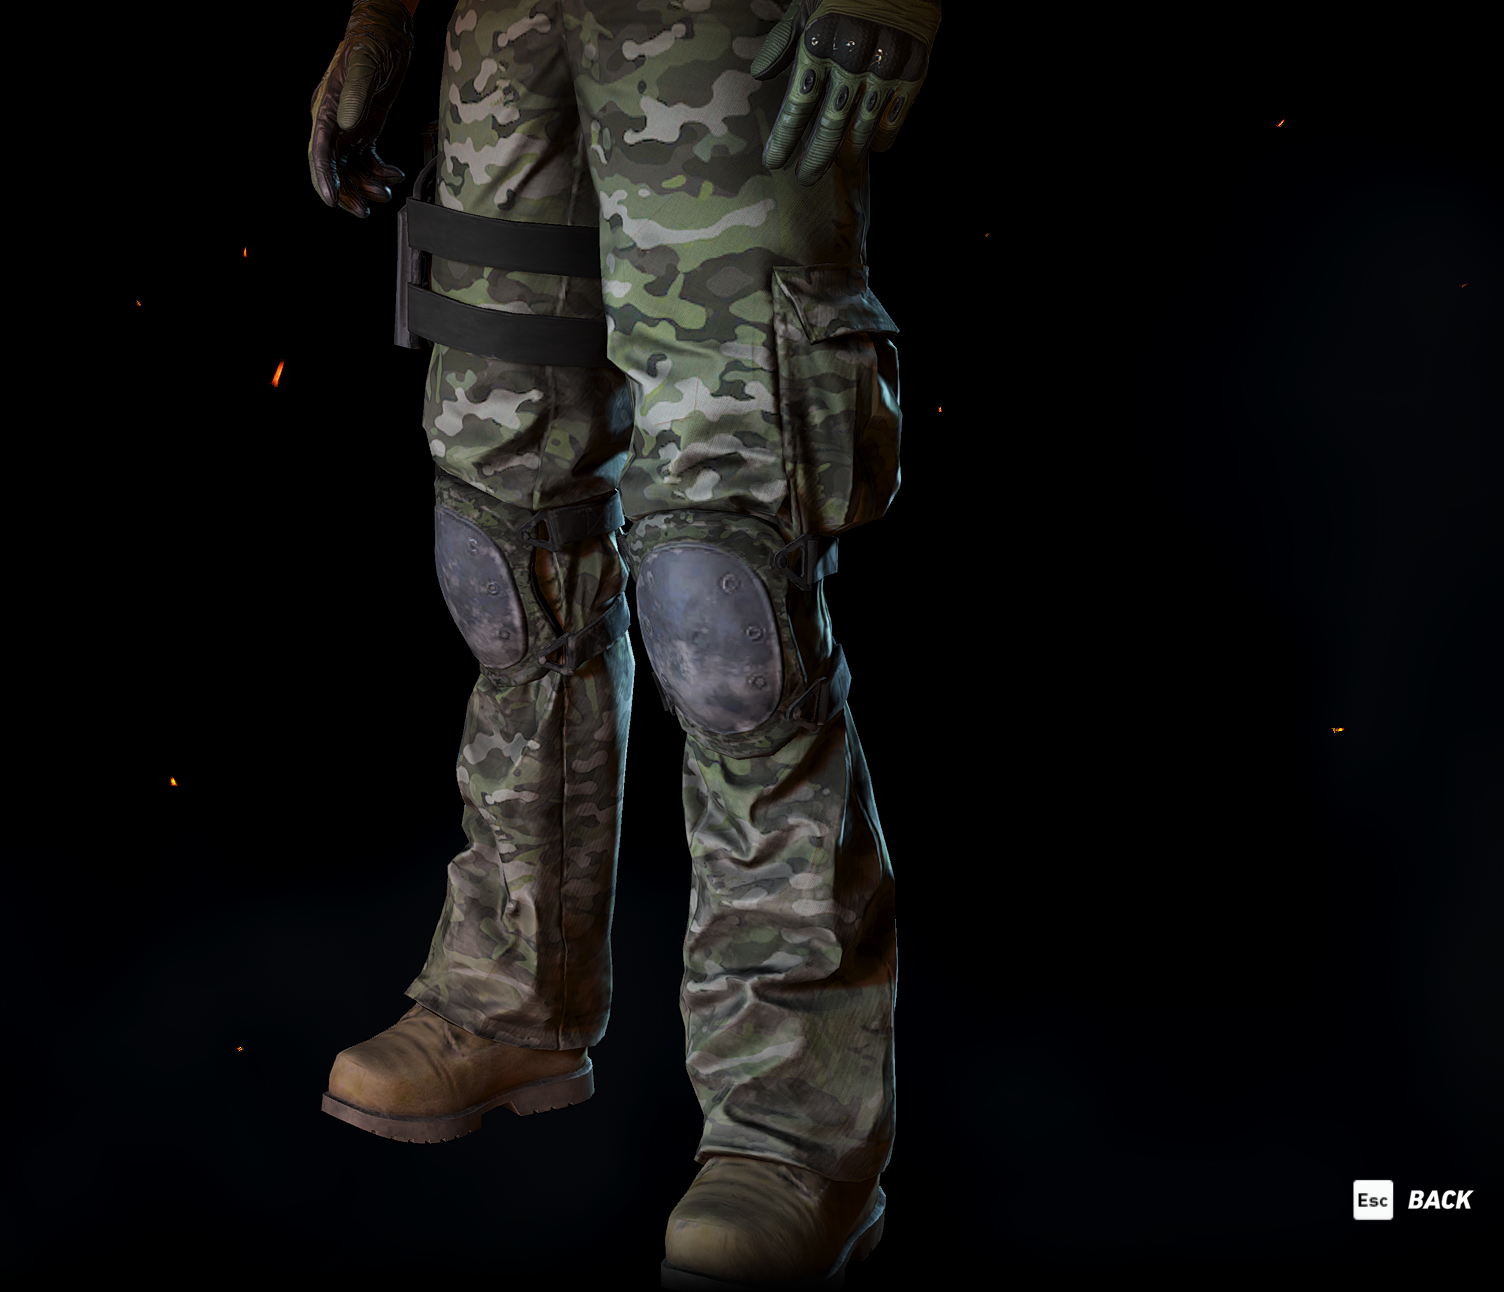
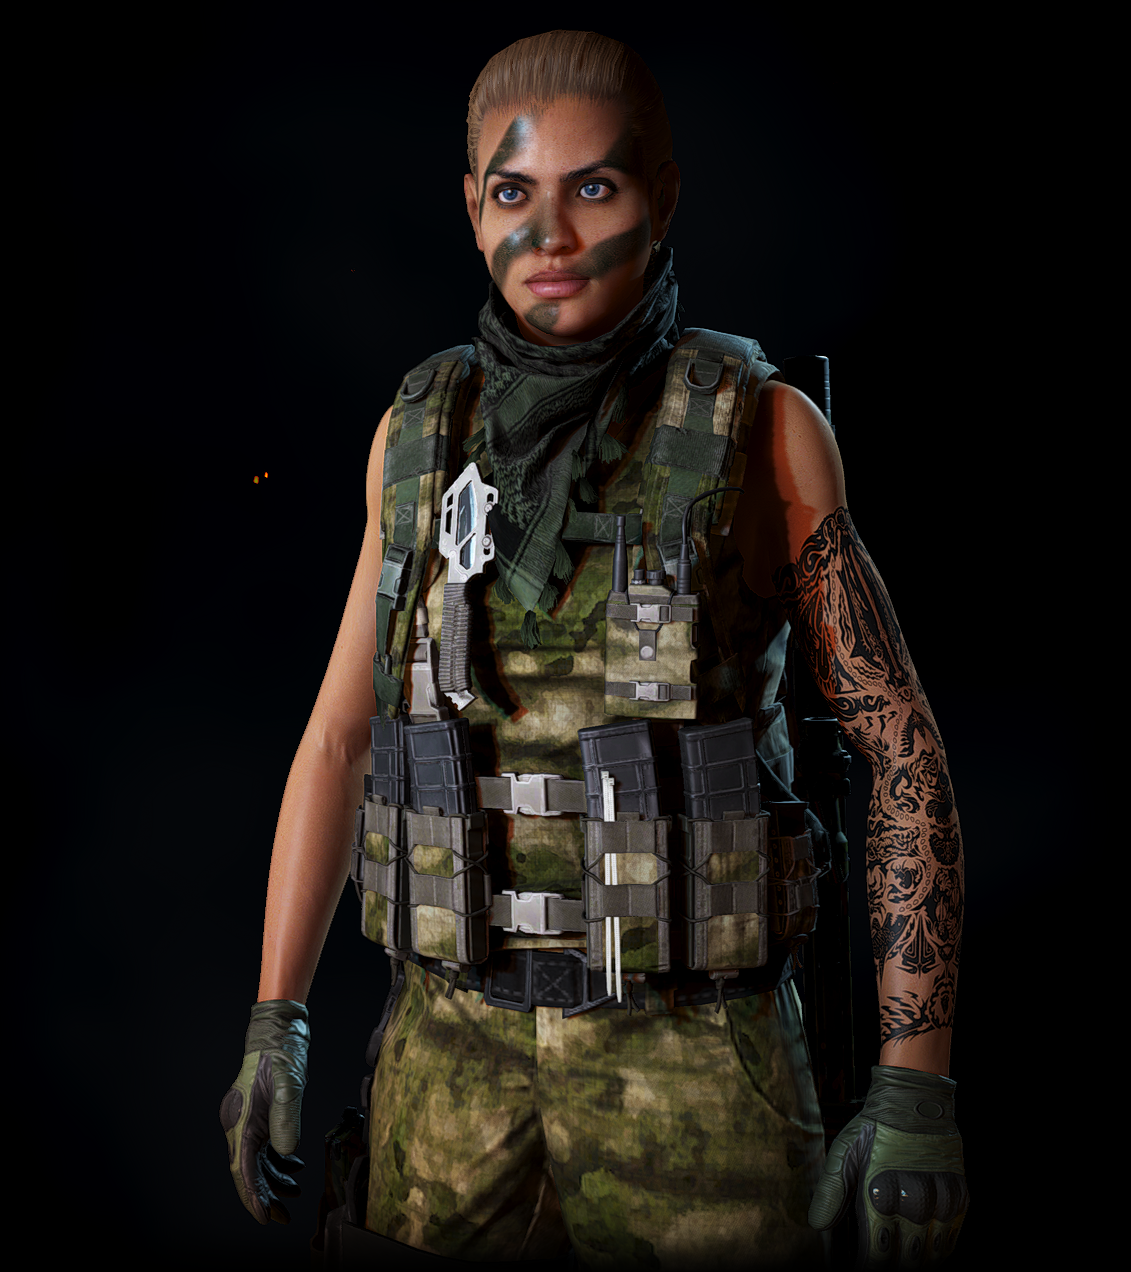
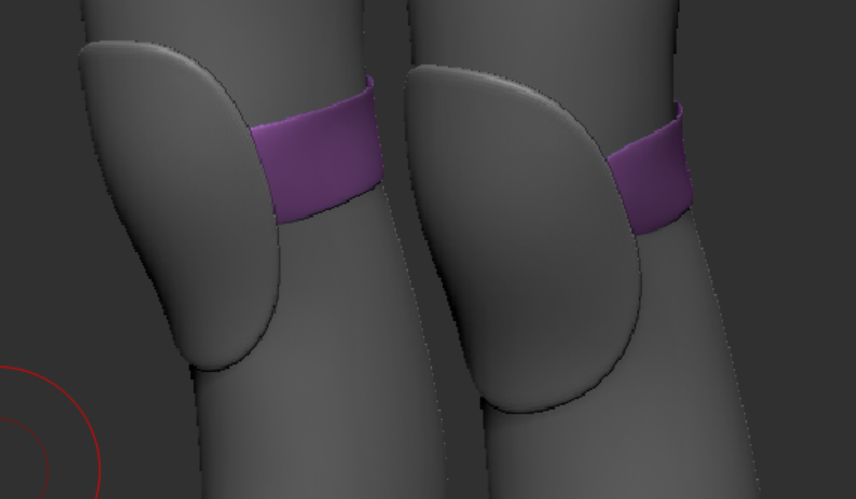
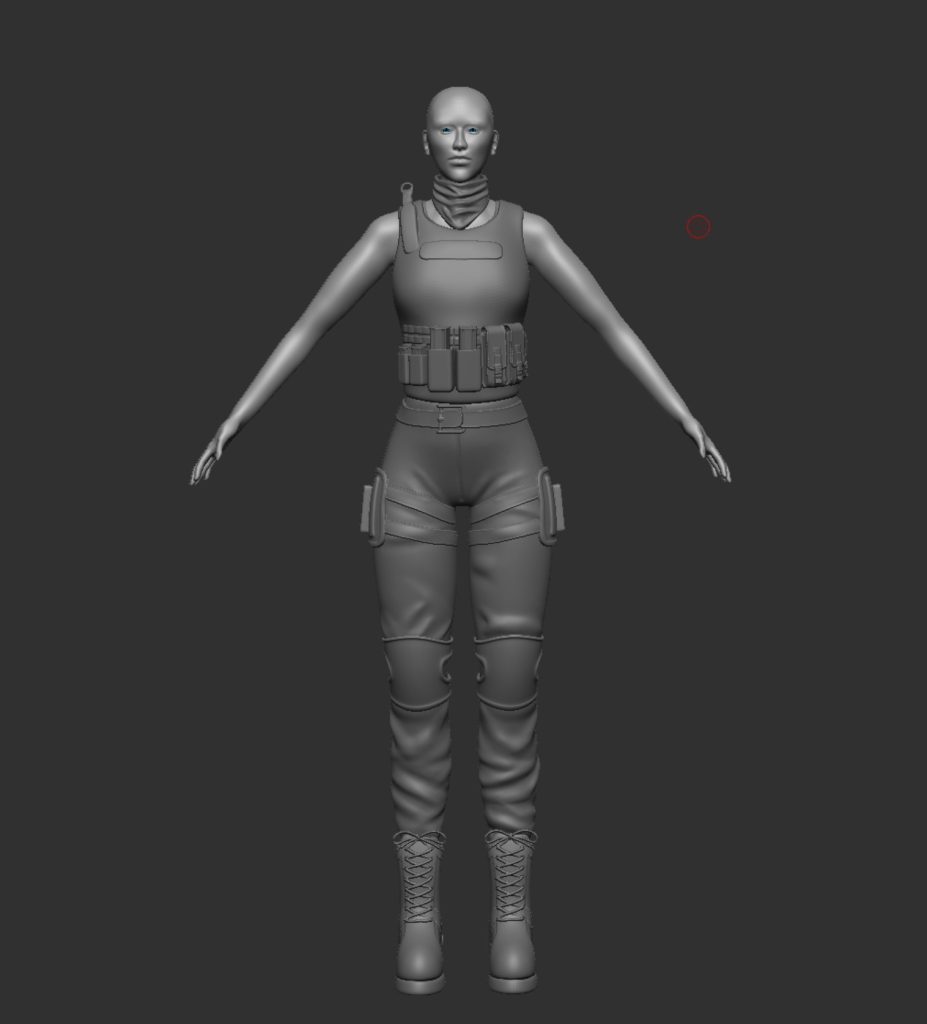
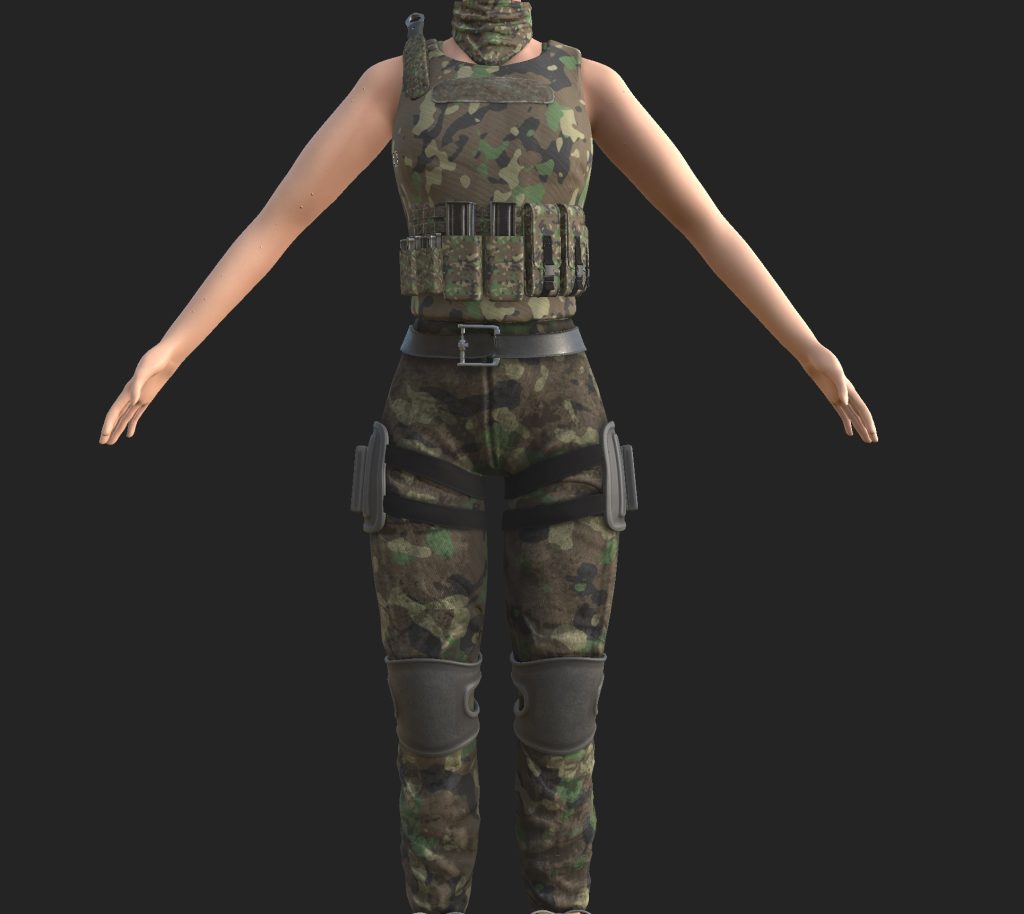
I started off with the vest making sure there was no clipping and the space for the arms was correct. I then added the molle loop attachments which is where the magazine holders and pouches would attach. I followed this up by making cloth creases along the legs of the trousers based on references I was using. The final couple things were the gun holders and the kneepads, these did not take long to make using simple shapes and the Zmoddler tool, however I had a slight issue initially with getting the right shape of the pistol holder however i figured it out in the end by watching a few videos on youtube. I then finished it off by making a simple belt that could potentially be used to carry things.
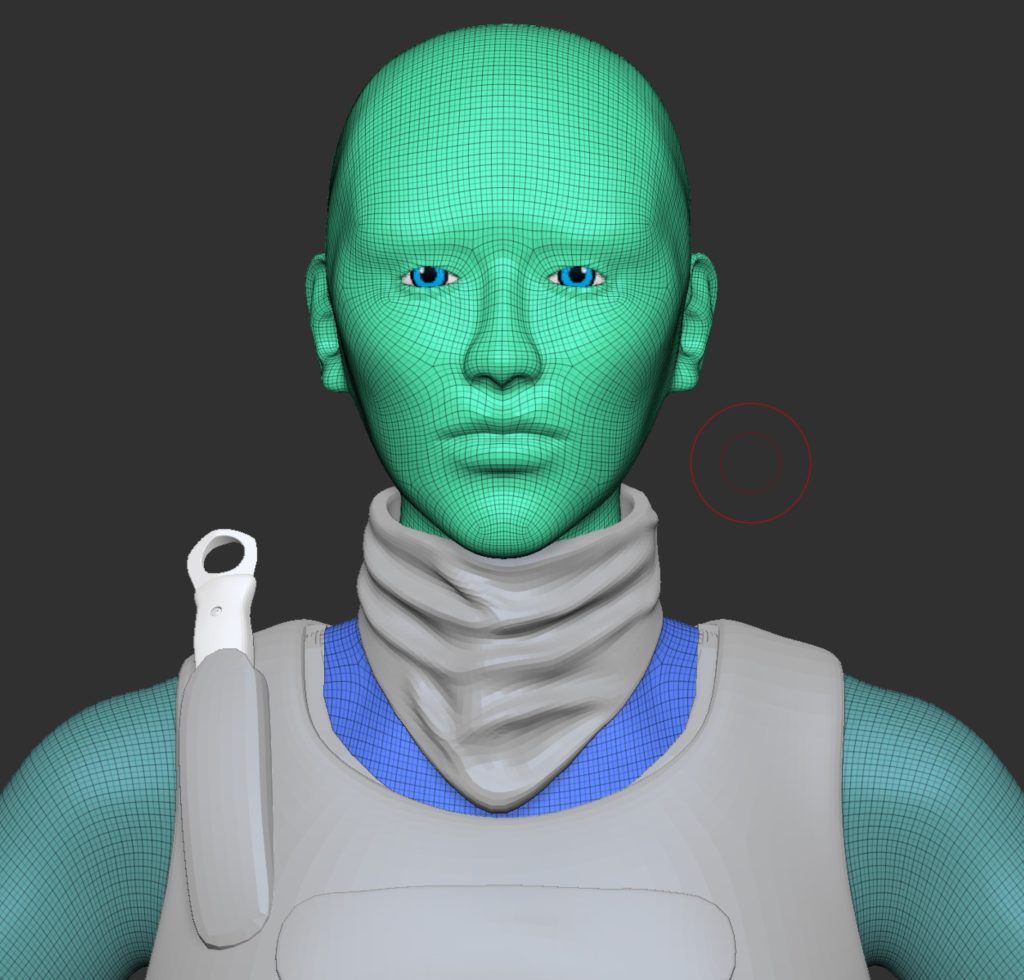
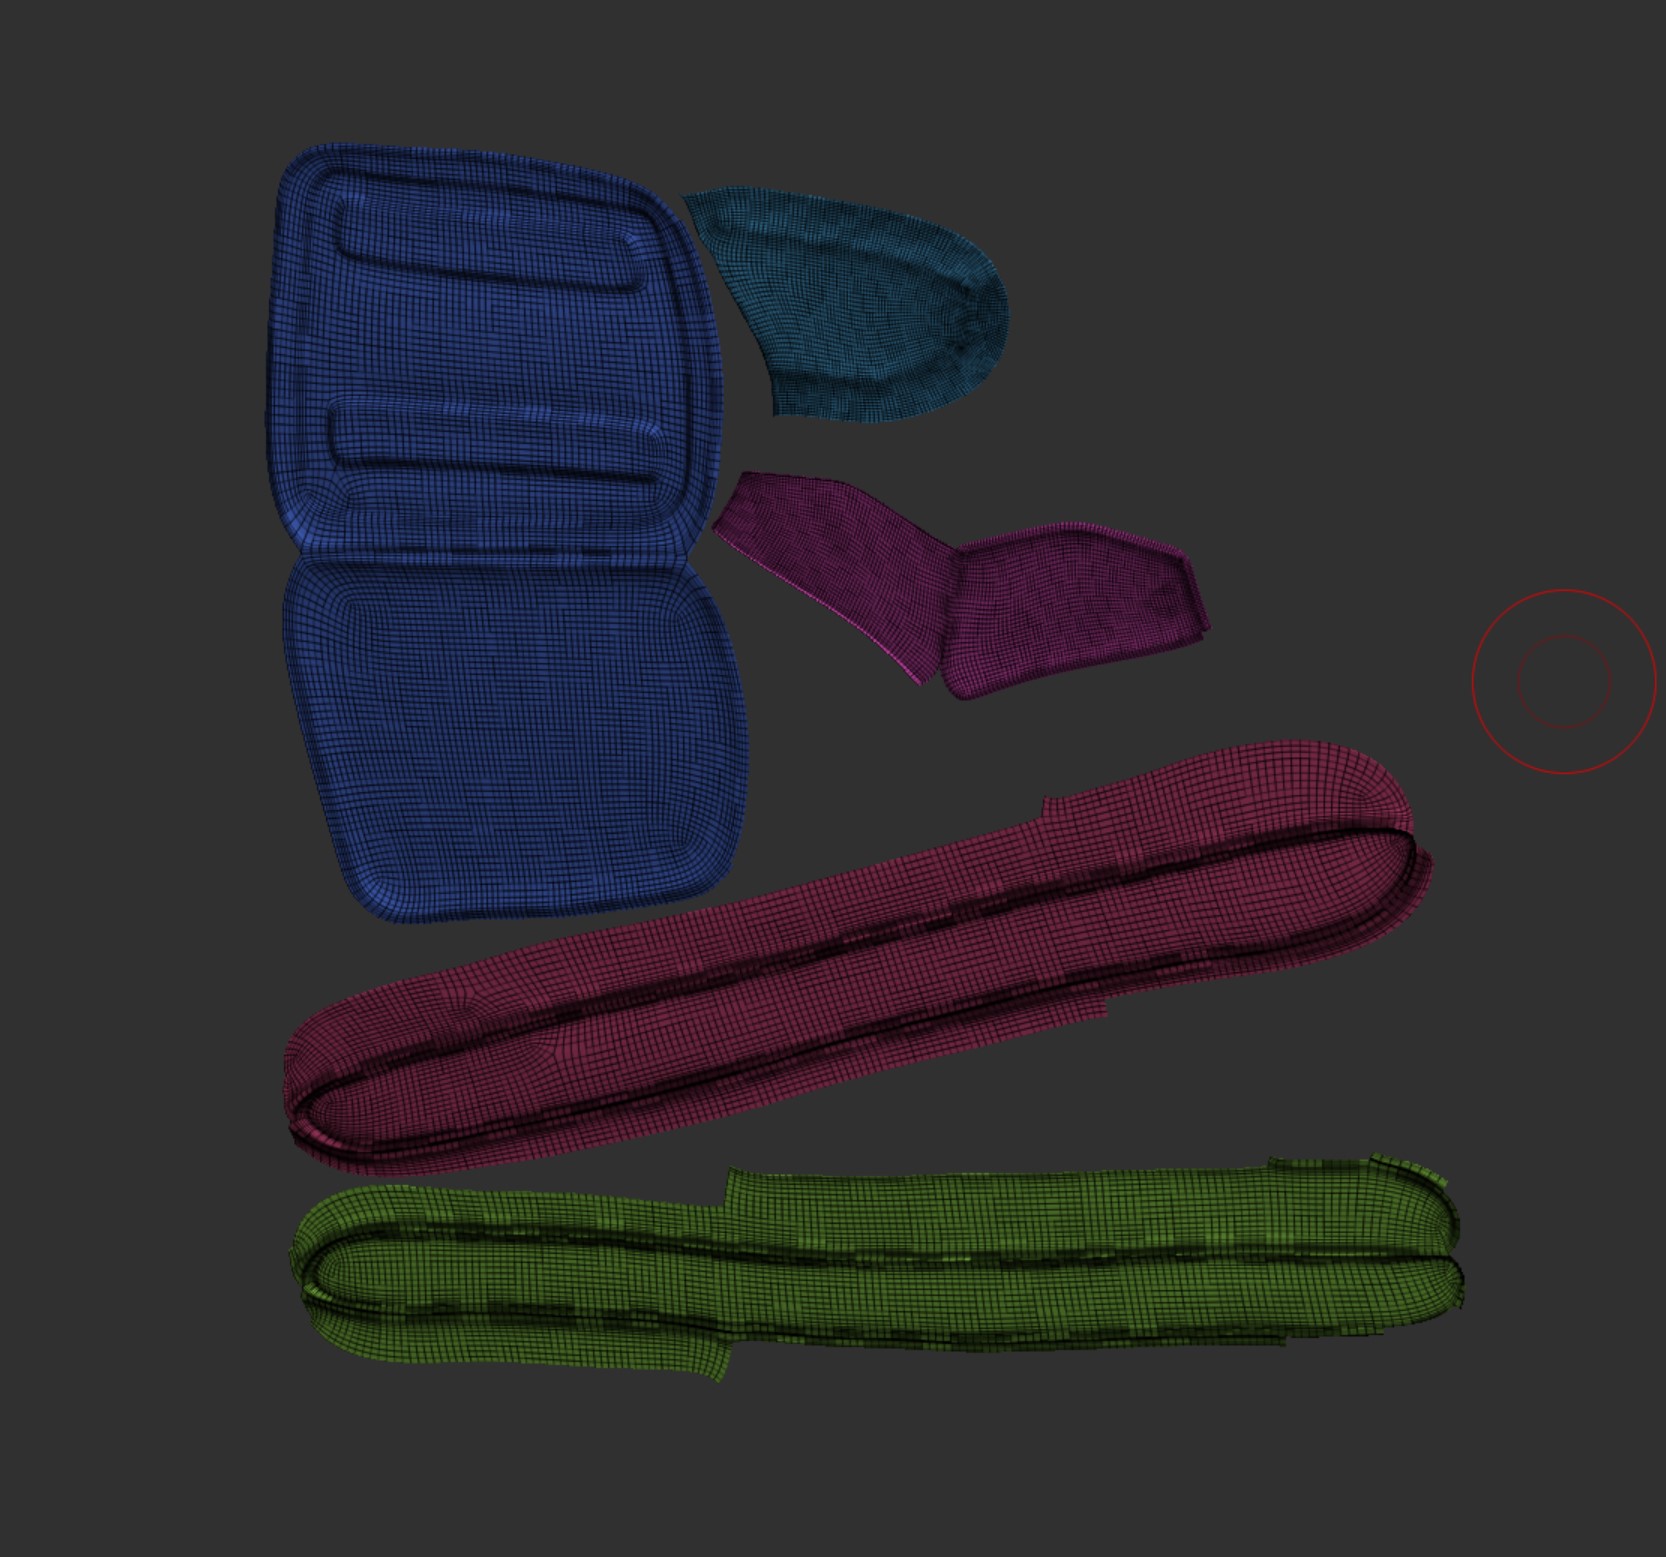
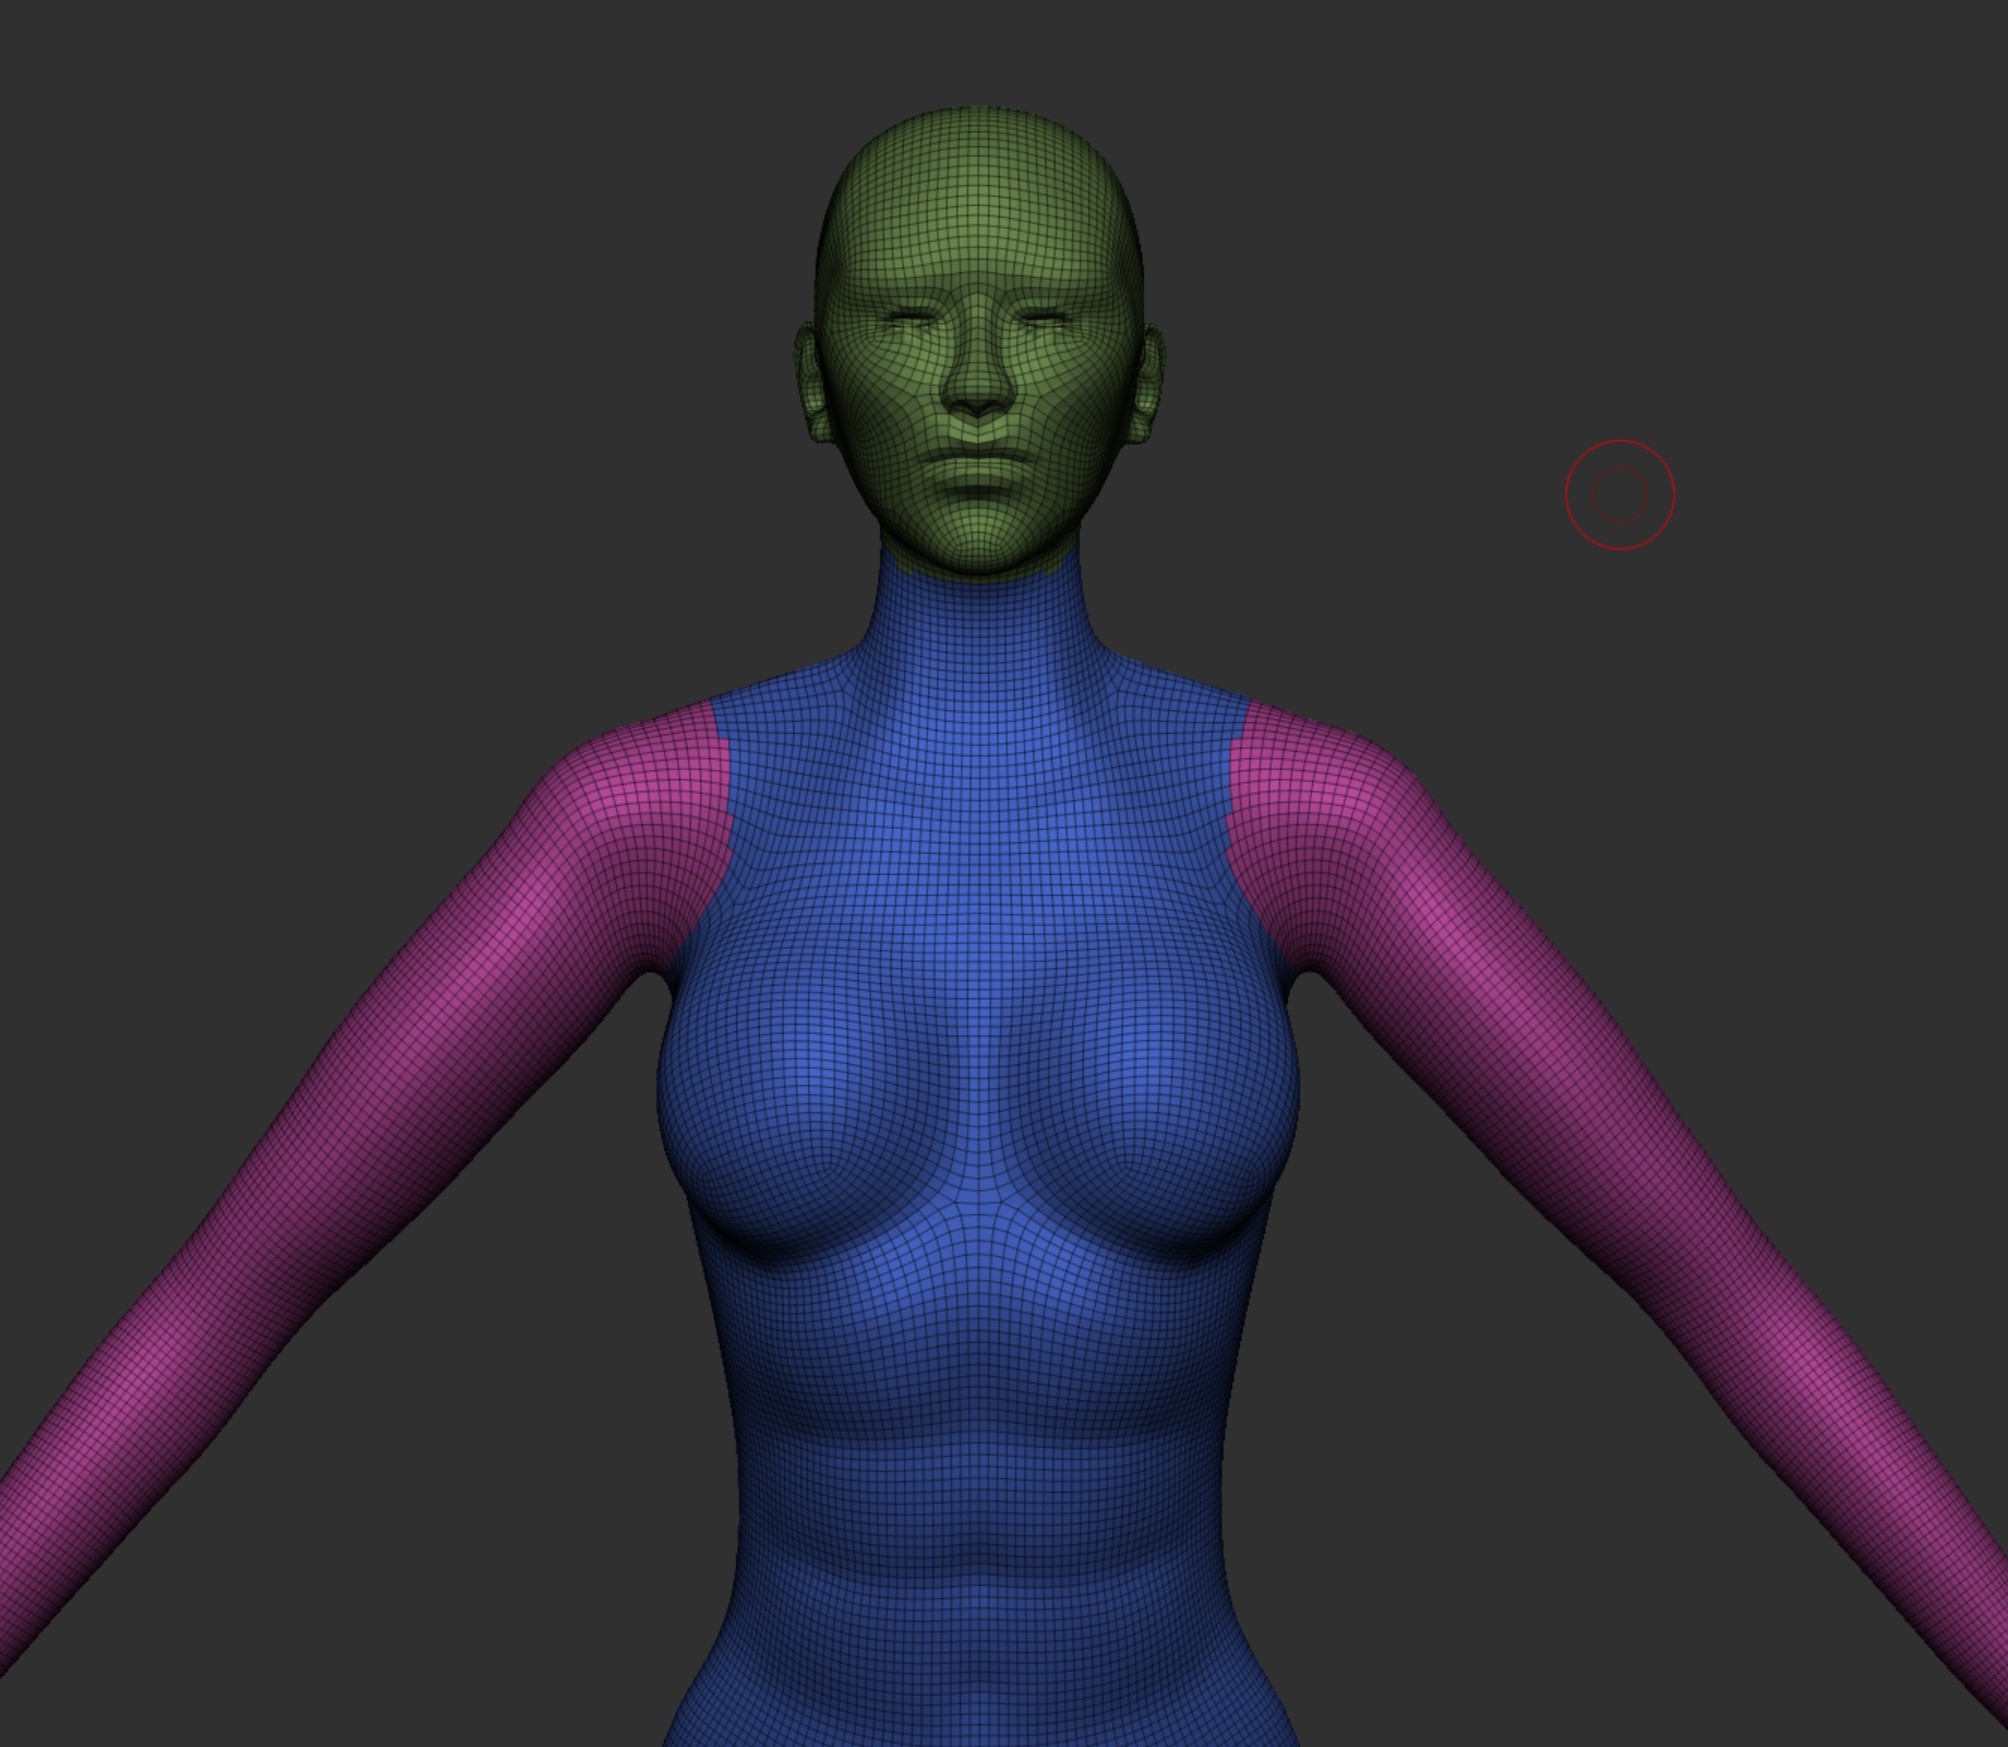
Now that the sculpting was finished i now had to make sure there were no issues with the topology, this is the stage when you would do retopology which tends to be done by hand which is time consuming and since i had not done this before I used the tools within Zbrush to tidy it up. (It is not perfect but for the aim of this project it works, this is something I aim to learn in the future as its a big part of the production line). Below are some examples of the topology, I am happy with how it all came out especially with it being done using a mixture of tools within Zbrush and not the by hand method, however theres still room for huge improvement.
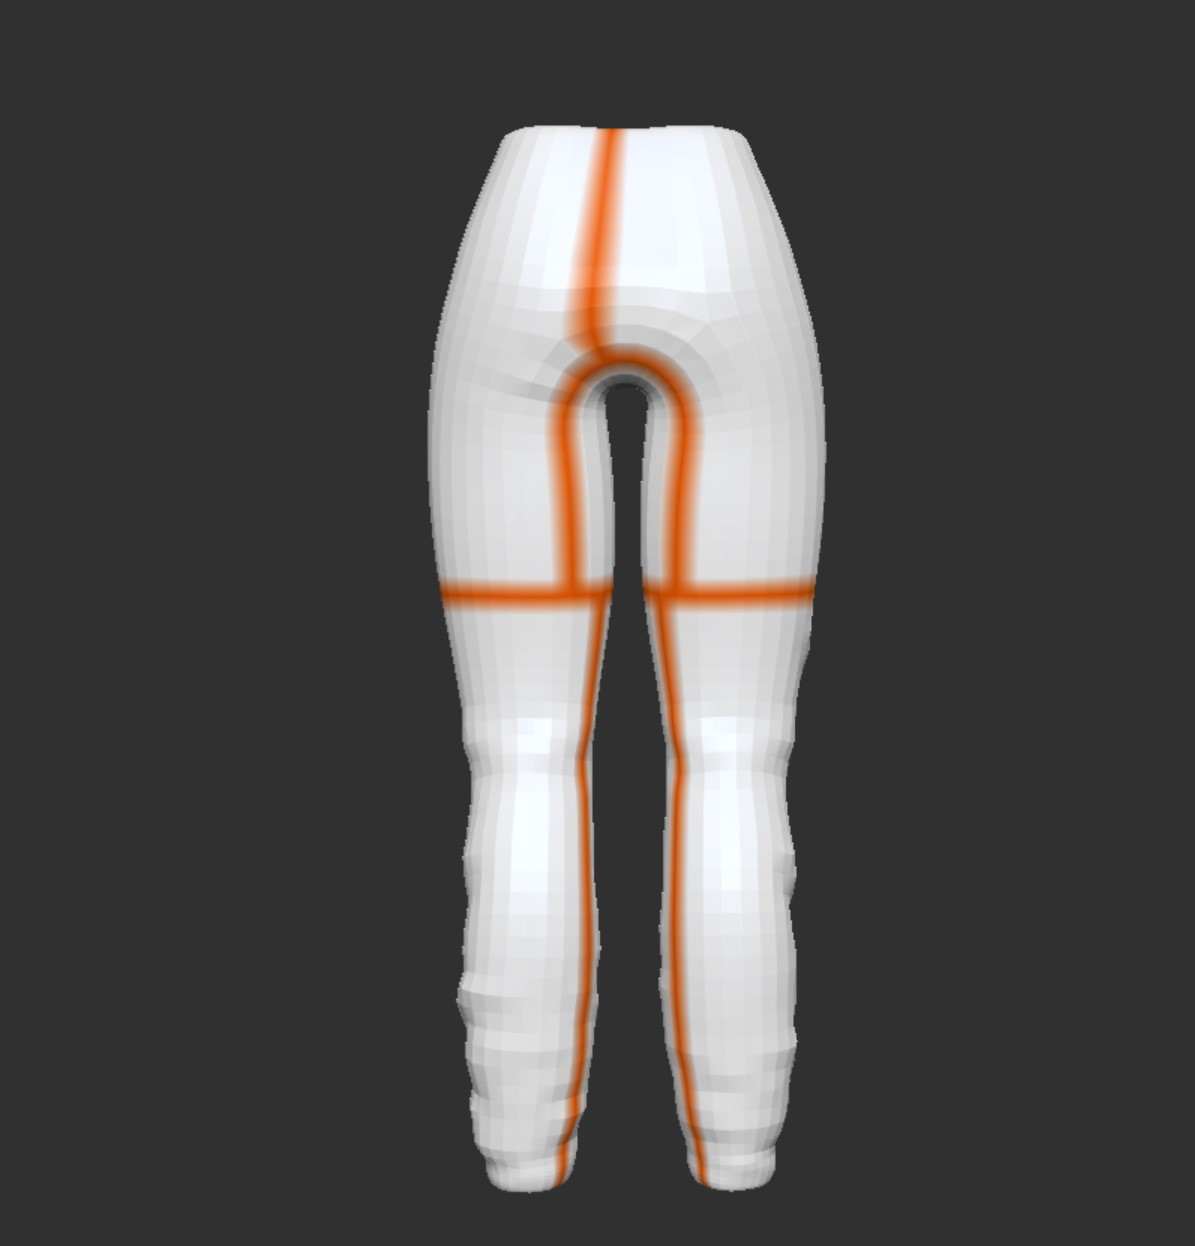
I then used UV master to create the UVs making sure to use the polygon setting and the symmetry setting if needed. To assist Zbrush with creating the seams I made sure to use the attract and project paint tool to try and make sure seams were out of the way as best as possible. Here is an example of the UVs, protect and attract and the seams being at the back of the trousers, and as you will see in a example later on the seams are not visible unless the texture pattern changes.
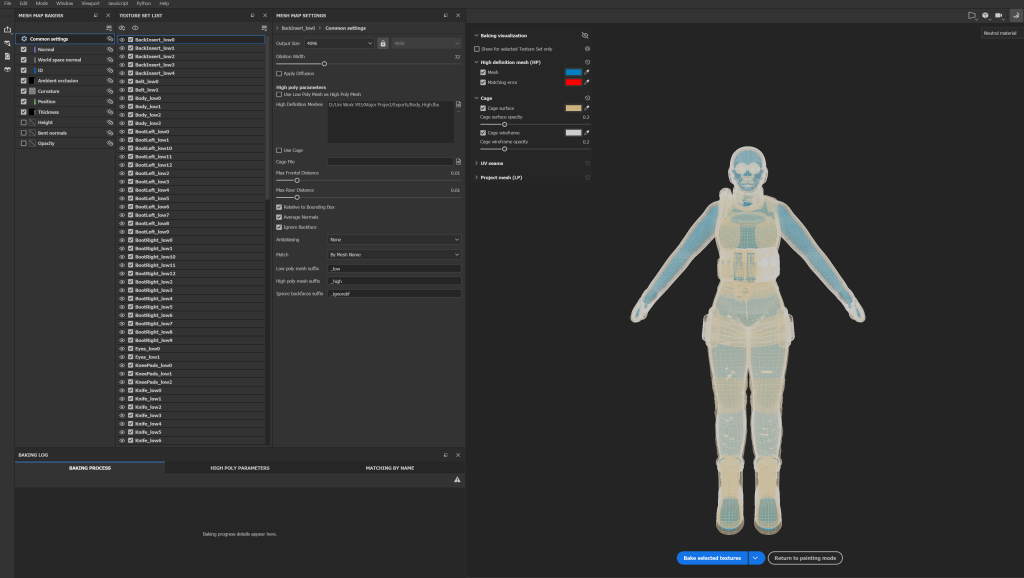
It was now time to export to substance painter but first i had to get a few things set up. First was the subtool names, these had to be what the subtool was so for example Trousers followed by the sub division level so it would be Trousers_low, I then had to repeat this for the high subdivision level. You do this so that when you bake the details from the high poly (left) onto the low poly (right) you can match them up by using the name within substance painter.
Now that was set up i could finally import into substance painter and start baking the details. I used a few youtube videos to help set this up and it took me a while to get to this point as i was learning as i go, but eventually I got my head around it, and managed to set it all up correctly.
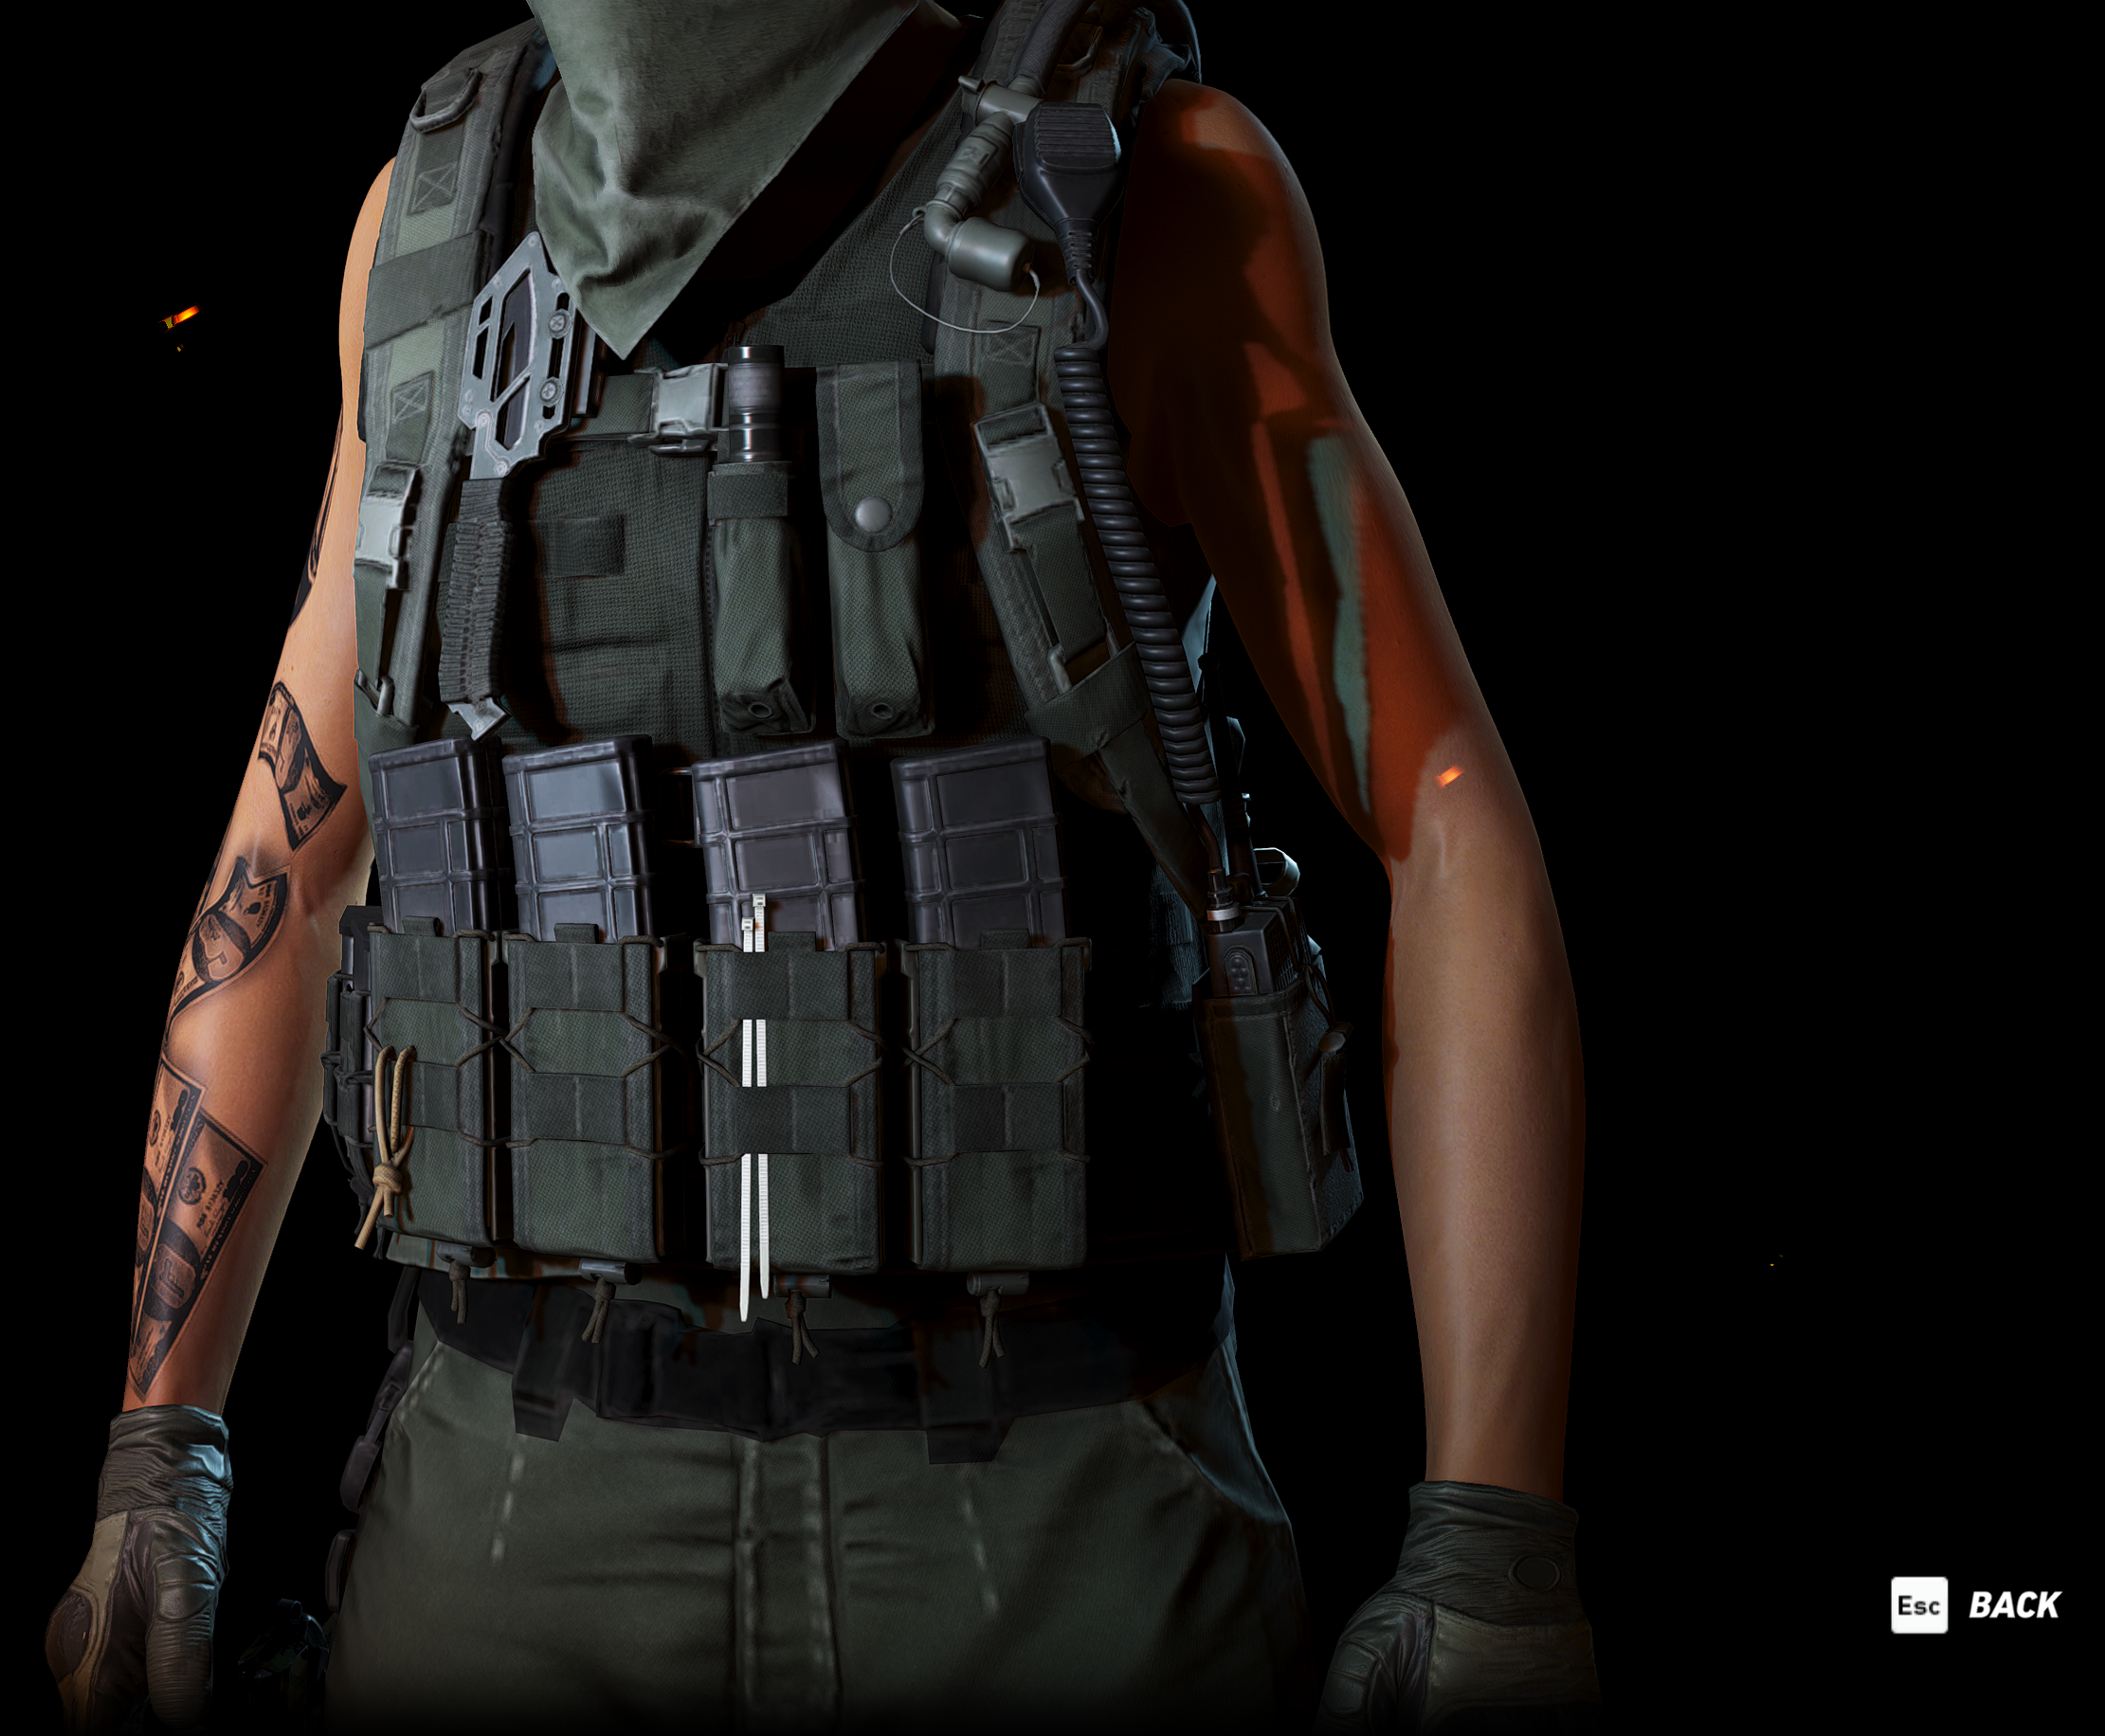
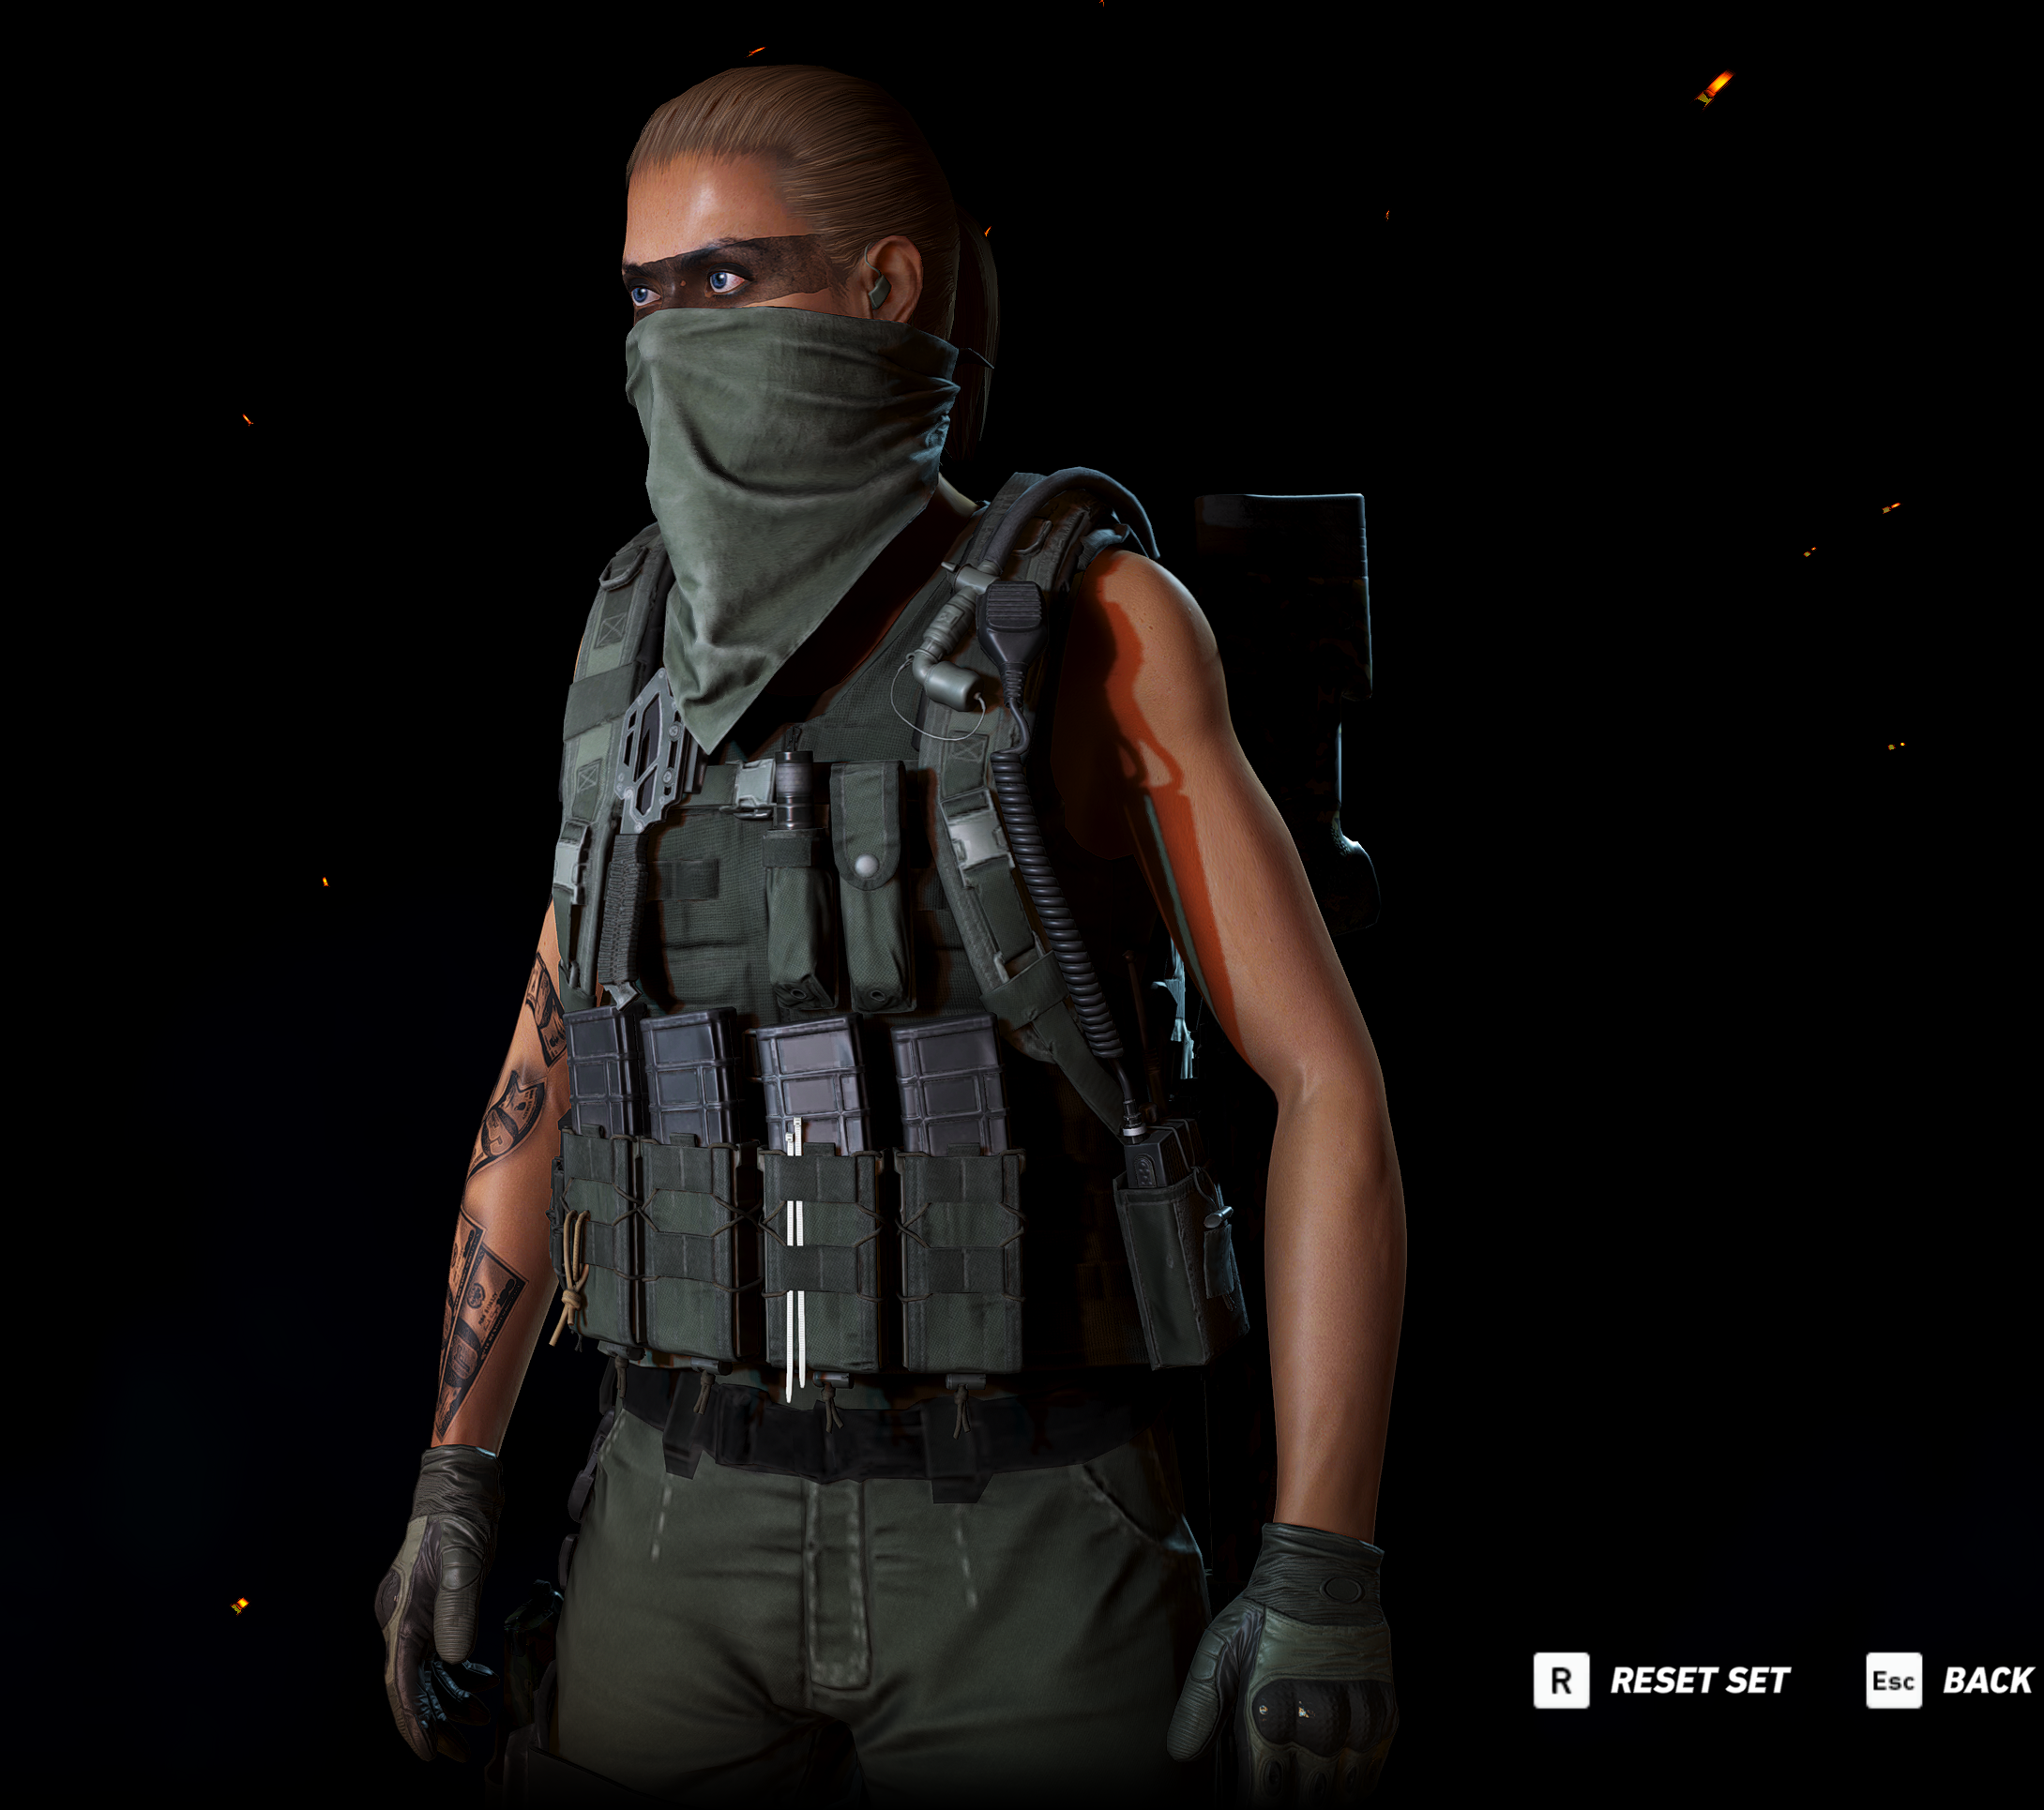
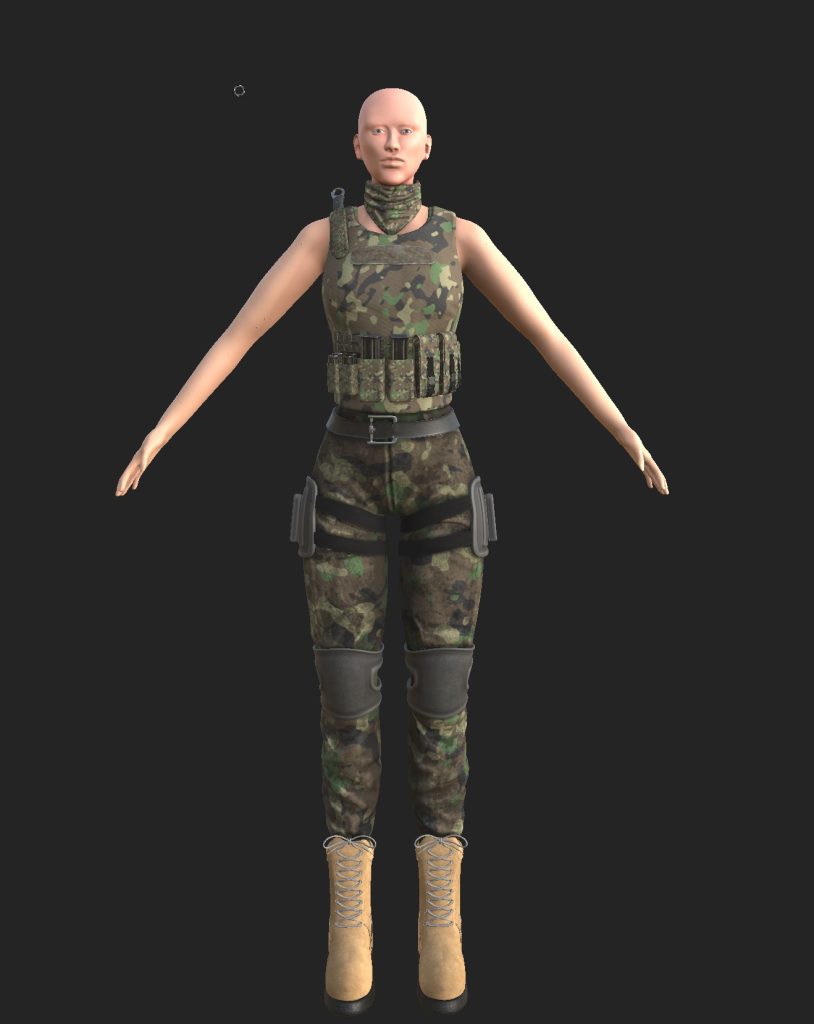
Now that the details had been baked on i started to play around with the materials and all the different settings they have within substance to try and make the character look how i wanted him to. I decided to use a variety of materials ranging from smart to basic ones. Im really happy with how it looks and is how i imagined it.
Similar to the other character hair has been a issue and i have decided i will have to use some other tools and sculpt the hair, eyebrows and eyelashes, using some tutorials i have found online as i have had some issues with maya and have not been able to grasp xgen well enough to do it for this project. Again its another error on my part with not thinking ahead however the alternative still should be to a good enough standard that im wanting to reach.
Reflection & Future Plans:
Looking at this finished piece of work and all the planning that went into it I am very pleased with how it turned out. It is unfortunate that the hair was something I failed to do however, this is something I plan to return to in the future and do for this character. I feel that this character is a very good base for me to build on as a long term goal of mine is to be able to fully rig and import her into unreal engine. Throughout this project I have been able to expand my knowledge of character design, and develop my skills within multiple pieces of software. One area that will be key for me to improve on is re topology as its a key part of the pipeline. Instead, I had to use the auto re topology tools within Zbrush to do it as I had not done re topology before.
both of the project characters will be the first into my character portfolio, I have already started planning ideas for my next project and the one I’m leaning towards is sculpting Batman, The Joker and Redhood. This would be a long term project and wont really have a time frame (for now).
Reference List:
YouTube (Nick and autumn, 2020) Screenshots of character poses [Video] Available Online: https://www.youtube.com/watch?v=rdCrB6J5gB8
Reddit (Afo_25, 2020) Silhouette image [Image] Available Online: https://www.reddit.com/r/CallOfDuty/comments/fu4ah0/mw3_when_everyone_thought_that_this_silhouette/
SportSkeeda (Krishanu Ranjan Sarma, 2022) Silhouette Image [Image] Available Online: https://www.sportskeeda.com/esports/modern-warfare-2-dark-water-correct-answers
Artstation (Hou yuan, 2022) female genji [Image] Available Online: https://www.artstation.com/artwork/lRNzkG
Artstation (Shawn huvincent, 2019) NYPD robot Image [Image] Available Online: https://www.artstation.com/artwork/qAEz8y
Artstation (Ankit raj, 2020) Sci fi female Image [Image] Available Online: https://www.artstation.com/artwork/YaWYKP
Backiee (Enci, 2022) Samurai robots Image [Image] Available Online: https://backiee.com/wallpaper/scifi-cyberpunk-samurai/226585
Showsnob (Karl Mesa, 2022) Back implant Image [Image] Available Online: https://showsnob.com/2022/09/26/cyberpunk-edgerunners-season-1-episode-2-recap/
CyberPunkFandom (N/A, N/A) Back Implant Image [Image] Available Online: https://cyberpunk.fandom.com/wiki/Cyberware
Dreamtime (bibacouma, N/A) 3 angles face Image [Image] Available Online: https://www.dreamstime.com/royalty-free-stock-photos-3-views-female-face-image9397388
BadKing (BadKing, N/A) Shoe lace brush Image [Image] Available Online: https://www.badking.com.au/site/shop/miscellaneous-custom-brushes/laces-brush/
BadKing (BadKing, N/A) buckles brush Image [Image] Available Online: https://www.badking.com.au/site/shop/miscellaneous-custom-brushes/buckles-straps-brush-set/
Gumroad (N/A, N/A) Stitches Image [Image] Available Online: https://app.gumroad.com/d/dd8047edad09ab8ff39c87e148fcaae7
Amodrn (Emma Norris, 2018) back muscle Image [Image] Available Online: https://amodrn.com/6-surprising-reasons-youre-not-making-progress-in-the-gym/
Swolverine (Walter hinchman, 2020) Abs Image [Image] Available Online: https://swolverine.com/en-gb/blogs/blog/lean-muscle-workouts
Pinterest (N/A, N/A) Lean Woman Image [Image] Available Online: https://www.pinterest.co.uk/pin/712624341016731197/
IStock (MediaPhotos, 2015) calf Image [Image] Available Online: https://www.istockphoto.com/photo/calf-building-workout-gm489310952-74631309
Dreamstime(Artyustock, N/A) Boots Images [Images] Available Online: https://www.dreamstime.com/stock-illustration-military-boots-suede-side-view-army-uniforms-d-graphic-image77864586
Dreamstime(Artyustock, N/A) Boots Images [Images] Available Online: https://www.dreamstime.com/stock-illustration-military-army-boots-back-view-mens-d-graphic-image77864413
Pinterest (Army Navy Shop, N/A)boot Image [Image] Available Online: https://www.pinterest.co.uk/pin/427560558356221599/
Pinterest ( N/A, N/A) Soldier image [Image] Available Online: https://www.pinterest.co.uk/pin/352266002115803434/
Pinterest ( Igor Shin, N/A) Soldier image [Image] Available Online: https://www.pinterest.co.uk/pin/76913106126475687/
Pinterest (Luis Balderrama, N/A) Soldier image [Image] Available Online: https://www.pinterest.co.uk/pin/4081455901466488/
Pinterest (Luis Balderrama, N/A) Soldier image [Image] Available Online: www.pinterest.co.uk/pin/62276407337372941/
Ubisoft (Me, 2023) Ghost recon wildlands In game screenshots [Images] Available Online: https://store.ubisoft.com/uk/game?pid=574474b488a7e3b8638b456a&dwvar_574474b488a7e3b8638b456a_Platform=pcdl&edition=Standard%20Edition&source=detail