Game Design Diary
7th of December:
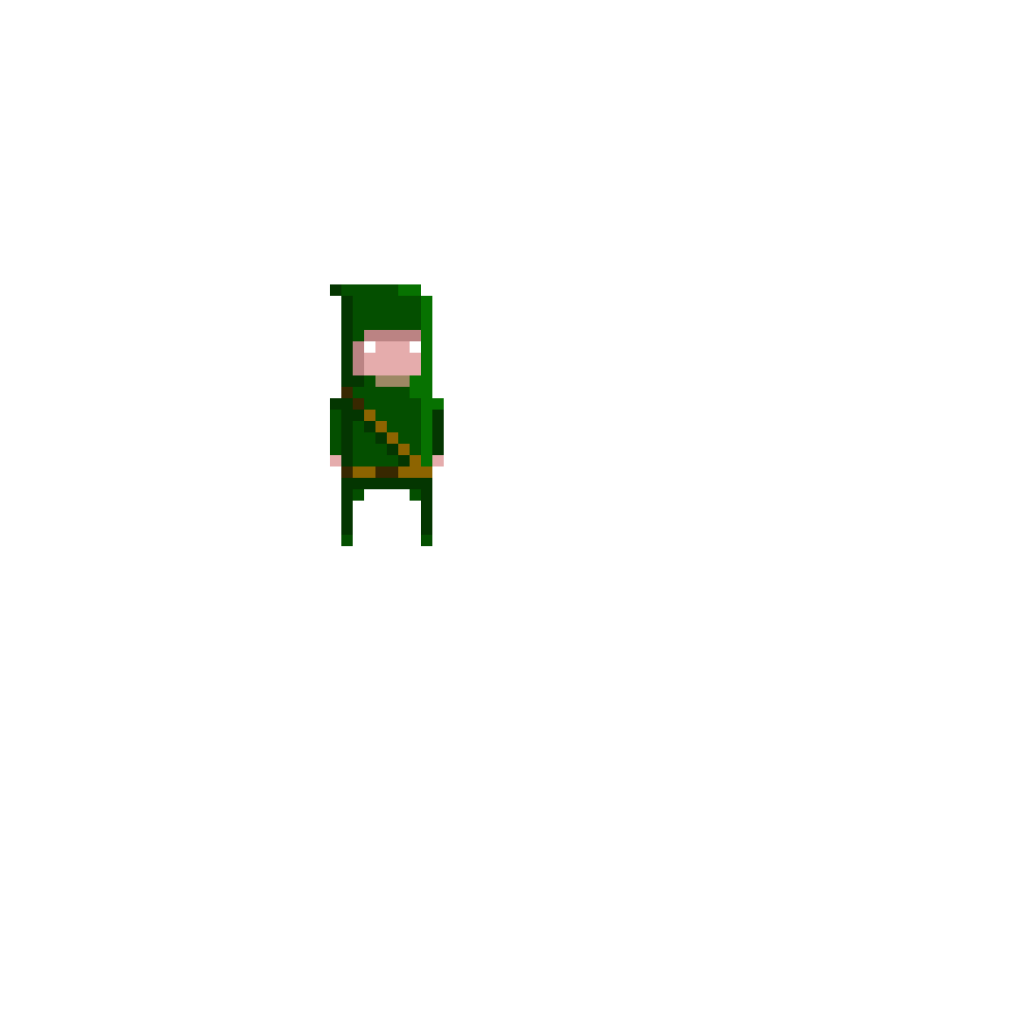
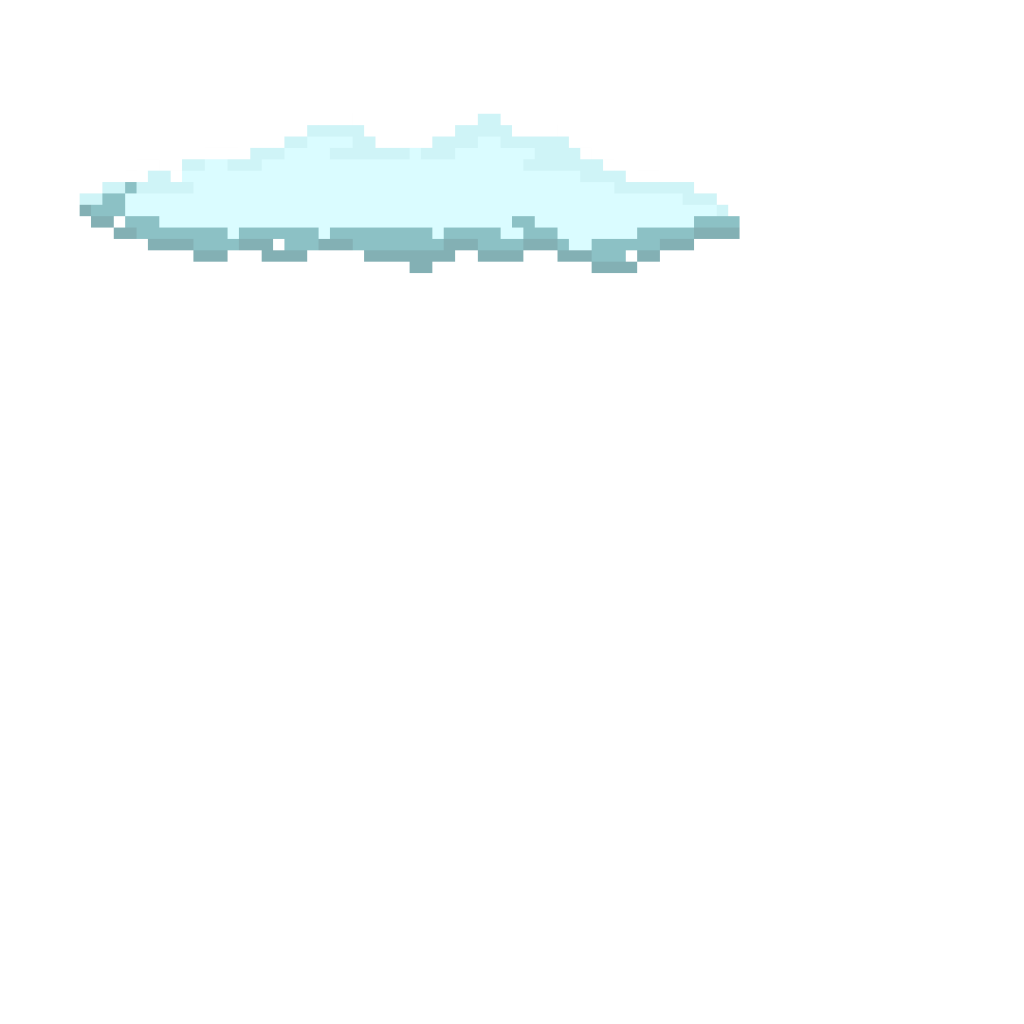
I created the main character using a free website tool called Piskel, I find this really useful for creating pixel art as i am pretty new to it so it helped me try different things etc. The image on the left shows the current design of the main character im happy with this however the colours might change so he looks more like an assassin, i also need to make a bow. The image on the right shows the clouds i made to go within the levels.
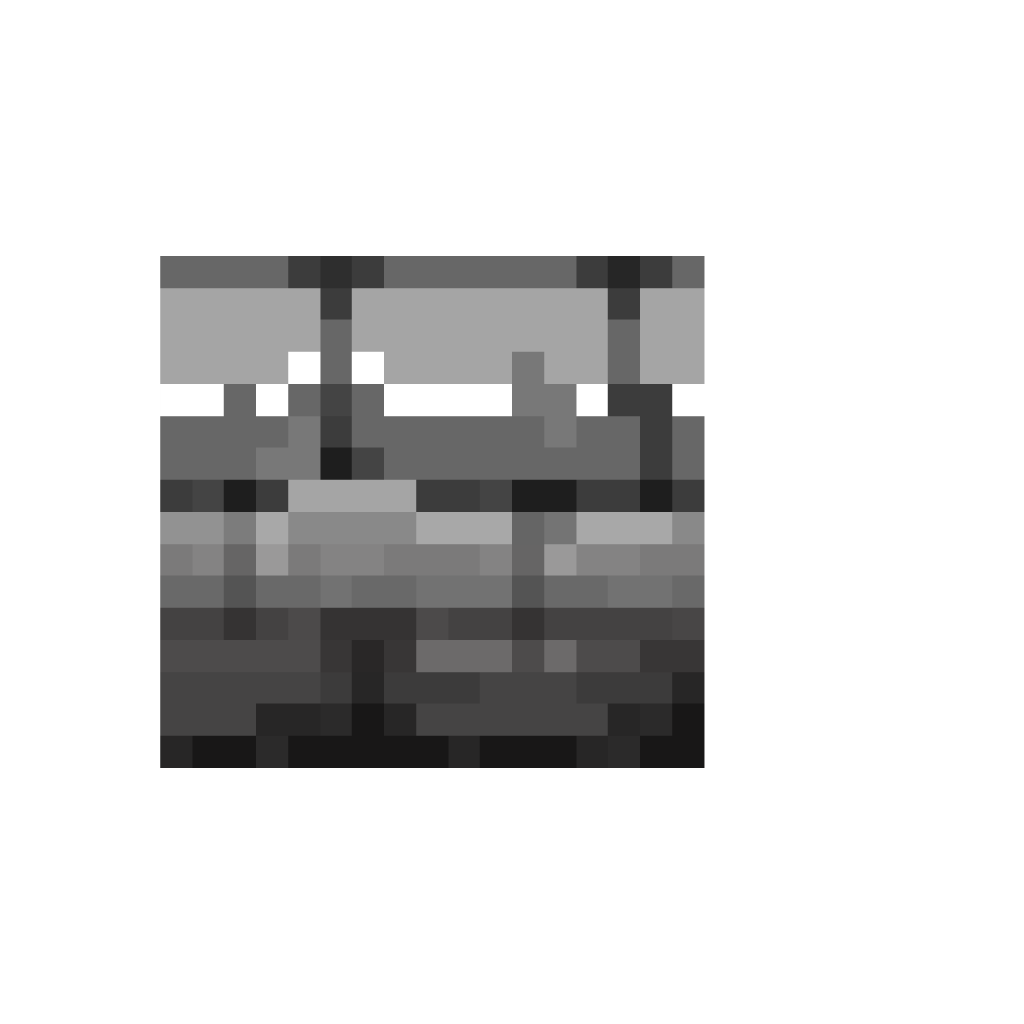
I created the design for the castle wall/floor of the game since the main character is an assassin i thought it would be best if it was spent on top of buildings etc instead of just on the ground. The first design is on the right and the second is on the left. At first i was going to stick with the original design however i felt that it didn’t fit the pixel theme i was going for with the characters and clouds etc. Once i had a rough idea of how i wanted it to look i began creating it. I’m really happy with the final design (on the left) even though i know there’s still lots of room for improvement.
14th of December:
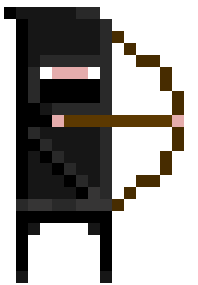
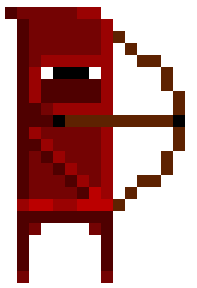
After trying multiple designs and rethinking things i decided to change how the main character was going to look. Since its an assassin i wanted a more assassin like design. Here is the final design i stuck with. I’m really happy with this as i feel like it captures the idea of an assassin a lot better and has a sneaky element too it.
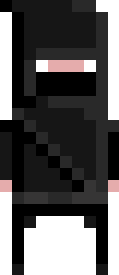
I then added to this design by making the character hold a bow and arrow and have it ready to fire. i would like to add a small animation if possible of the character pulling the bow out when the player presses the fire button however it might be too complicated.
18th of December:
Now that i had a character design i went into unity and started to create the script for movements like walking and jumping. Since we had done this before it didn’t take too long to get right with help from the old script too.

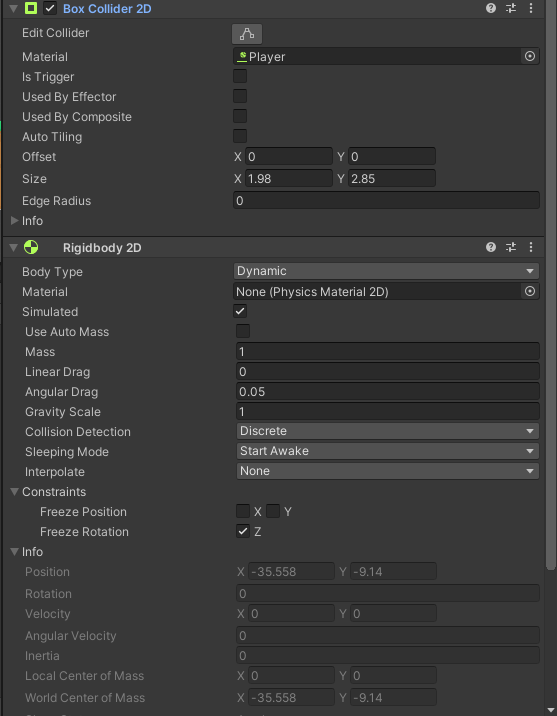
Once this was done i went back into unity and made sure i added a 2D box collider and a rigidbody 2D component to my player sprite. i also added a 2D physics material to stop the player getting stuck like we had done for the project earlier in the module. I added the 2D box collider to the test blocks in the scene too to make sure the player didn’t fall through them and could walk on them and jump.
i also created a new label and called it ground i then selected all of the test blocks i placed into the scene and selected that label for them, this will allow the groundcheck that is placed at the players feet to know when contact with the test blocks has been made and will allow them to jump again. (here is a gif example below).

21st of December:
Now that i had the basic movements done and working properly i then decided to create one of the enemy designs as i already had one made (the second image). I decided that the main enemy would look like the main character but have a different coloured outfit to symbolise thta they are the enemy and that they are evil, this also links with the fact that they have been cursed. I tried a few colours but i decided that it looked the best with red. I will add a bow to this design so that they can shoot arrows at the player.
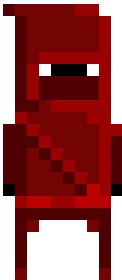

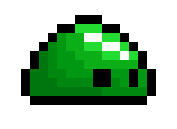
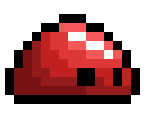
These three designs were made for a character design task and were the first enemies for my game. Green was the original design, and would be ‘poison’ while red would be ‘fire’ and blue would be ‘ice’ however i didnt wan to over complicate it so the player will just die on contact.
28th of December:
i created a simple arrow for my bow once i did this i put it into unity and added the components 2D box collider and rigidbody 2D. I then created a prefab of the arrow so i could delete the original off screen. Once this was done i moved onto the script for shooting the arrow.
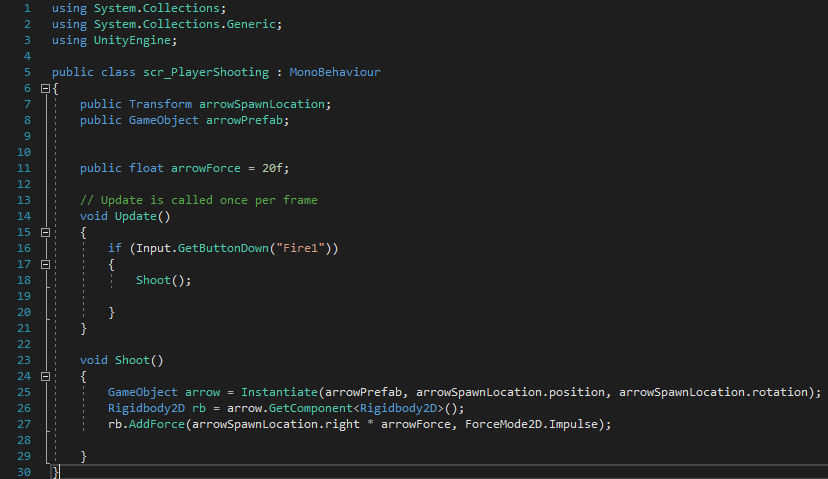
To create this i used the script we used for our previous project the top down shooter.
29th of December:
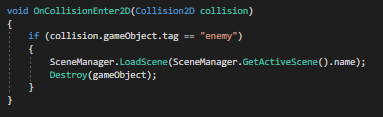
I then added a smaller script to the arrow so when it hits any object tagged as ‘enemy’ it would kill them and also disappear.
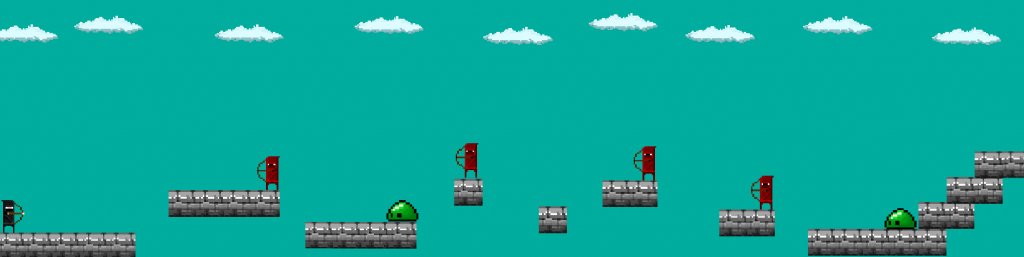
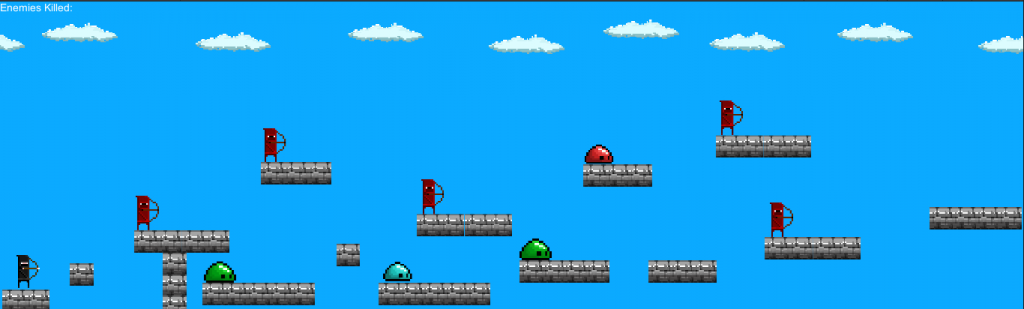
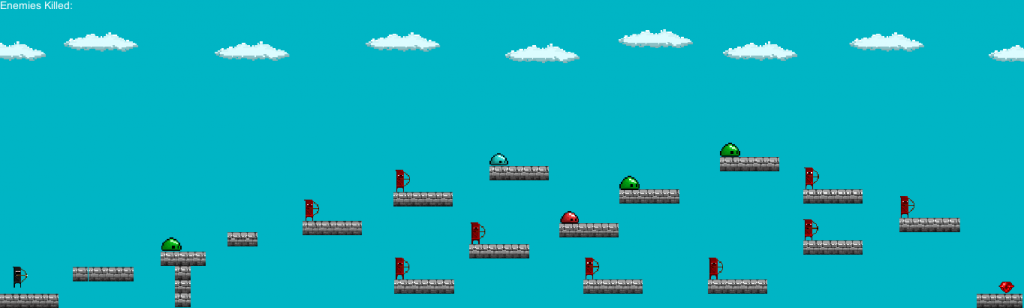
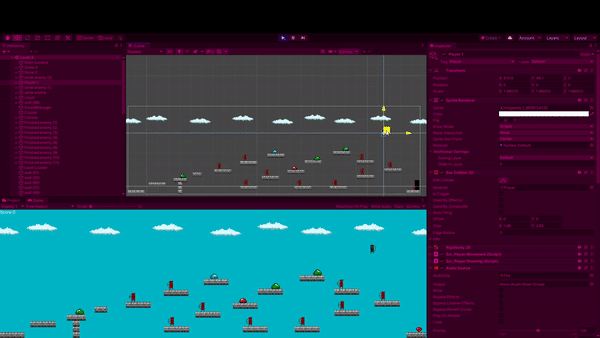
I then removed the tester blocks an put in my own to create the castle wall design i wanted for the first level. I then put in my enemies, and then tested it just to make sure the enemies died and everything worked how it should, which it did.
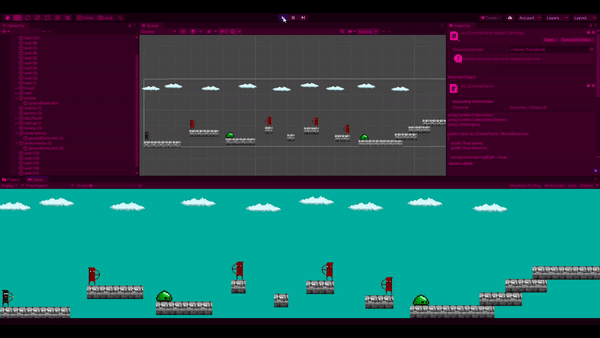
I then tested a script to have the enemies move back and forth on their own platform. (first section of the script and final few lines below it).
1st January:

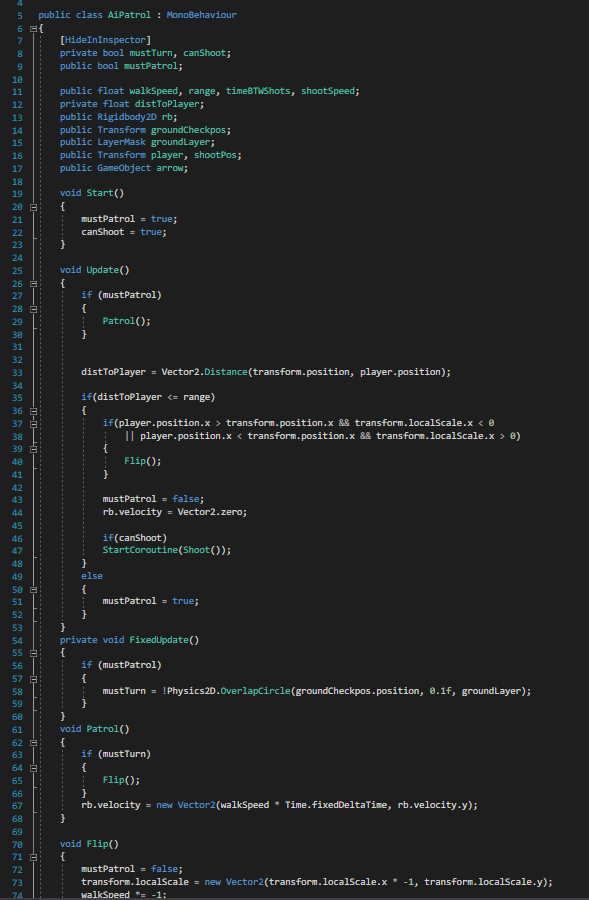
As shown in the script the ground check (which is placed at the feet) will make sure there is a object with the layer ground, without this the enemy will repeatedly turn left then right. The script also checks the distance between the player and the enemy and once the player gets in range of the enemy it will stop patrolling and focus on the player trying to kill them.
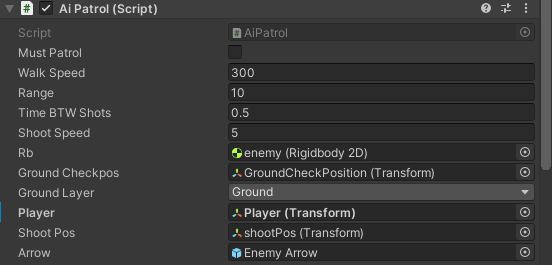
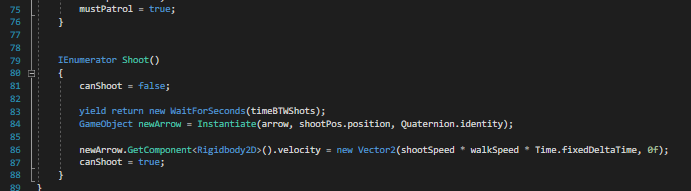
Here are the components of the script, The player transform is what makes them focus on the player once they are in the range of 10 as shown above. ShootPos makes sure the arrow comes from the front of the bow and the arrow prefab is the arrow setup to kill the player.
2nd January:
Once all this was done i then wanted to add in something the player could collide with or trigger to cause the game to load the next level. After doing some research etc i ended up with this.
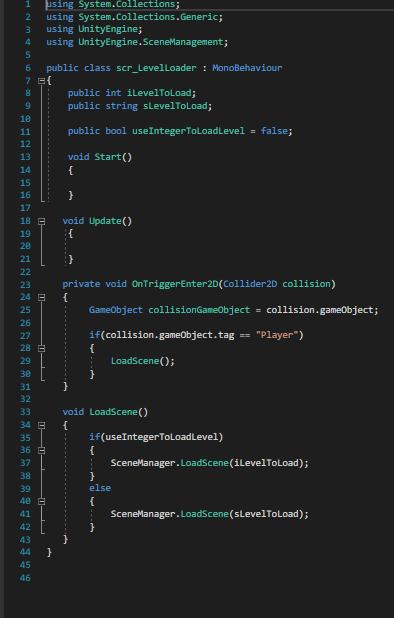
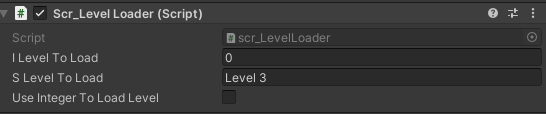
With this script i can use either the integer of the scene to load the level or the level name i have decided to use the level name to load it.
5th January:
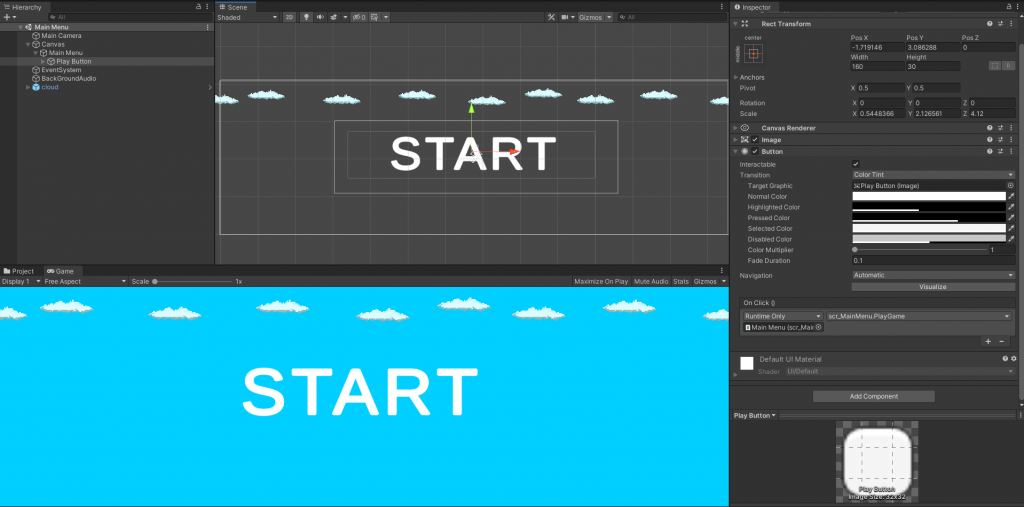
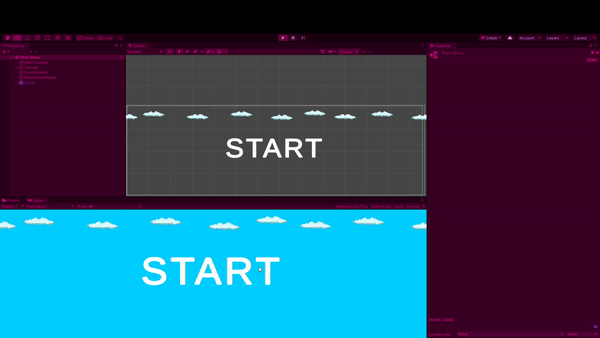
I then moved onto making the start menu not anything too detailed just a start button with some background music. here is the design for it.
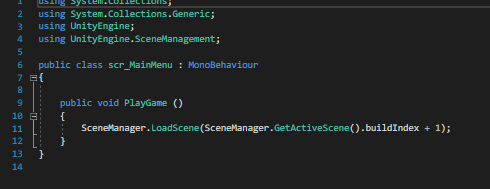
here is the script i used, since i didn’t need any other settings it was a very simple. i then attached it to the button under the on click component.
it was very similar with the congratulations message for the end of the game however i didn’t need a script for it i just needed the scene name for the level loader.
As shown in the gif just after they collect the crystal and collide with the level loader it loads the congrats message.
10th January:
I double checked the sounds to make sure they were correct and that i was happy with them. To get them to work in each scene is a Sound Manager which is in the centre of each scene. It also has a audio source attached to it. Below the image is the script for the sound manager too.

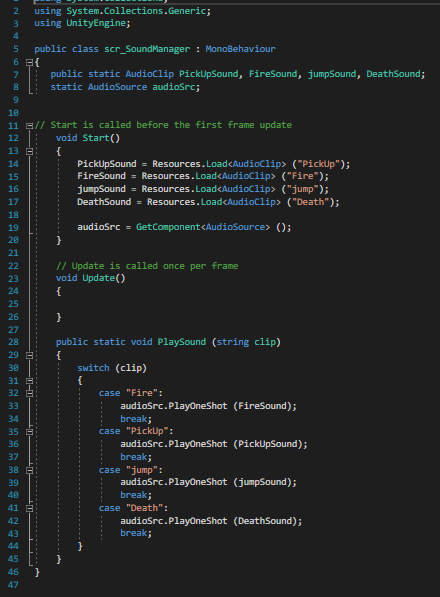
As shown above within the if statement is scr_SoundManager.PlaySound and then the sound i want to play when the enemy is killed by the players arrow. However for this to work you need the script in the screenshot below at the start of your script. you can also see within this script is a line for score. Every time a player kills an enemy this increases by one.

(follow up about sound)so for each sound, jump, fire, death etc i just had to repeat this on each script.
11th January:
I have had feedback off of family and friends etc about how things could be changed and things that could be added which has been done so throughout the progress of the game one idea being the killed counter and another being the increase of speeds and range. I have also made a slight story change so instead of there being a boss fight instead you fight your way through the army and taker back the stolen crystal that protects the kingdom from curses etc.